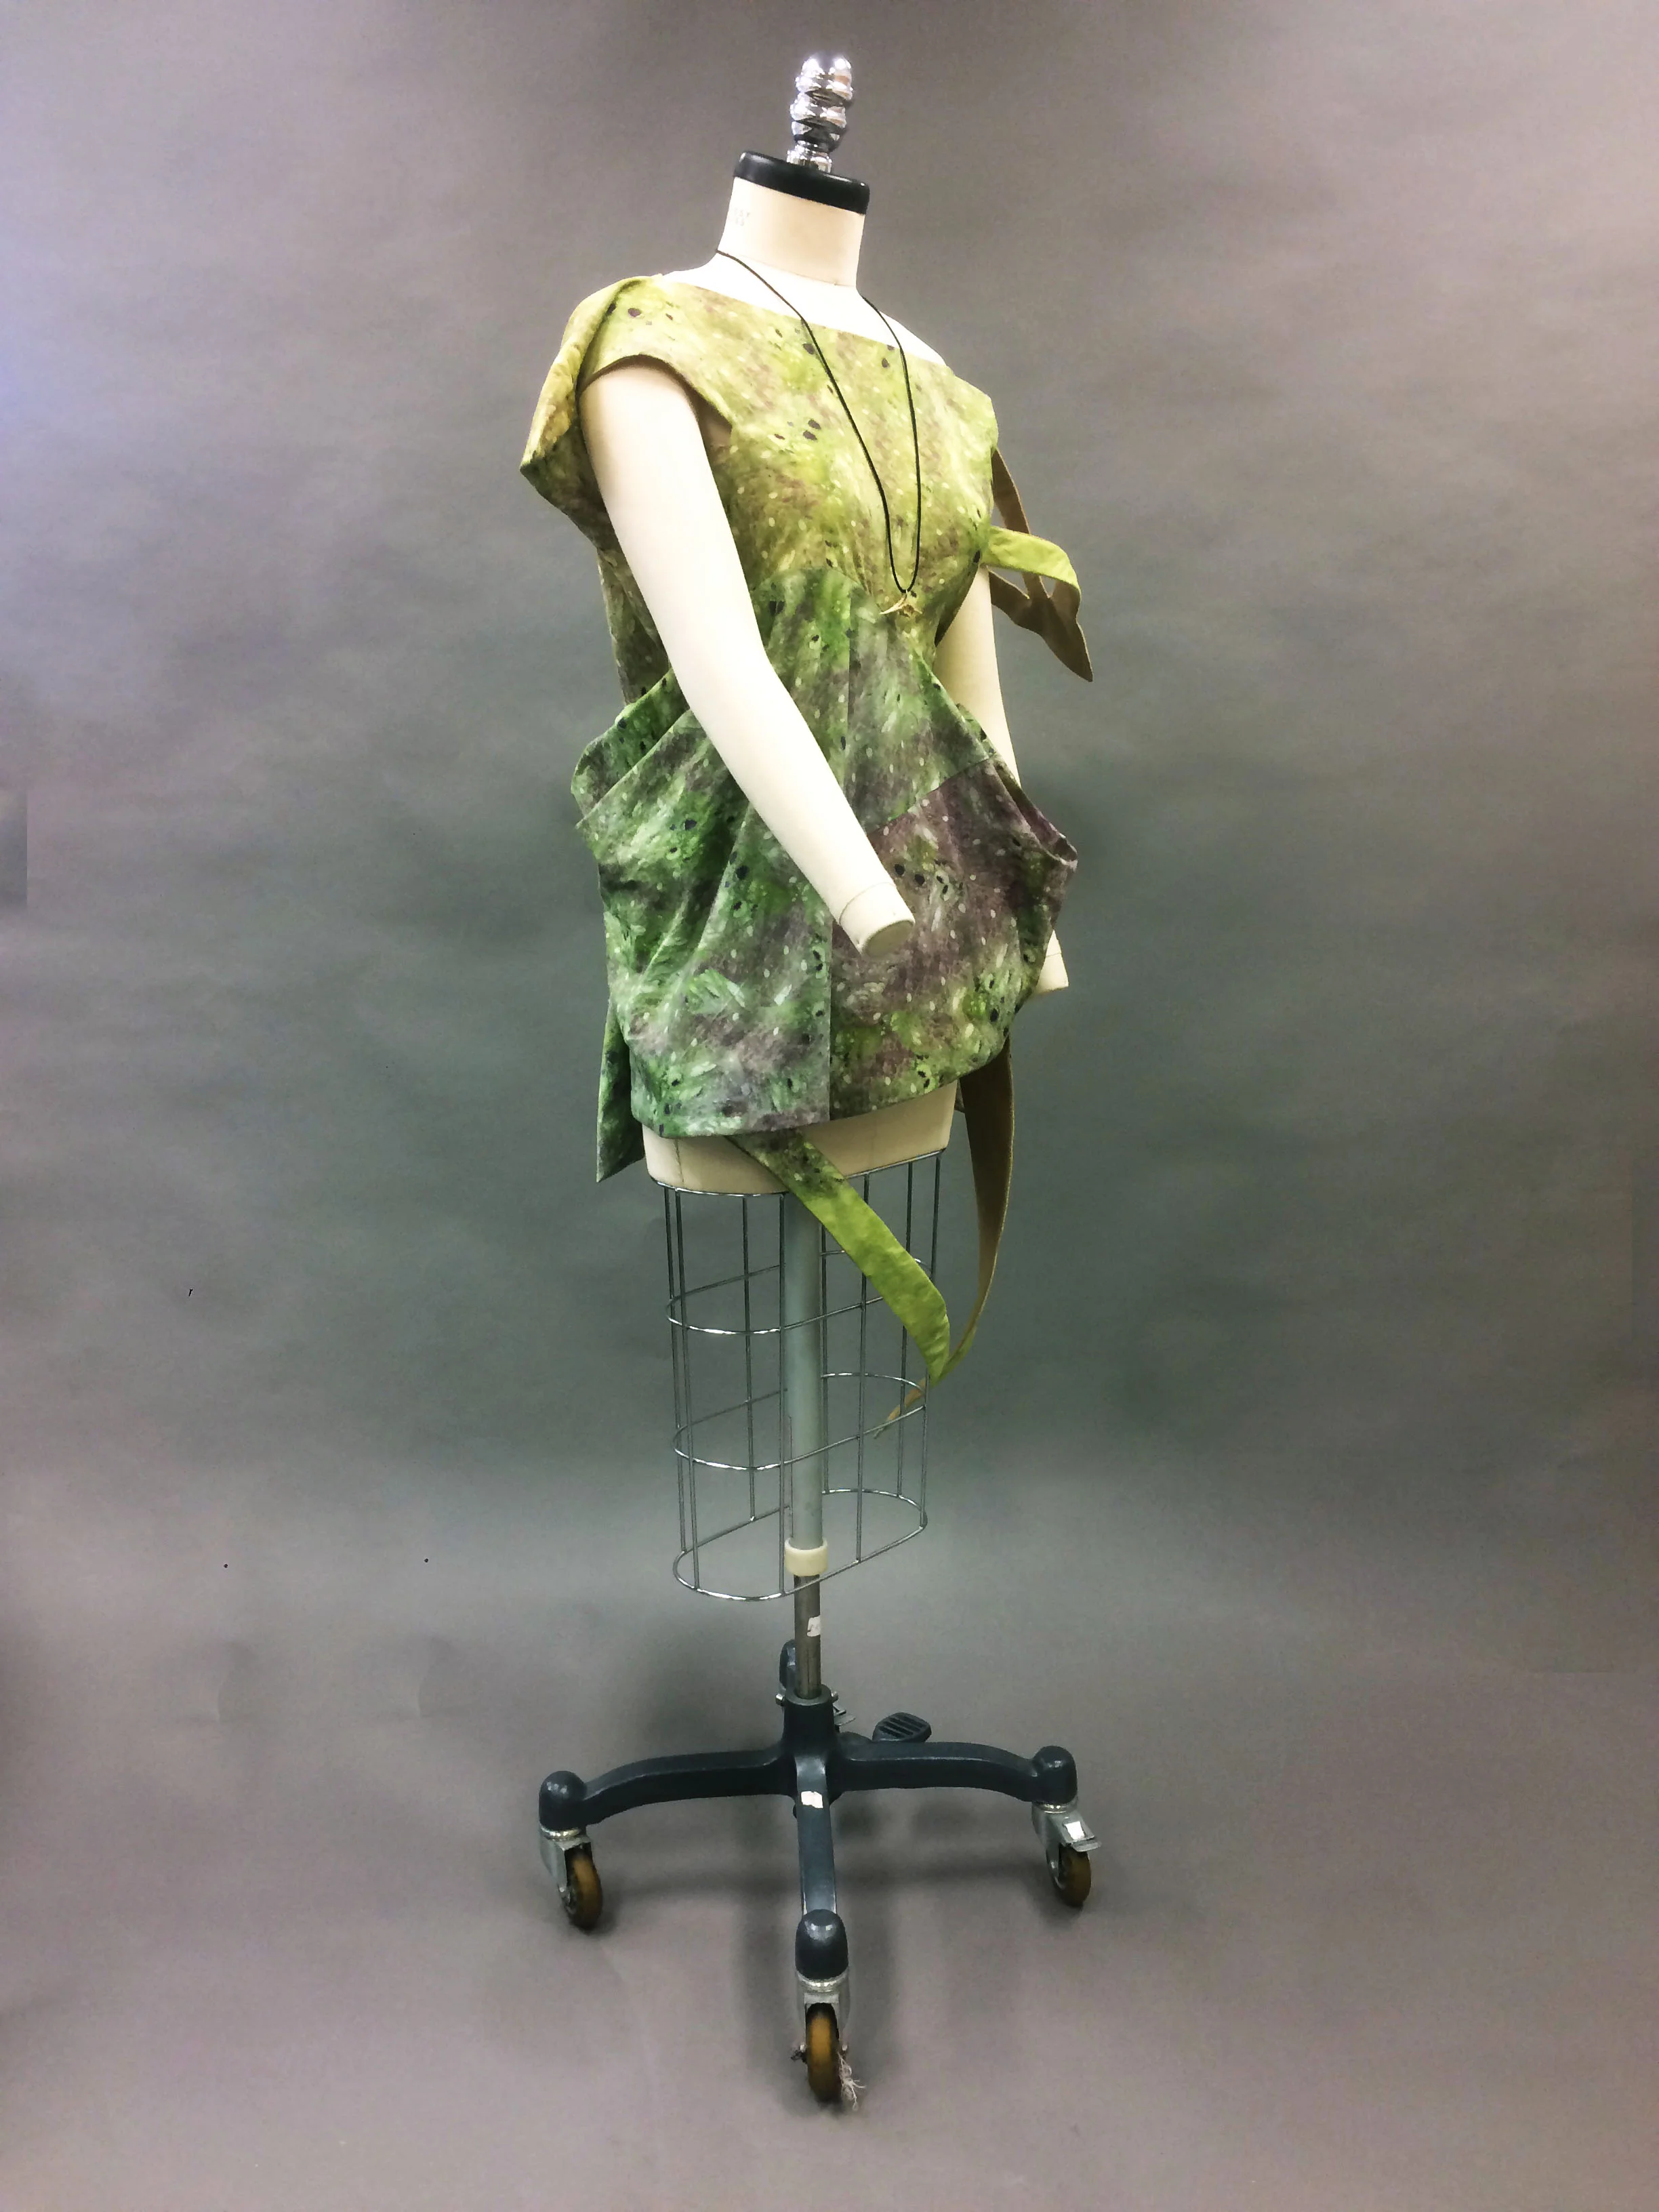
Vertebrae: A Tribute to the Oregon (Pacific!) Coast Part 3
In the summer of 2017 I was lucky to attend an amazing workshop hosted by Iowa State University called "New Configurations in Fashion: Innovative Form Meets Engineered Textile Printing." The focus of the workshop was on learning the subtraction cutting pattern making technique popularized by Julian Roberts. The process involves the creation of unique drape and form by the removal of areas of a pattern and connecting the open spaces together. At the workshop we experimented with the technique on half scale forms to visualize the effect of cutting and connecting together the various parts of the fabric. Once we were happy with the pattern we scanned the half scale patterns onto the computer and scaled them up using the Optitex patternmaking software.
In addition to the lesson on subtraction cutting, we were also given demonstrations by Heather and Hitoshi Ujiee on engineered digital textile design. We explored various methods of creating unique print designs both in Adobe Illustrator and Adobe Photoshop. We were then able to create unique textile prints for our subtraction cut garments and have them printed on a variety of different fabrics on site at the workshop.
I went into the workshop knowing that I wanted to explore the next part of my Tribute to the Oregon Coast series. I had collected a number of fish bones off of the coast of Orcas Island in the San Juan Islands (not technically Oregon!) several years prior. The bones are varied in size, color, and shape. Of all the pieces I collected, I am particularly drawn to the spinal vertebrae. The column of the vertebrae is made of a series of small holes that make up the marrow and it makes an interesting and unique design on the side of the bone. I am also drawn to the shape of the bone itself, especially the thin, delicate spikes jutting out on either side of the bone. I decided before attending the workshop that my aim would be to pay homage to the spinal vertebrae while exploring these new garment making techniques.
I began my draping process by first making a series of sketches illustrating where I wanted to place the large spiked spines on the garment. I wanted to marry the organic, natural drape of the subtraction cut parts of the garment with the stiff, structured elements of the spine. Since the subtraction cutting process was mostly experimental, I could only chart out a basic shape and hope for the best!
I started with a rectangle with the neckline, large side spike, and shoulder line on a fold because I knew that would be the easiest way to construct the spike jutting off of the shoulder. Once I had the basic rectangle and large front spike, the rest of the draping process came from experimenting with the placement of the holes throughout the pattern.
Once I was happy with my half scale pattern the entire piece was digitized and imported into the Optitex pattern drafting software. I was able to true up my seams, create perfect circles, and scale up the pattern to full size. I then imported the pattern into Adobe Photoshop and began creating the print.
I wanted my print to be created from the literal design taken directly from the marrow on the side of the bone. I took a small portion of the photograph of the side of the bone, blew it up, and started manipulating the pattern so it became a large varied repeat. This process took a very long time as I only had a 3x3 sized photograph of the bone to work from. I was able to directly place the print onto the digitized copy of the garment pattern. Used Photoshop's blur and desaturate tools to blend the pattern out towards the edges of the spikes so the whole design looked more reminiscent of the actual bone. Once I had the print I created a few variations of hue and scale and printed a test swatch. When I picked my size and color we printed out the entire thing!
I chose to print my design onto a 100% cotton sateen which had a wonderful hand, but did not 100% agree with my color. After washing, the color of the print turned more green and purple than the tans and yellows I had originally designed. It was a happy accident, as the piece ended up looking more gross and gnarly, which was definitely something I was into!
I underlined and interfaced the spiked portions of the garment with heavy fusible interfacing and a cotton duck cloth. I also constructed wire frames that were handsewn into the opening of the spikes to reinforce the edges. I used a tan colored plain weave cotton broadcloth to face the openings of the spikes as well.
The garment has no closures, and simply pulls on over the wearers head. Inside the garment there are two drawstring ties that help pull the garment in at the waist to create some waist definition.
Overall I am very happy with the outcome of the piece, especially since I designed and completed it in only 3-4 days! The workshop was very informative and I learned so much in such a short period of time. I am excited to move on to Part 4 of the series!


