A Tribute to the Oregon Coast Part 4-Vegetation

First off, wonderful readers, I would like to apologize for the astonishing lack of updates on this blog and on this website in general. The last two years have been a whirlwind of changes on both a personal and professional level. Since the last post in March of 2016, I have earned my doctorate degree, presented the Seafoam dress at ITAA and won a major award for it, completed a 3rd project in the Tribute to the Oregon Coast series, moved from teaching at Mount Mary University to now teaching at my alma mater Framingham State University, and am now living in a house that I am renting to own!

The most recent exciting news is that this Earth Day, April 22, 2019 I will be having a solo exhibition of my Tribute to the Oregon Coast garments on display at the Henry Whittemore Library on the FSU campus. The exhibition will open with a reception and a talk I will be giving on creative scholarship and my process on creating the garments. This exhibition will also showcase the fourth and final garment in the series: Vegetation!

The concept for the Vegetation project has been something I have had in mind since the beginning of the series. When I used to spend time out in Newport and Yachats, Oregon and on the shores of Orcas Island up in Washington State, the coastline would often be littered with various washed up seaweed and kelp species from the area. The waves would often tangle the long stems and leaves into piles along the shore. After laying out in the sun for hour they would start to smell and dry out. I always thought the pieces had an interesting texture and shape, and the tangled up piles were fun to poke with sticks! While these were interesting on the surface, the kelp along the coastline has a number of uses and benefits to the ecological landscape.

https://www.discoverourcoast.com/coast-weekend/coastal-life/wild-side-nereocystis-luetkeana-bullwhip-kelp/article_9e7a6438-856f-569d-b496-9b7412640b84.html

http://www.methowvalleyherbs.com/2008/06/pickled-bullwhip-kelp.html

https://www.opb.org/news/article/kelp-seagrass-oysters-ocean-change/

As seen in the articles linked above, the kelp can be harvested and used for pickling , and according to the third article, could be used to help regulate the acidification that is effecting the oyster population along the entire Pacific coast. With these benefits in mind, I found it appropriate to end the series with designing a garment that would aid in bringing awareness to a more positive environmental phenomena.

My very early sketches of this concept were very literal—like making a gigantic bullwhip kelp as a dress. Structurally this could be interesting, but I was having difficulty finding workable fabrics with the color and texture that looked the most like the kelp and would work well with the shape. I played with this concept for months, but never felt the spark of inspiration to move forward on testing these designs out. The second one seriously just gives me tennis ball vibes. Yikes!

I lost steam with this project until February when I stumbled upon a really unique leather hide in a small fabric shop in New York City during a school field trip. I admit that I find working with leather very daunting. I’ve never made anything but small accessories from leather, and the price usually scares me off. I did love the color and texture of this hide though, so I took a picture and left it in the store. I thought about that leather for months. I had serious buyers regret. I could not find anything quite like it anywhere locally. I took another trip out to NYC in May and went on a wild goose chase trying to track down the same store and amazingly the leather hide was still there! I could not leave without it. It turned out to be the most money I’ve ever spend on a single fabric purchase but I think it is absolutely perfect for this project. That being said, I now finally have to face my fear of cutting into it!

I jumped back into this project reinvigorated to try all new territory. Sewing in leather was one hurdle I would have to jump, so why not give myself a few more? So I am going to make this piece a menswear project! I have yet to make a non-cosplay specific menswear piece. In contrast to some of my earlier creative scholarship, I am also aiming to make this more of a wearable piece with elements that could be worn separately in everyday life. I am going to be fitting this garment to a very special friend of mine, and he is serving as a muse for this project.

I am aiming to create a three piece look for this project: a leather jacket, digitally printed shirt, and modern kilt. My model enjoys wearing kilts, and finds them easy to wear and style with many types of other garments. My hope is that he can incorporate this piece into his wardrobe.

I’d like to share some of the journaling and brainstorming I’ve been doing over the past few weeks. Whenever I start a new project like this I like to quickly sketch many different ideas, jot notes, and figure out specific embellishment techniques that would work well with my intended design. For this project I am considering trapunto, cording, and heat forming techniques on the leather. I cut a small section of the hide and practiced with a few different techniques. I am heavily leaning towards the design in the third and fourth images, as I like the balance of the embellishments on the coat with the shirt and kilt.

I have much, much more to go on this project, but I am hoping to make considerable progress over the next few weeks. I have already created a print and had a swatch sent from Spoonflower. The colors are not to my liking so I am going to try a couple more varients before I settle on a final design. You can look forward to seeing that in the next post!

Thanks for reading and I’d love to hear your feedback on what I am working with so far!

Best,

Laura

A Tribute to the Pacific Coast Part 2-PROGRESS!

Well it's been a few long months of working on this dress now and I'm finally starting to see the end. This gown has been a labor of love and I am just obsessed with how it is coming out.

If you follow my Facebook page you've probably seen my progress photos. I went with the technique I posted about in the last blog. One of the coolest things is seeing how the foam "grows" from photo to photo.

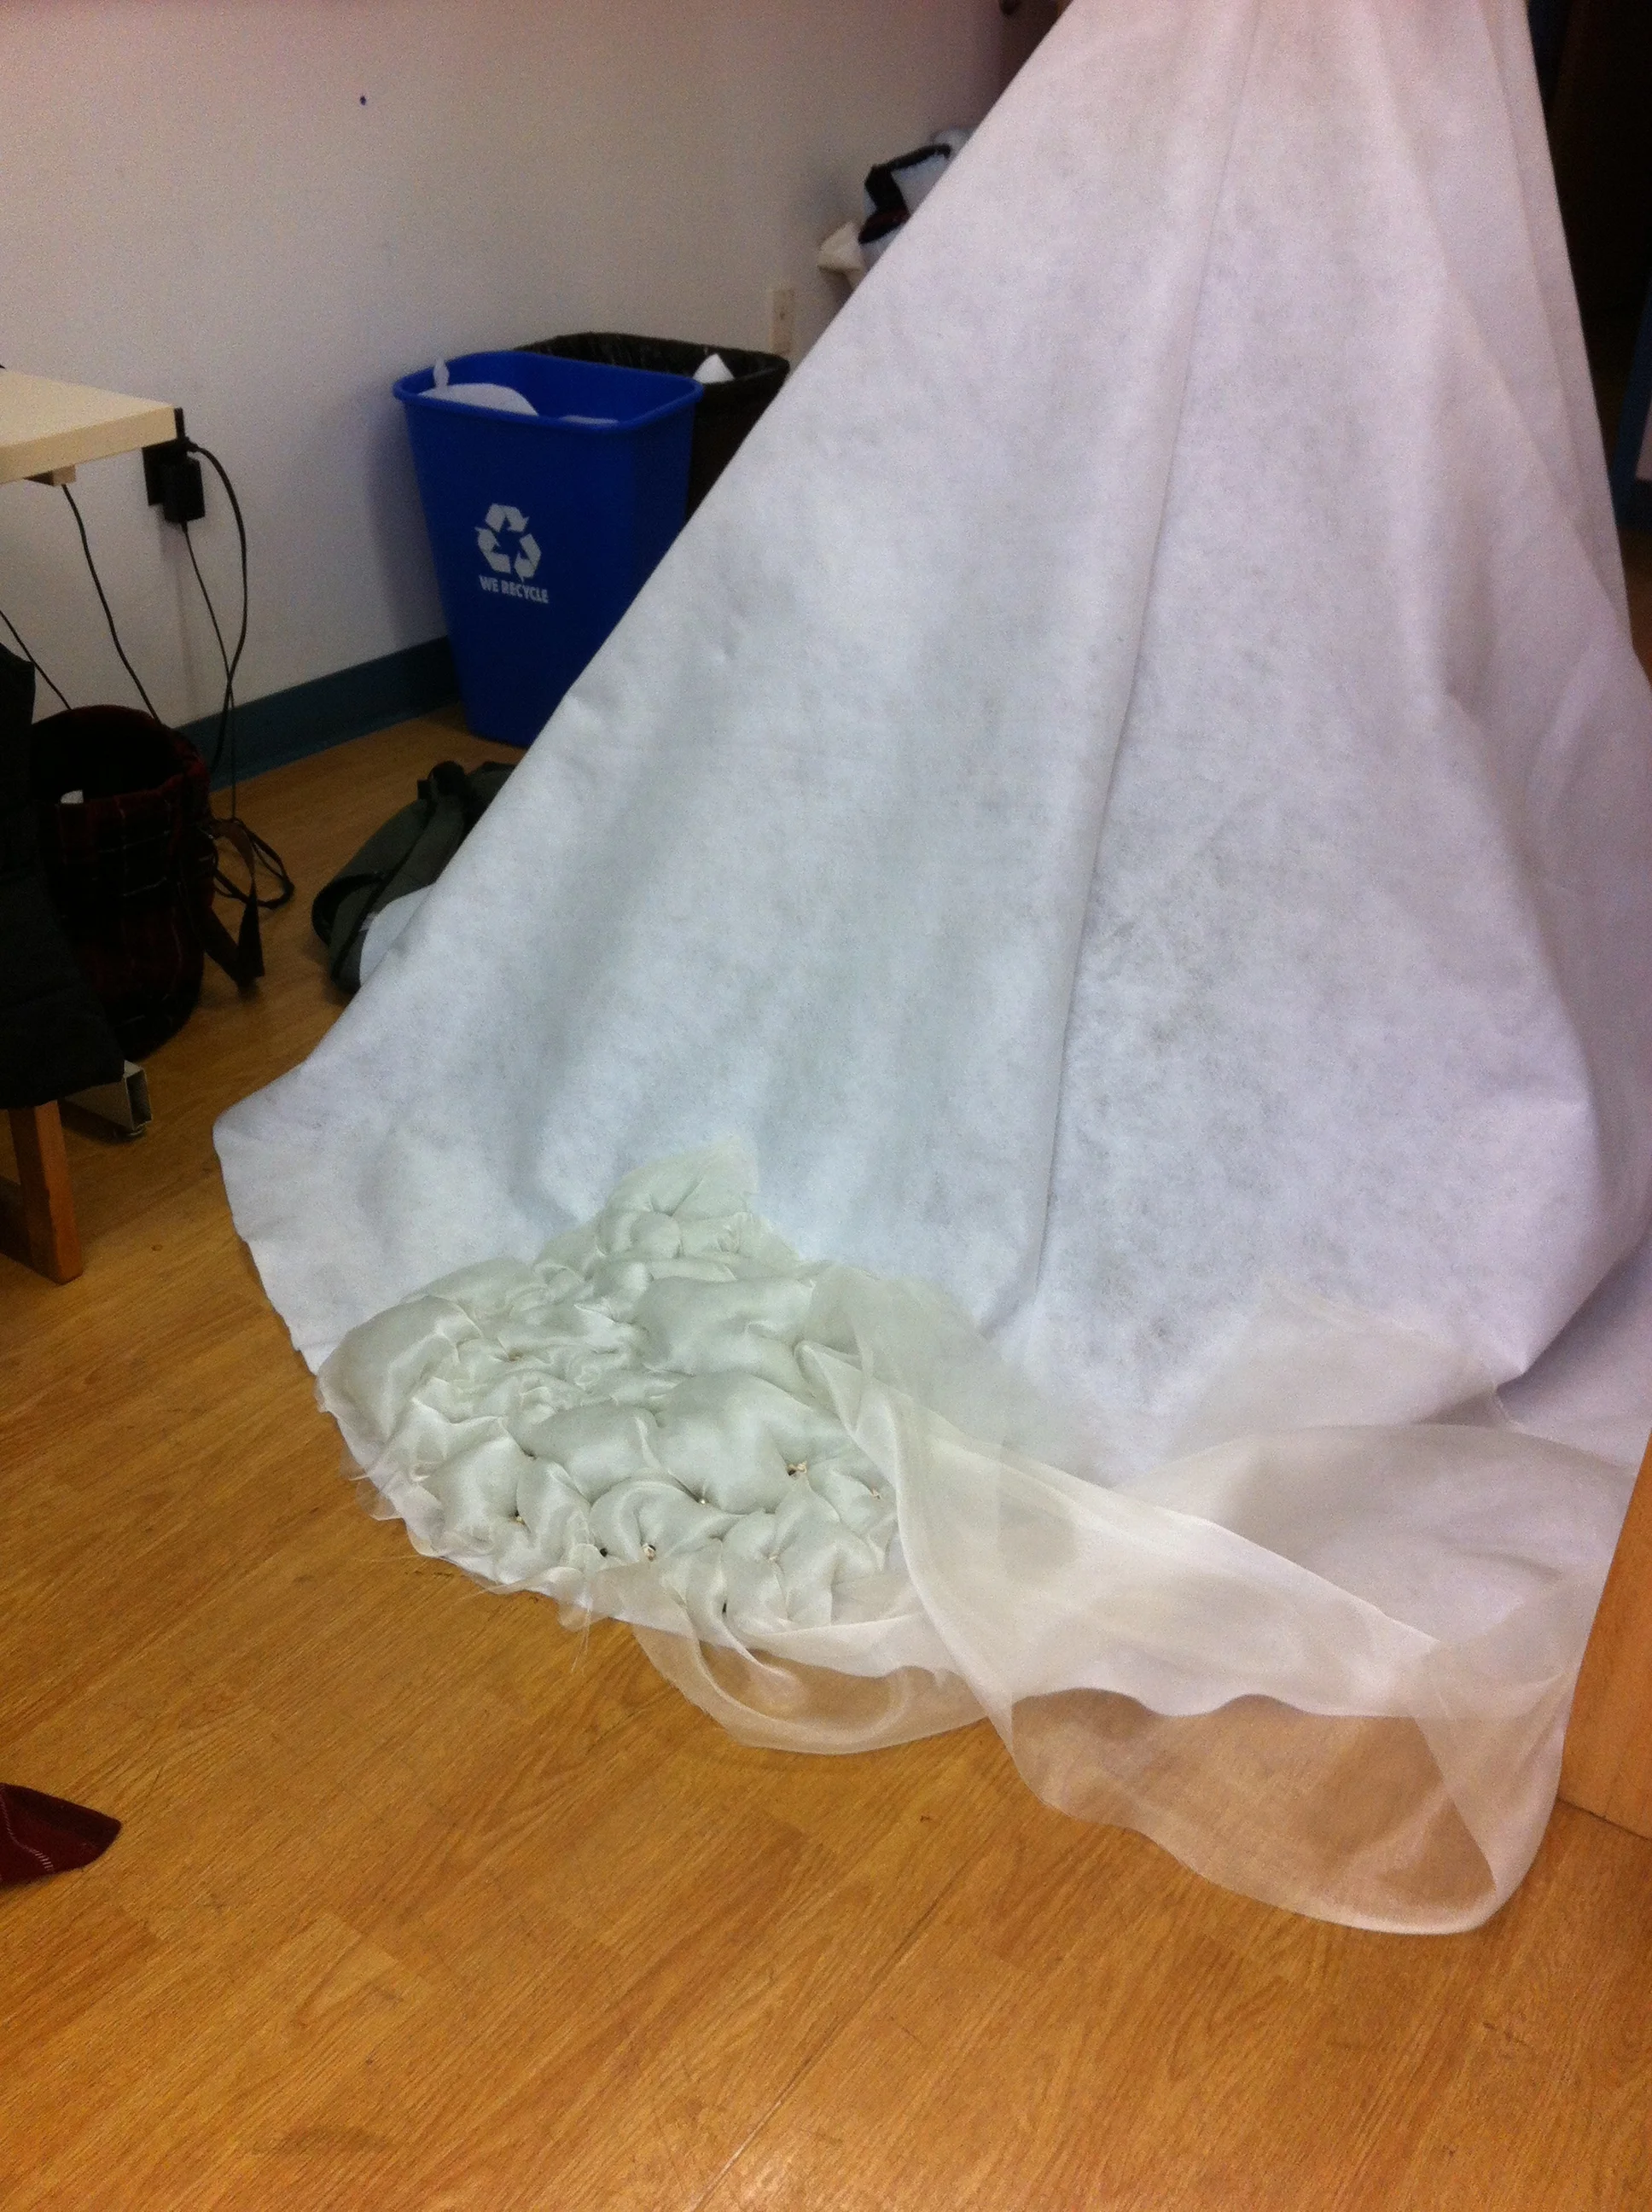
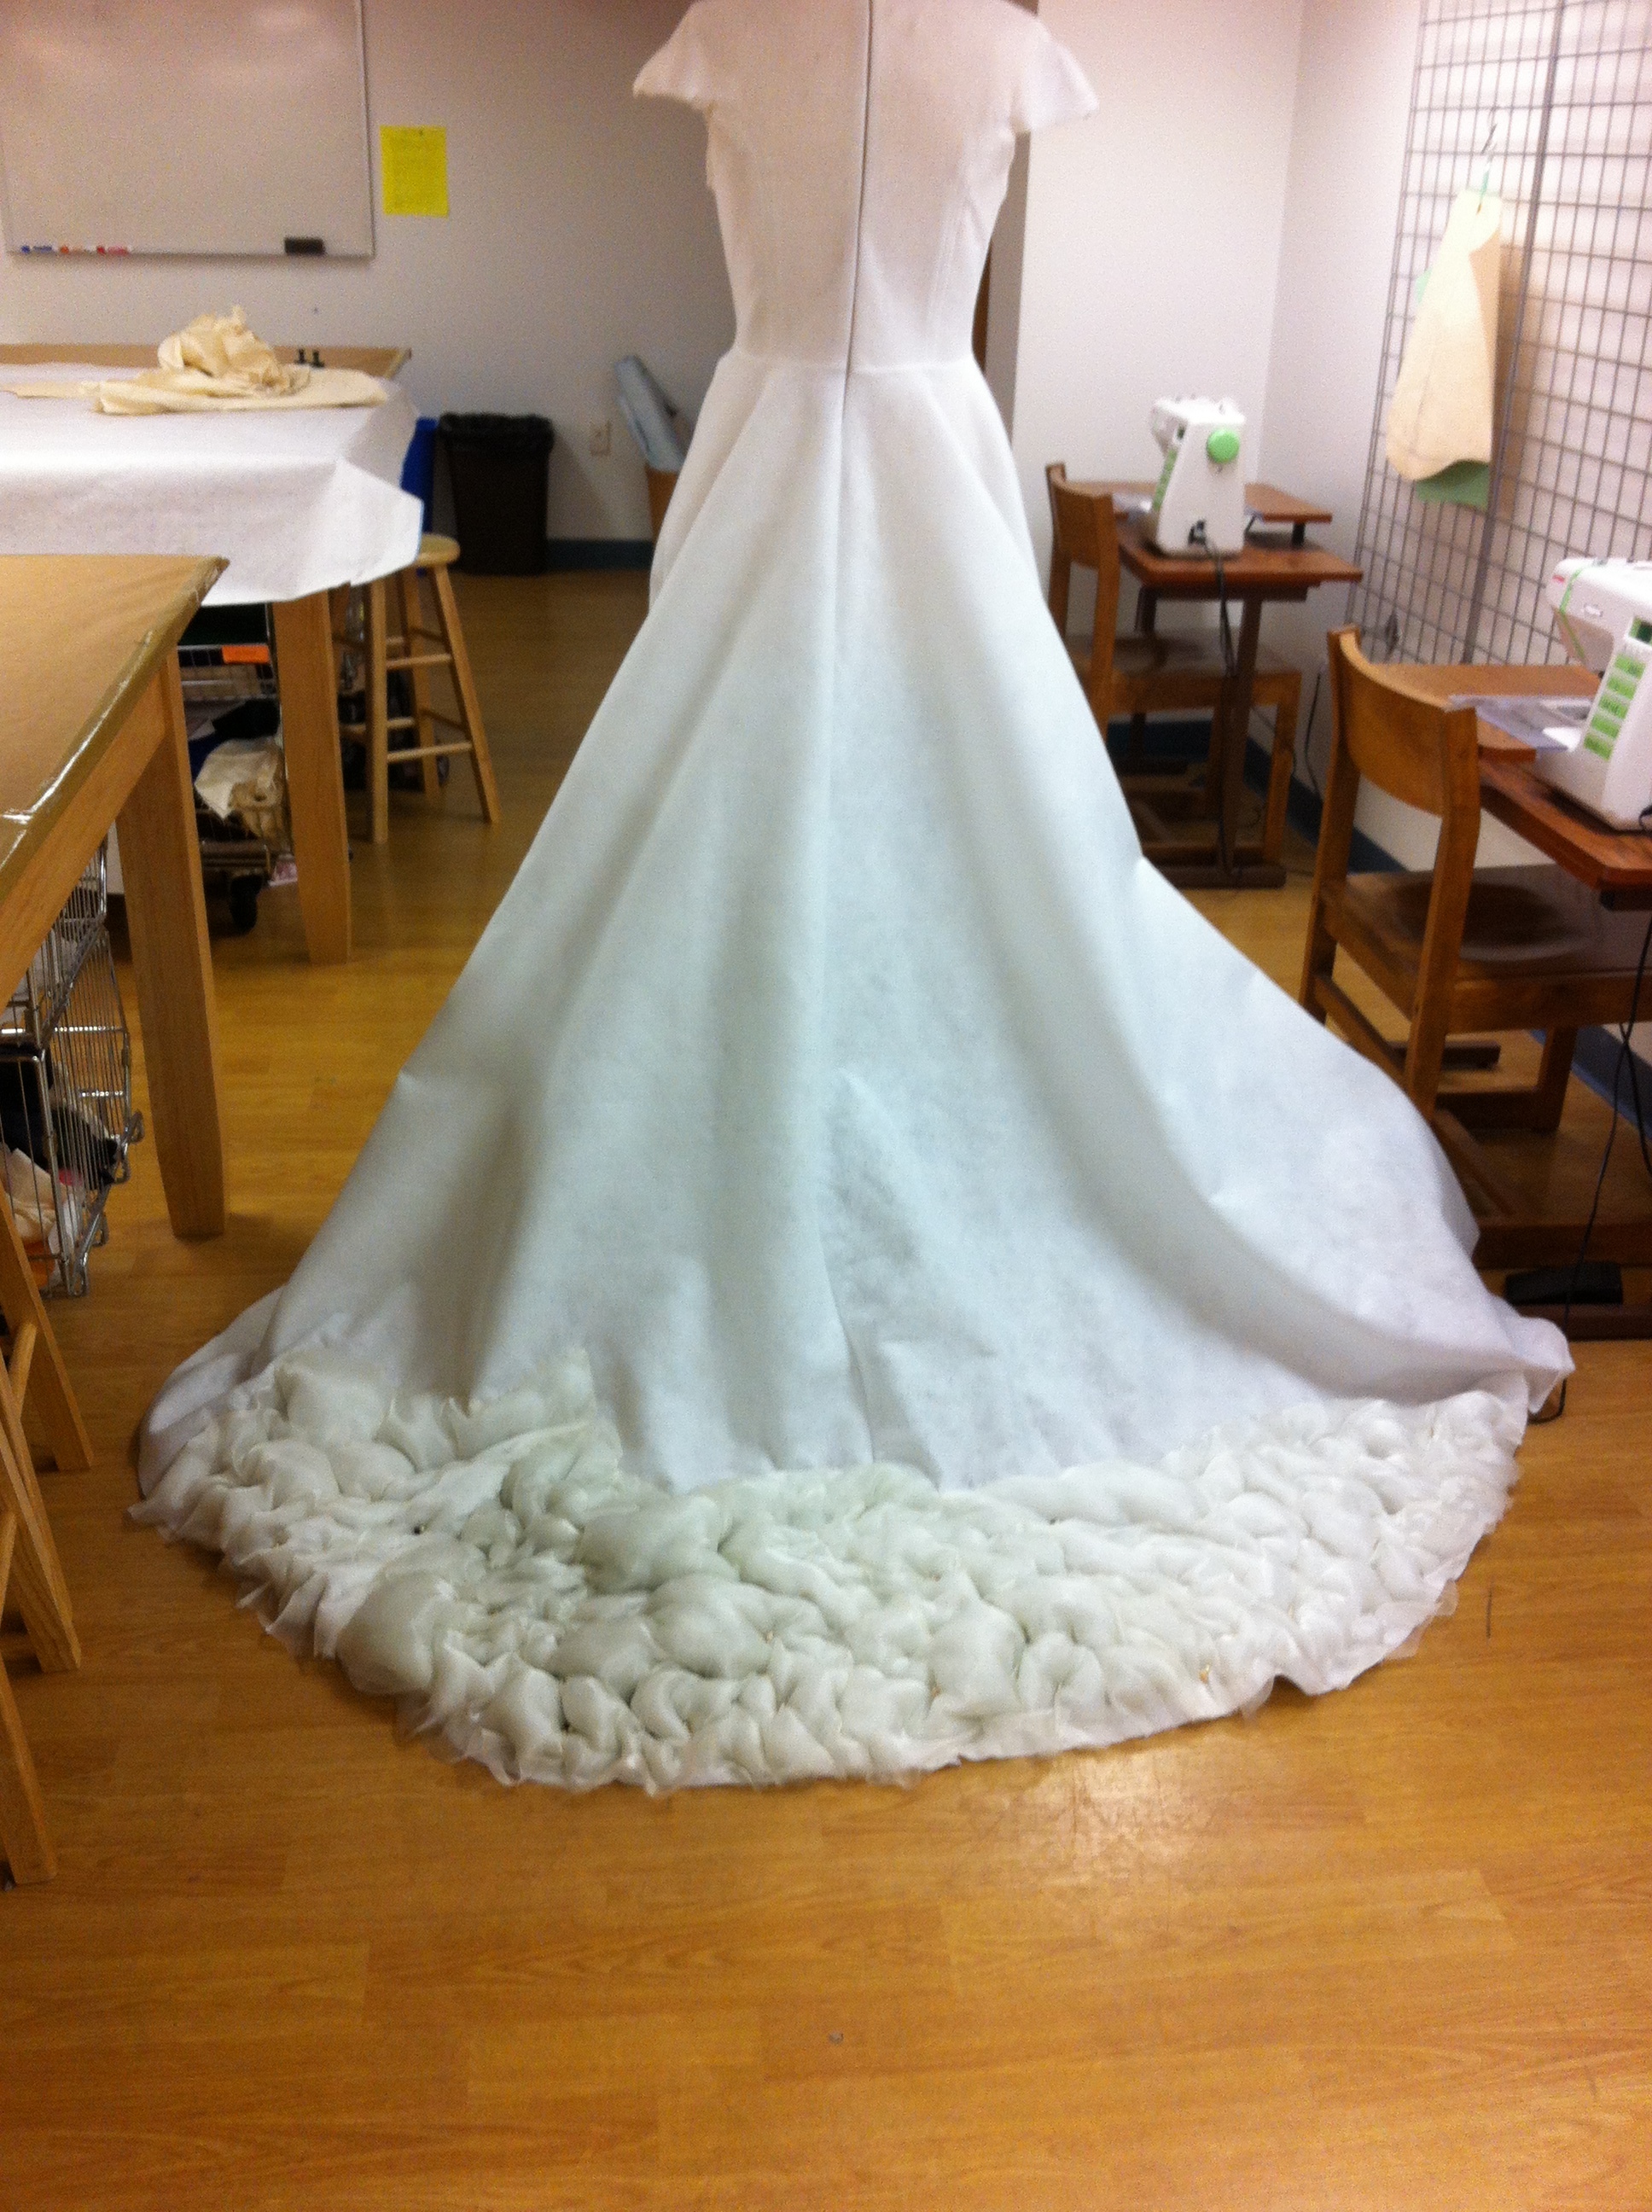
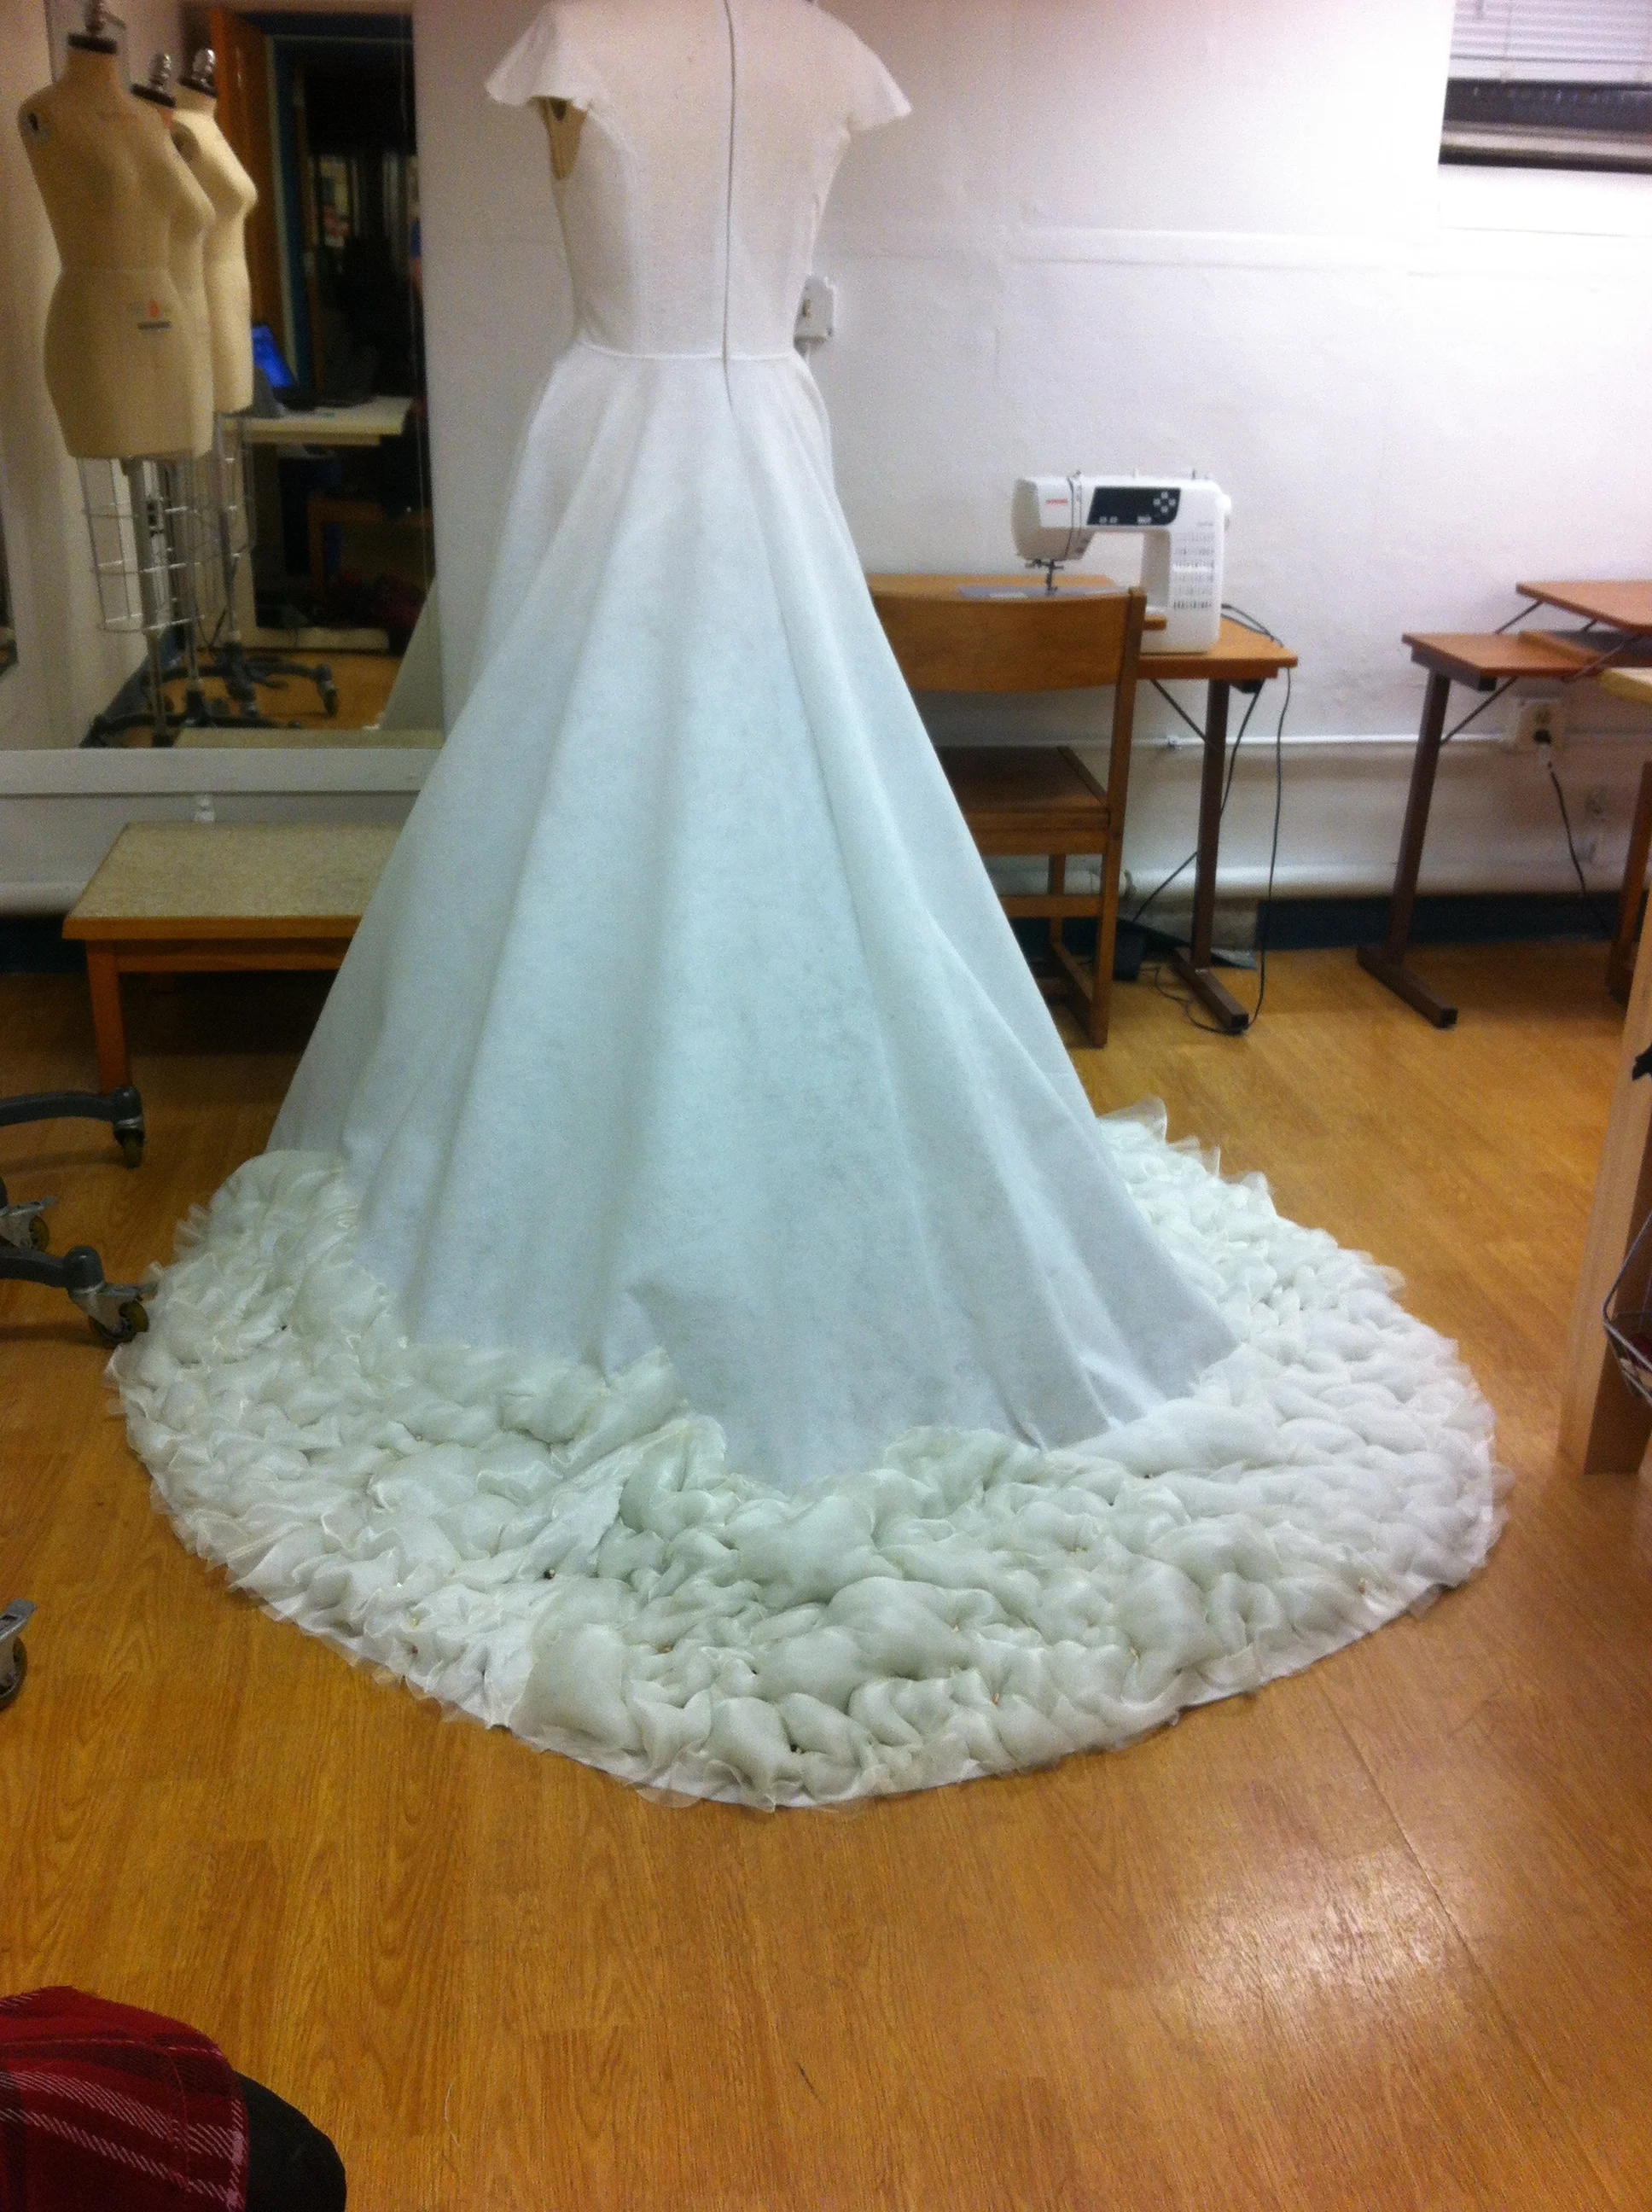
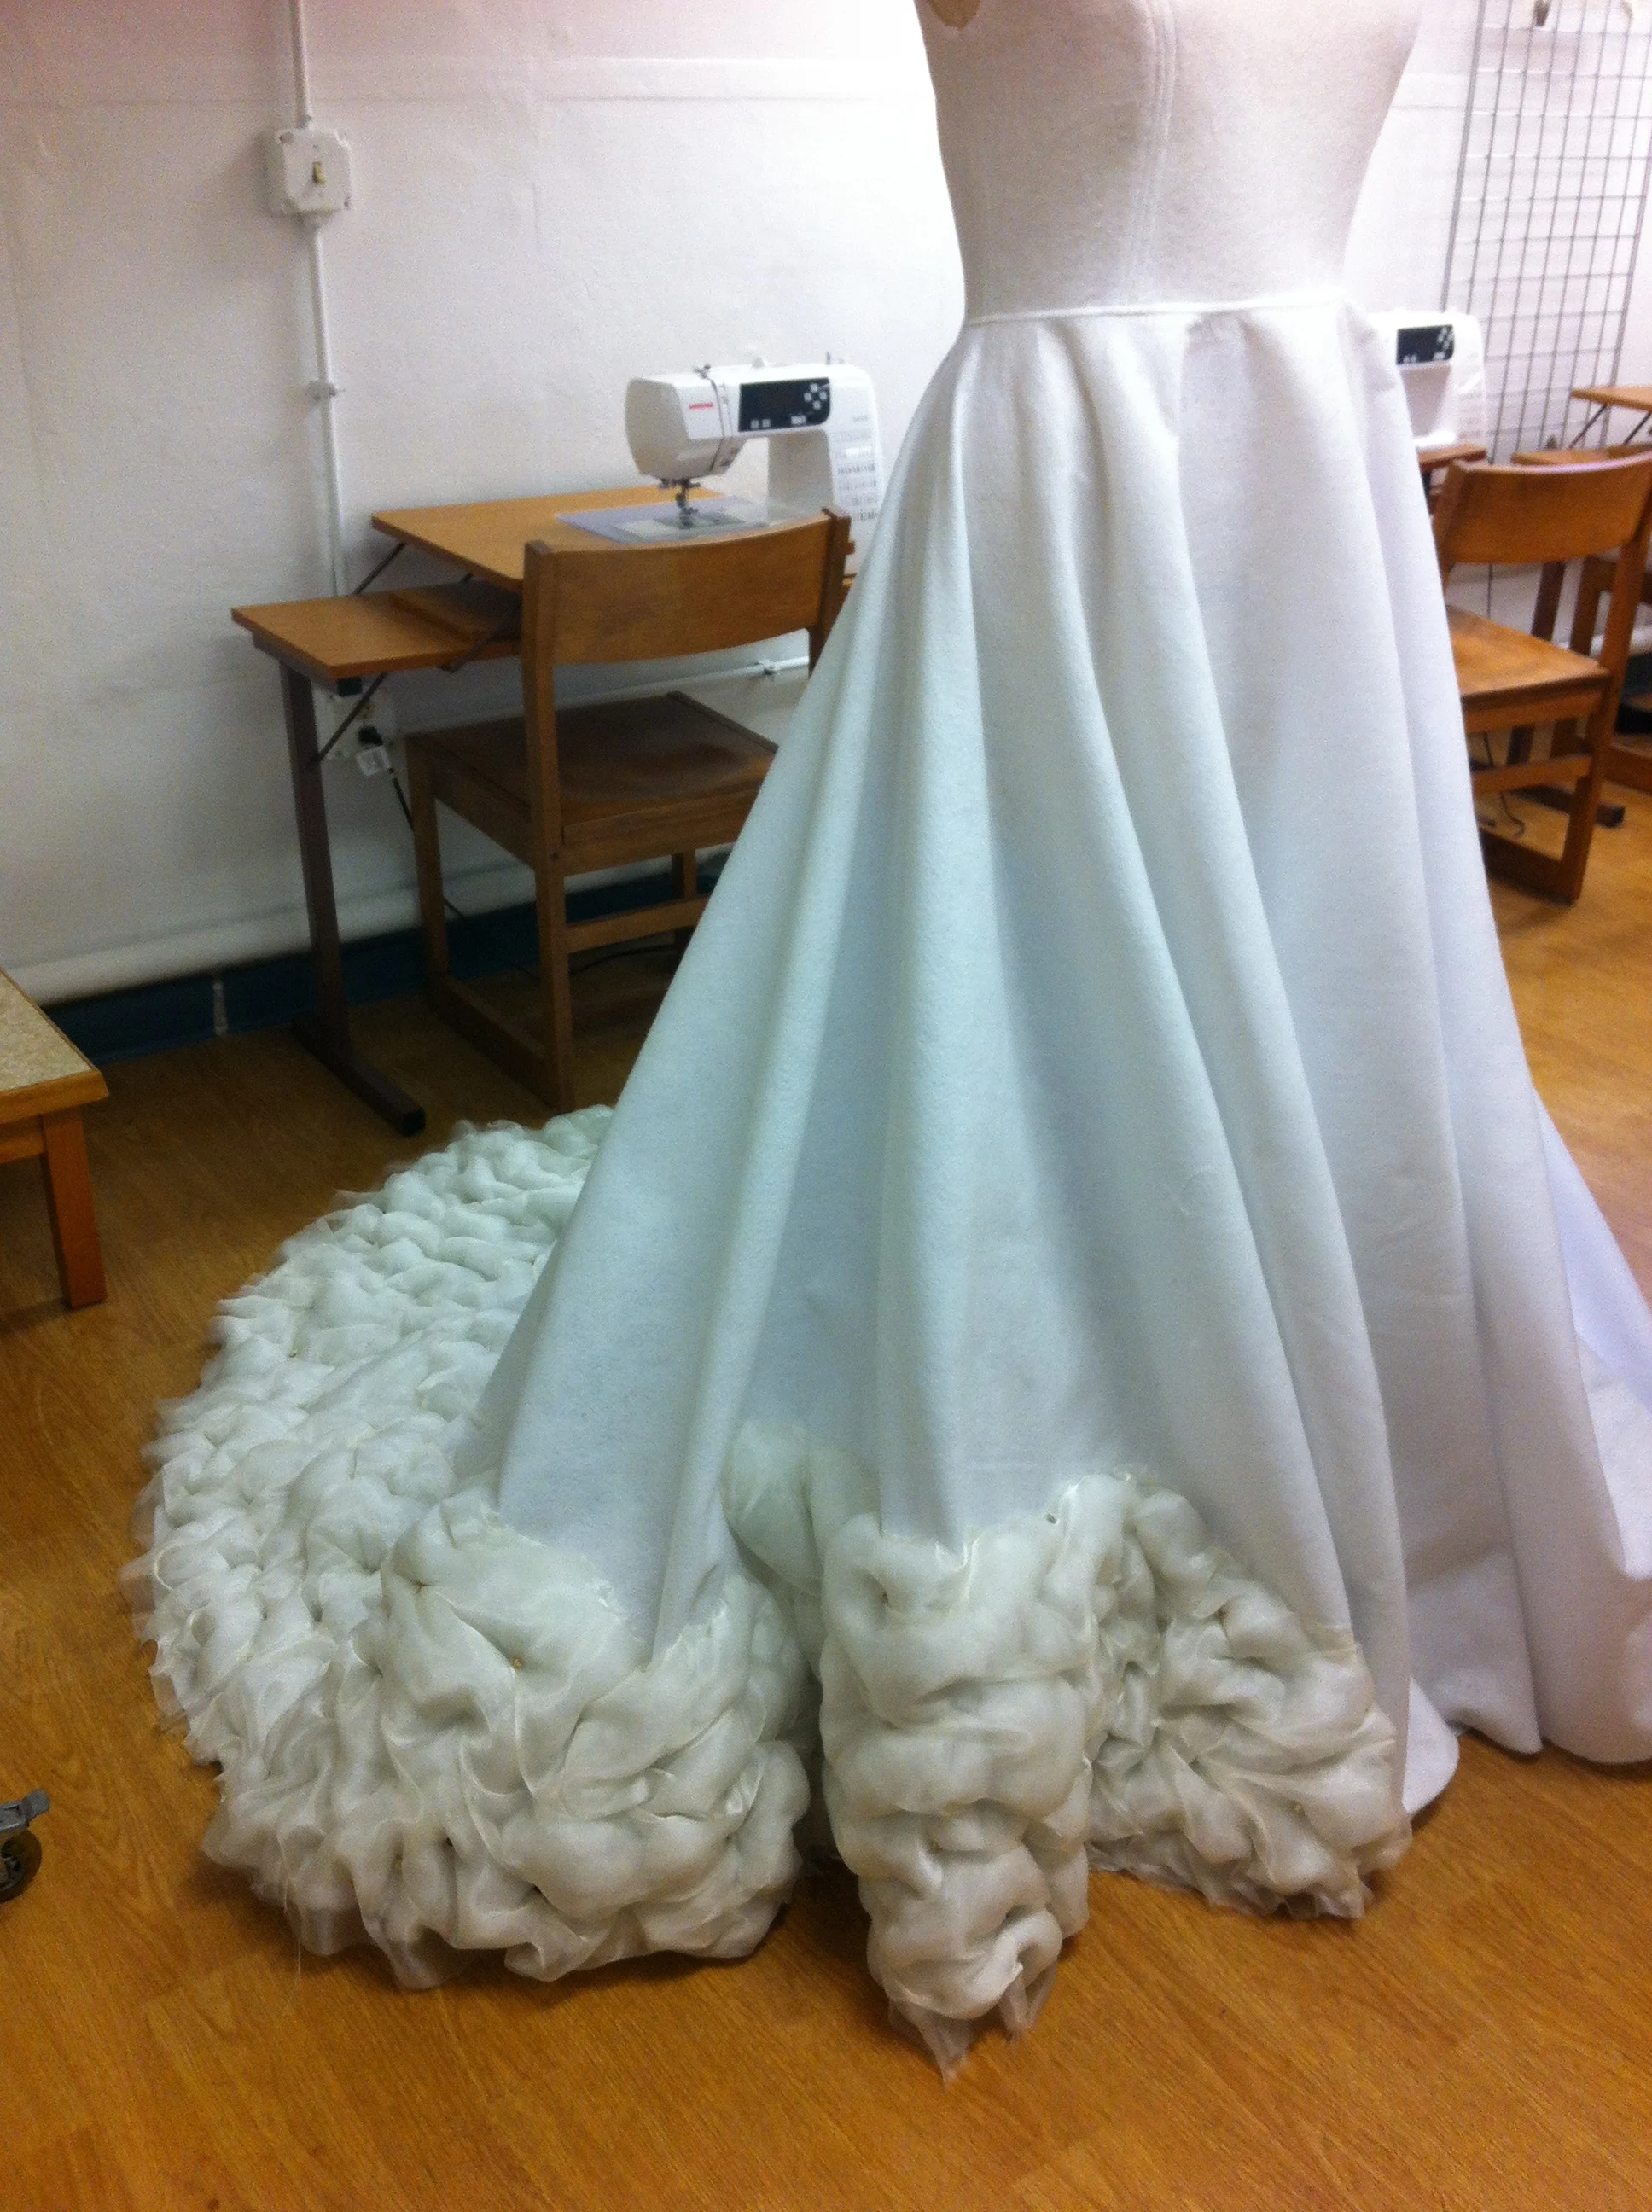
Each and every puff is sewn down by hand to the felt underlayer. In nearly every puff I've sewn in beads, shells or sequins so in person there is a very natural and almost "sandy dirt" look to it. The garment looks so much more gritty and "wet" in person due to the shimmer of the organza and the texture of the batting coming through the sheen of the organza. I am very happy with how the garment is coming out. It weighs a ton, will be very difficult to pack into a closet or a box, but I love it so much I don't care. I hope to someday photograph it on the actual Oregon coast.


The rest of the garment will have the puffs getting smaller, more concentrated, and covered in more beads. I'm hoping that by sewing in more beads there will be a slight difference in overall color as well. I'm leaving the bottom edge of the garment unhemmed because I really liked the broken deconstructed look of it. This dress is not meant to be pretty. I wanted it to look very organic.

If you want to keep up to date on more progress be sure to Like my Facebook page. I often post my progress pictures on days that I work! 

Thanks for reading!

A tribute to the Pacific coast part 1: Dancing Seafoam

In the last few weeks I've begun to think about where I would like my design scholarship to go. I've been seeing patterns in my work over the last few years and my time spent at ITAA seeing other scholars design work has made me think more critically about what kind of designer I am and what I hope to accomplish as a designer. I've done some reflection on the work that I've done and thought about the kinds of things I'd like to do and have noticed my work follows two veins: studies in sensory experience and tributes to natural phenomena through clothing (sensory experience being my autobiographical projects, projects based on movement, or clothing to elicit sensory responses). I have decided to pursue both of these endevours in a more purposeful way to create more complete and rigorous design scholarship. This year for my three ITAA entries I've decided to focus on tributes to natural phenomena. My first project in this new series will also be a study on movement and texture. I've decided to design three garments that pay tribute to my favorite place in the world: the Pacific coastline, specifically along the Oregon and Washington coasts. 

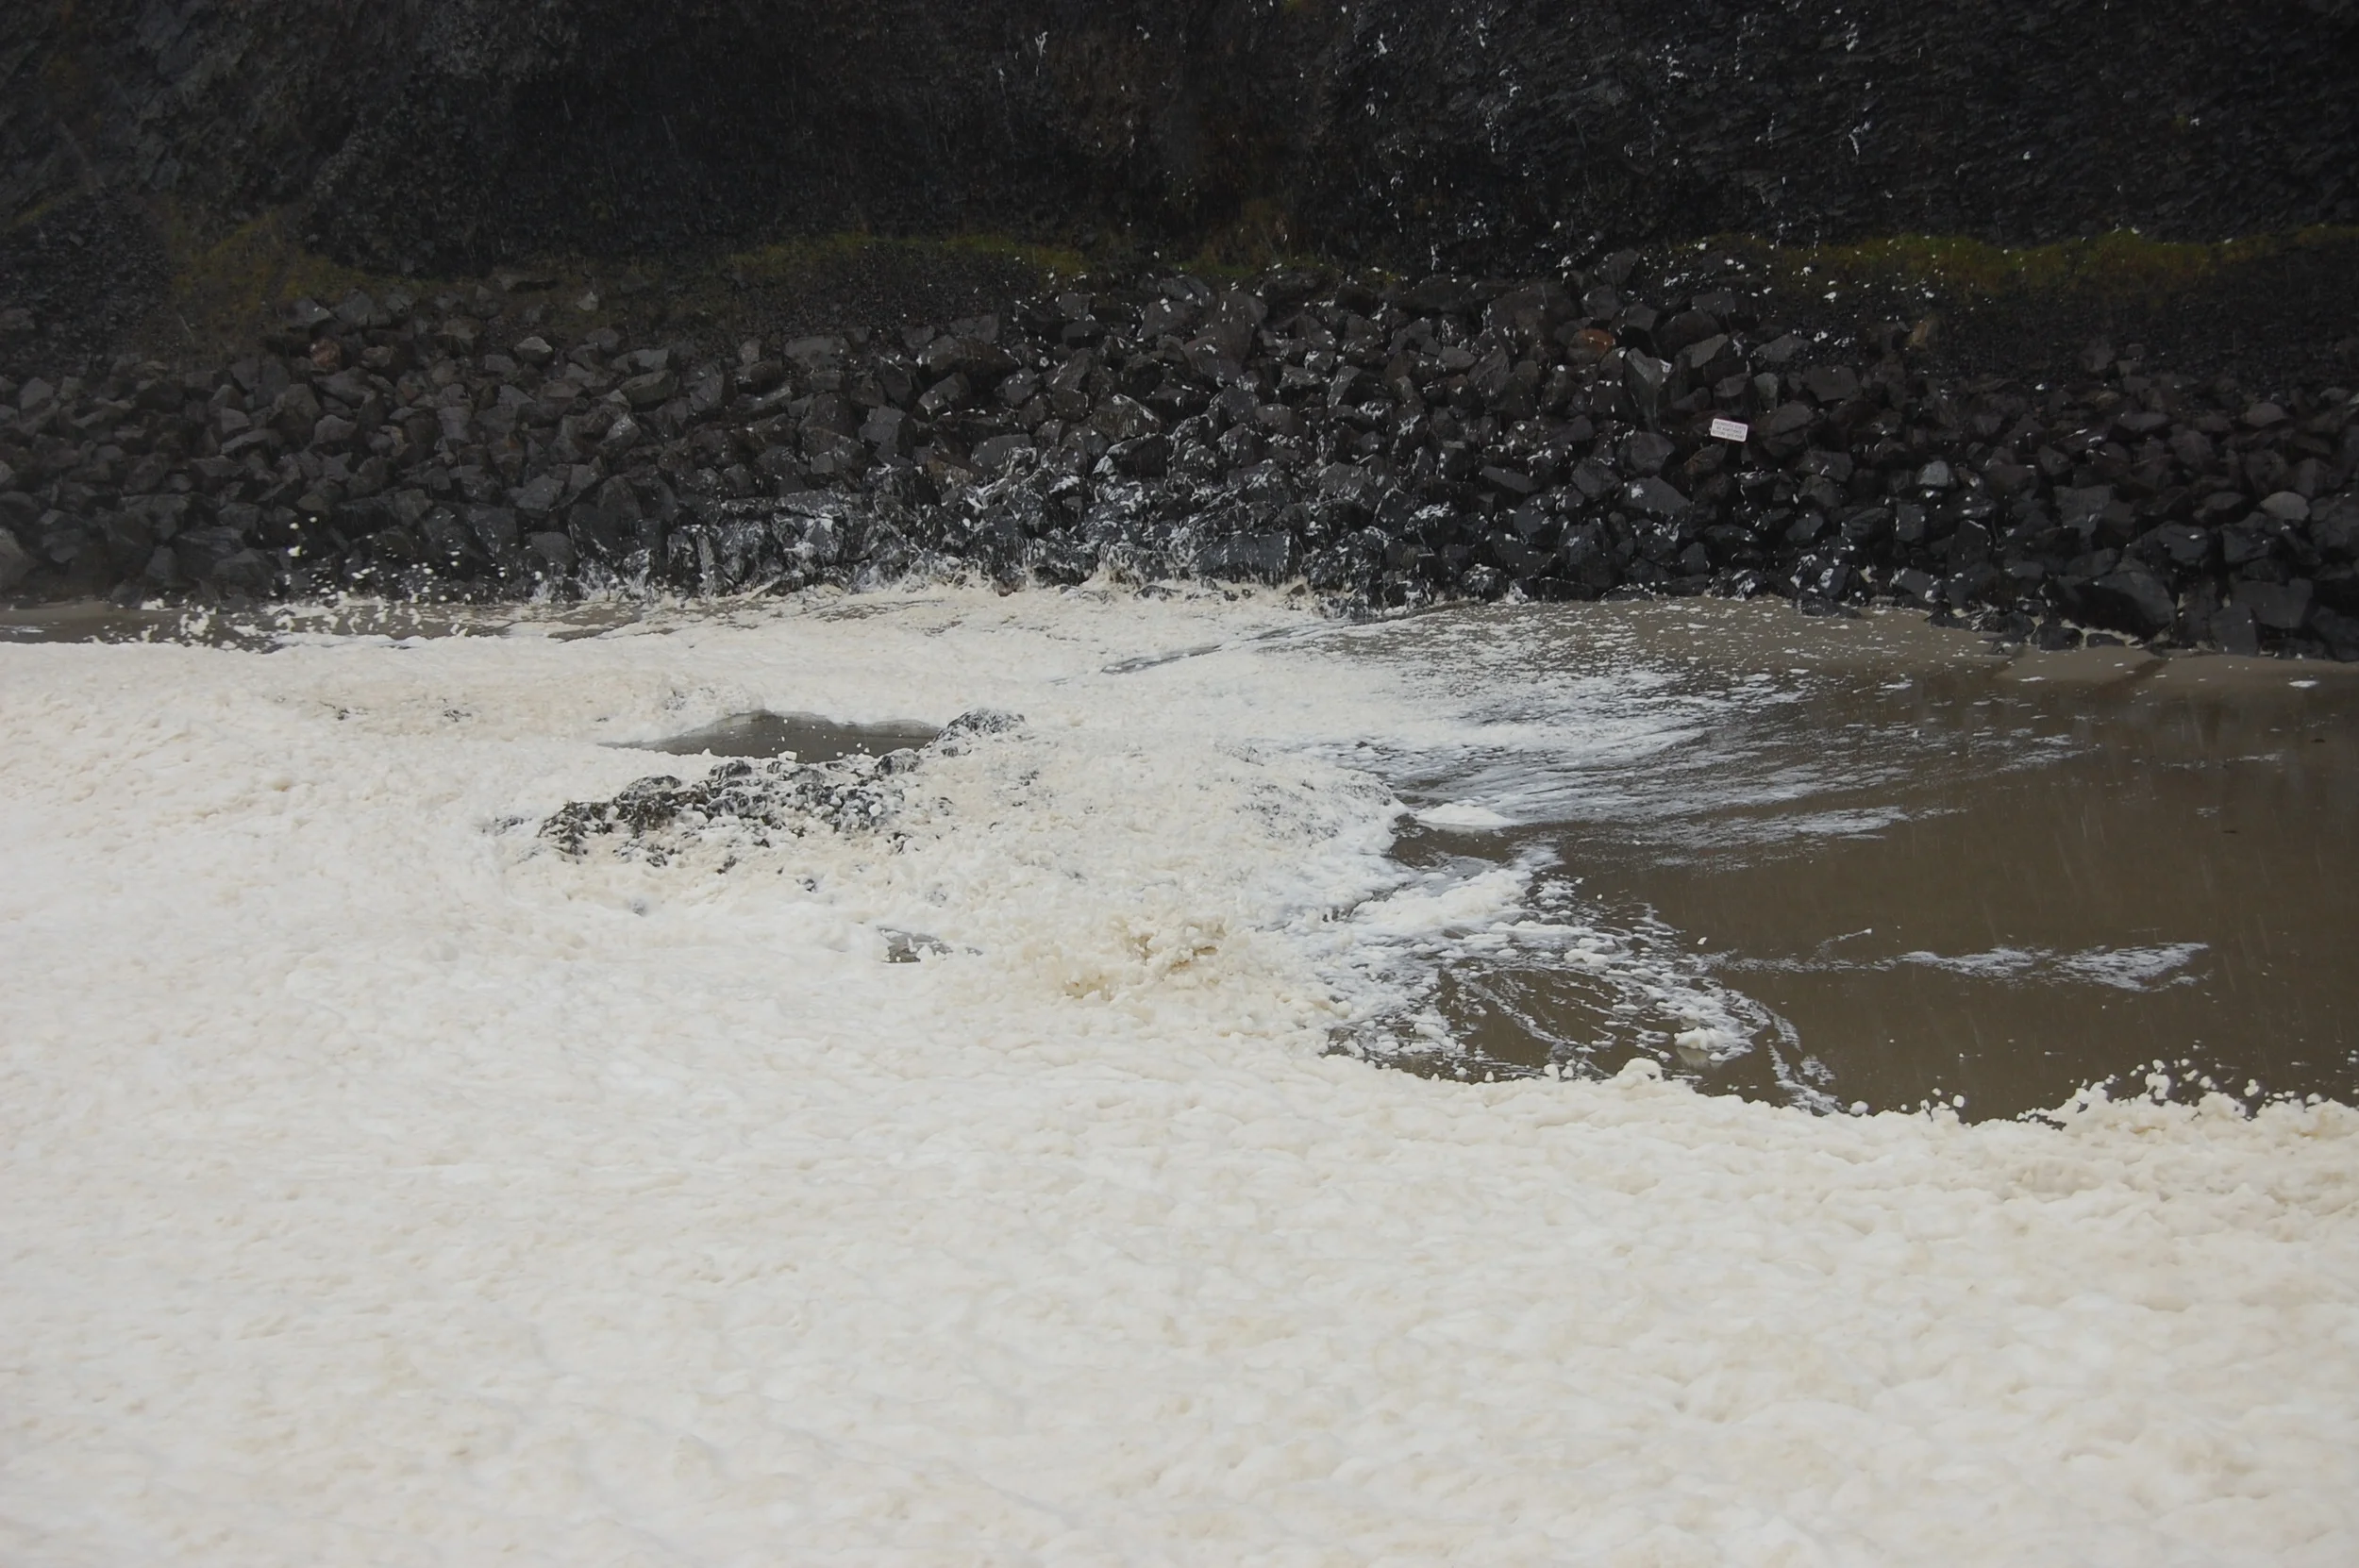
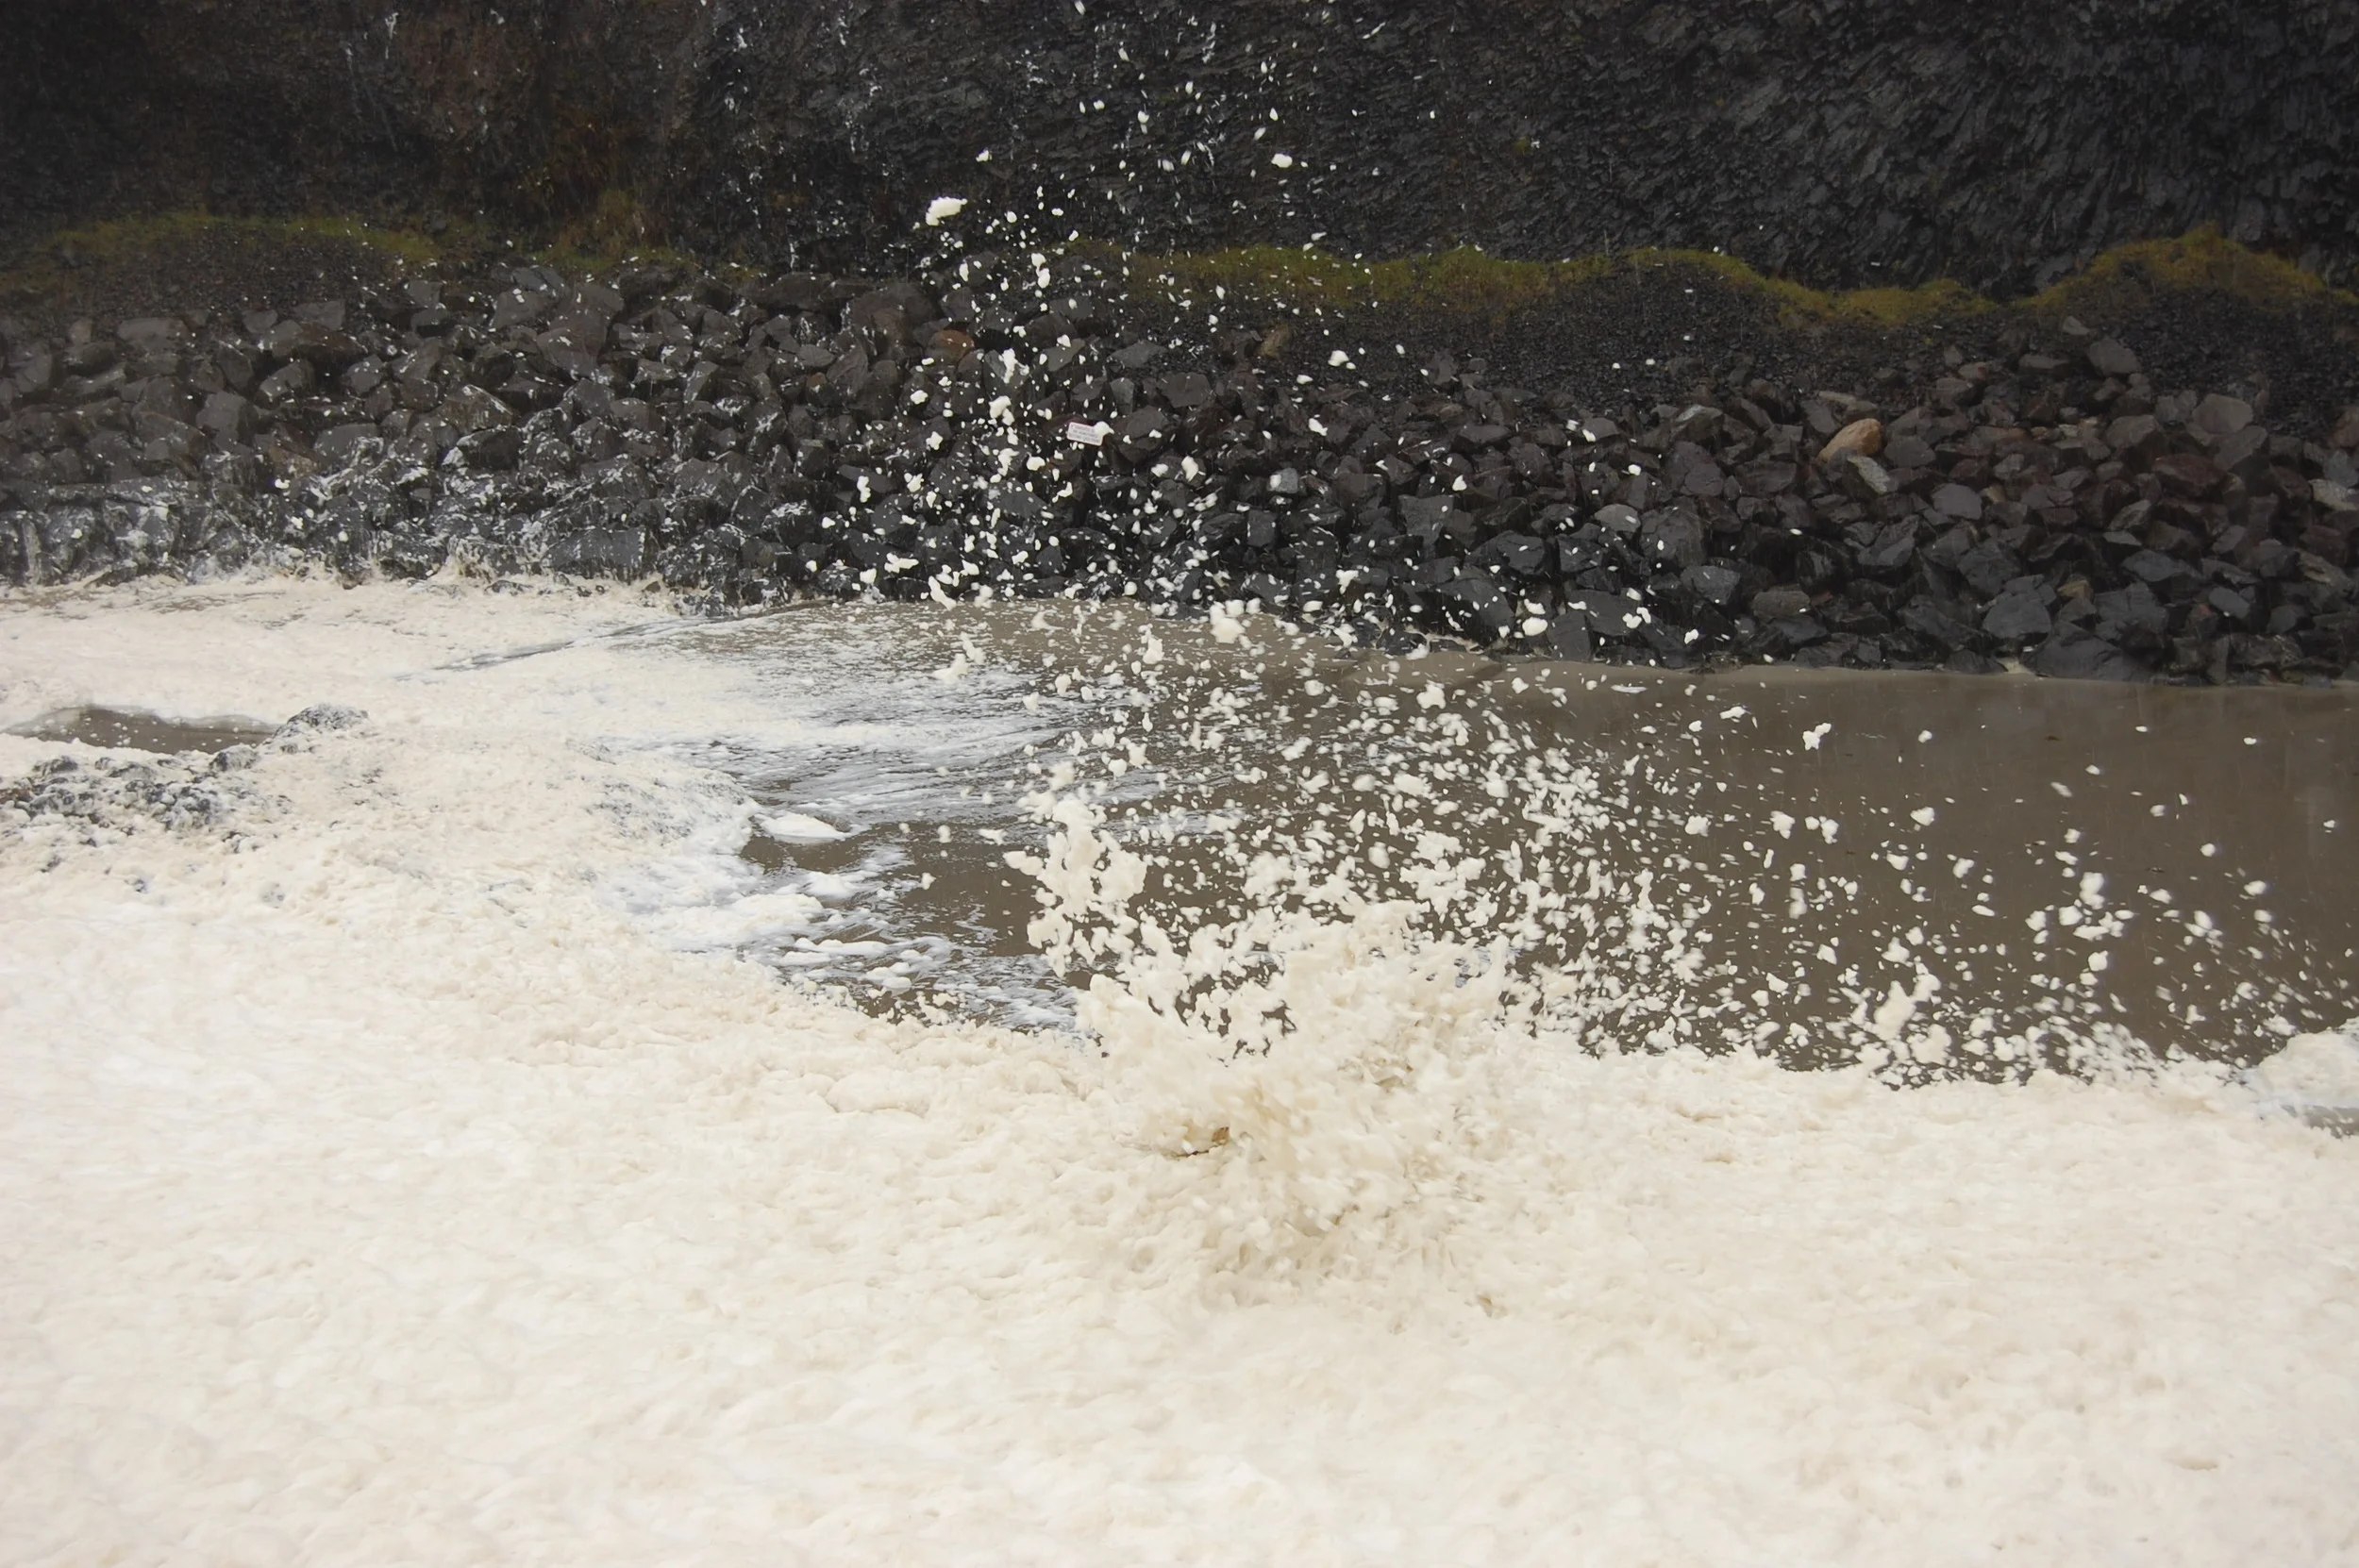
The very first time I visited the Oregon coastline I went with my mother and my husband and it was shortly after our move to Oregon. The day was abysmal. It was very rainy and the wind was gusting close to 70mph. We tried to make the best of it and visited several key locations near Newport, OR. The most memorable place for me was the Yaquina bay natural area. We walked out to view the water and this odd seafoam had built up on the water and seemed to be overtaking the shoreline. The waves made the foam undulate with each swell and the wind was causing the foam to break up and fly into the air like snow. It was absolutely mesmerizing to watch. I had tried to capture the phenomena on my camera in several photos.

The foam was a light beige color, and parts of it were mixed with sand and various flotsam and jetsam from the shore. The surface of the foam was bumpy, almost like lava, but the whole thing moved with lightness and quivered in the high wind. It was beautiful.

Since seeing this I started to think about how I could mimic that kind of movement in a garment. The juxtaposition of the heavy looking sheet of foam with the lightness of it when wind hits it is fascinating. I began with some crazy ideas. My first involved trying to replicate the vertical flight of the foam in a swirling vortex. I designed large complicated garments with fans built into the skirt and along the back. I had pictured wiring all the fans to a phone app that I could turn on with the touch of a button and parts of the garment would lift and swirl seemingly on its own. This turned out to be a much larger engineering feat than my means could pay for (the only way to get battery operated fans all synched to an app was through a custom battery unit produced by one company that still had the project in Kickstarter phase and it would have cost hundreds!) I decided to test my grand idea on a small scale and purchased a small desk fan (small enough to sew into a garment) and sewed some fabric strips to it. The result was comical. Only the fabric closest to the blades would lift, and once they reached a certain height they'd fall in a sad stringy mess to the side. I had to change my approach.

I sat on the idea for a month or two trying to decide how to approach mimicking the seafoam. I thought of maybe sculpting cotton gauze with starch in order to get light but solid "bubbles" that I could loosely attach to a base fabric. This idea could work, but I did not like the woven texture the gauze would have, and the technique would be messy and not quite the light-but-solid look I was going for.

This last week I came upon a technique I think will work. I purchased batting, felt, and organza and constructed a small sample of "puffed" bubbles much like the image above. I layed batting in between the organza and felt and sewed tucks into the fabric, making ridges that resulted in fabric that looked a lot like the foam. The result is not light on its own, but with the right design and silhouette the movement of the garment itself could lend to the movement I am looking for. 

To make the look more authentic, I sewed small glass beads, sequins, wooden beads, and sea shells into the tucks of the puffs much like how parts of the shore were mixed into the foam.

Once I had the technique down I began to think about the garment. I wanted the garment to have a large sweeping hem so that as the model walked the movement of her legs would add to the look of the garment. I immediately was drawn to one of my favorite Alexander McQueen garments: the Oyster dress

This dress was part of his Spring/Summer 2003 "Irere" collection wherein many designs were inspired by a ship wreck at sea. See the entry for this at the Met here.  The gown is made to look like the edges of an oyster shell, and the large skirt and hanging ruffles reflect the image of a drowned maiden emerging from the waves. I adore this gown and the movement and rawness of it. The hanging strands of silk over the shoulders and the complex laying of the skirt are incredible. Seeing this garment in motion is similar to  the type of movement I picture the foam dress to have. You can see the gown in motion here at 5:45. (I've also noted that the shape of this gown is similar to Elphaba's second act dress in Wicked but on a much larger scale and that's probably why I love it so much)

I decided that my silhouette would be less full, but still flared to allow full movement. I designed a high necked, extended sleeve bodice with a long circle skirt base to sew my puffs on to. My goal is to make my model look as if she just stood up from the sea and the foam has surrounded her body. Today I constructed the base of the garment from 72" craft felt so I have a sturdy, yet flexible base to sew my designs onto. The dress zips up with a cream colored invisible zip (since the fabric on top will eventually be cream colored). The waistline and shoulders are reinforced with twill tape to help support the eventual weight of the dress. 

Once I get a large portion of the puffs sewn on I will make a new blog post about that. For now I have a lot of work ahead of me!!

Nova Prime Irani Rael-Guardians of the Galaxy Part 2

Howdy!

I've got a little bit of progress to share on the vest pattern for the Nova Prime costume. In my last post I showed a picture of the pattern in Optitex. Well, as these things usually go, I've had to go back and tweak a few things here and there so the new pattern is slightly different.

Using Optitex to draft this pattern has been very interesting and certainly a learning experience! If I were to draft this pattern by normal flat pattern techniques I'd fold a whole bunch of 1" pleats on a piece of paper, trace my pattern on top of the pleats, cut it out, then open up the piece of paper. You don't really have the option to do that in Optitex. What I did at first was to make a series of grade points along the contour line where I wanted the pleats to be and then drafted in each pleat one at a time. This looked good on the screen and the piece looked correct when I closed the pleats up. However when it came to print out my pattern and I got to fold it all together something strange happened. I had a couple of pleats folding in the wrong direction (I should have checked counter clock wise instead of clockwise) and then one of them was actually folded over on top of another pleat. It was very odd! 

I ended up going back and starting the piece over again and drafted parallel pleats all at once, eliminated the lower pleated panel, and let the computer determine where the pleats would go. This turned out to be much simpler and probably something I should have done the first time around. Oh well, that's part of learning!

So this morning I sewed up the muslin of the vest in the base size (a size 16) and all the pattern pieces worked out perfectly. I made a slight change to my initial decision to do pleats for the front of the vest and decided to make them all sewn tucks instead. This does not change my pattern piece at all but it means that each pleat has to be sewn down. This drastically changed how the pleats laid across the bust and looks 100x better than my first muslin. 

Some general pointers I have if you decide to make this pattern in the future. First use the same color thread as your fabric and you won't see the stitching under the pleats. When marking the pleats I transferred all the markings of the pleats along the dashed lines of the pattern using tracing paper and a spikey wheel. When folding the pleats the foldline will be in the middle of the dashed lines. Pin the dashed lines together and stitch.

Also, steam is your friend here if you are ironing these pleats. The first mock up I made for the vest was out of some gross thrift store wool and I needed a ton of steam and a clapper (the wooden thing) to flatten the folds of the pleats. 

The final pattern for the vest will have a neckline facing, lining, back separating zipper, and bound armholes. 

Nova Prime Irani Rael-Guardians of the Galaxy: Part 1

Hi Everyone! 
Melanie and I are at it again! Continuing her love of all things Glenn Close, my sister has decided she wants to make a Nova Prime Irani Rael costume from the Guardian's of the Galaxy movie. Being the sweet sister I am, I volunteered to make her pattern and her wig. I'm currently taking a class on pattern grading and computer pattern development using the Optitex software so I not only get to help my sister but I get some great guidance while developing this pattern.

This post today will just be focusing on the pattern for the vest. 

Now if you don't remember this character from the movie she is the leader of the police force wearing a great blue suit and crazy Saturn ring hair.

Now looking at the costume I broke it down into several parts. First is the undershirt with the white collar that peeks out from above the vest and below her sleeves. I'm not going to draft this part. I'm going to leave it up to my sister whether or not she wants to make faux cuffs/collar or make a shirt. I know she can handle it. That leaves a vest which the jacket hooks on to, a skirt, and the outer jacket layer. I ended up sketching the skirt but I'm not going to develop a pattern for it since Mel has a skirt pattern that matches it almost exactly. 

The exhibit photos were taken by Freya over on Flickr. Check out her gallery for more photos of the FIDM movie costume exhibit on display now. 

 Now looking at the vest it has a built up neckline, center yoke, and diagonal pleats running through the bust. You can't see much of the vest besides that. I made a few executive decisions and threw in a princess seam below the bust for better shaping, and did princess seams down the back. I also chose to bind the armholes to keep everything smooth. What you can easily see in the photo above is the panel of hooks where the jacket connects to the vest. Here's a even clearer picture of it.

I developed the pattern in Optitex from a size 16 sloper that I digitized using the digitizer in the lab. My sister is not a size 16, but as part of my project I had Mel develop and fit her own sloper. She will be sending it to me and I will be grading the pattern to fit her. A bonus of developing the pattern in Optitex is that I can easily change the pattern for additional sizes when I develop a grade system.

Anyway, here are my sketches for the costume. Notice my sketch of the vest does not have the princess line on the lower side front portion. I decided to add that in while drafting the pattern. Also my hook and eye guide has 5 hooks despite the fact that the jacket only has four. My sketches were done before the exhibit photos were taken. The exhibit photos have also given me the chance to see that the skirt is a 6 panel gore skirt and not a darted one like I have sketched. That's what happens when there are only screenshots to work from!

For the vest I incorporated a 2" wide back neck facing and cut a front facing from the combined front yoke pieces. I left the front facing with a center front seam in order to make it easier to line up the seams. I drafted a seperate pattern piece for the lining of the pleated part of the vest. I transferred all the access of the bust shaping in that area to a tuck at the shoulder seam to allow the lining fabric some space to move. 

The pleated portion of the front panel is broken up into an upper section and lower section in order to contour over the bust. 

Here is what the finished pattern pieces look like in Optitex

 I will eventually be making this in different sizes and offering them as a download if people are interested. I will be making a muslin mock up of this pattern in the next coming weeks. Next is the jacket!!

Half Scale 17th Century Dress Recreation Part 4: The Bodice!

Hi everyone! 

It's been a long time I've posted an update about this project because I've been working on the most labor intensive portion of it: the bodice! I've just finished it today so now I can share my process with you. 

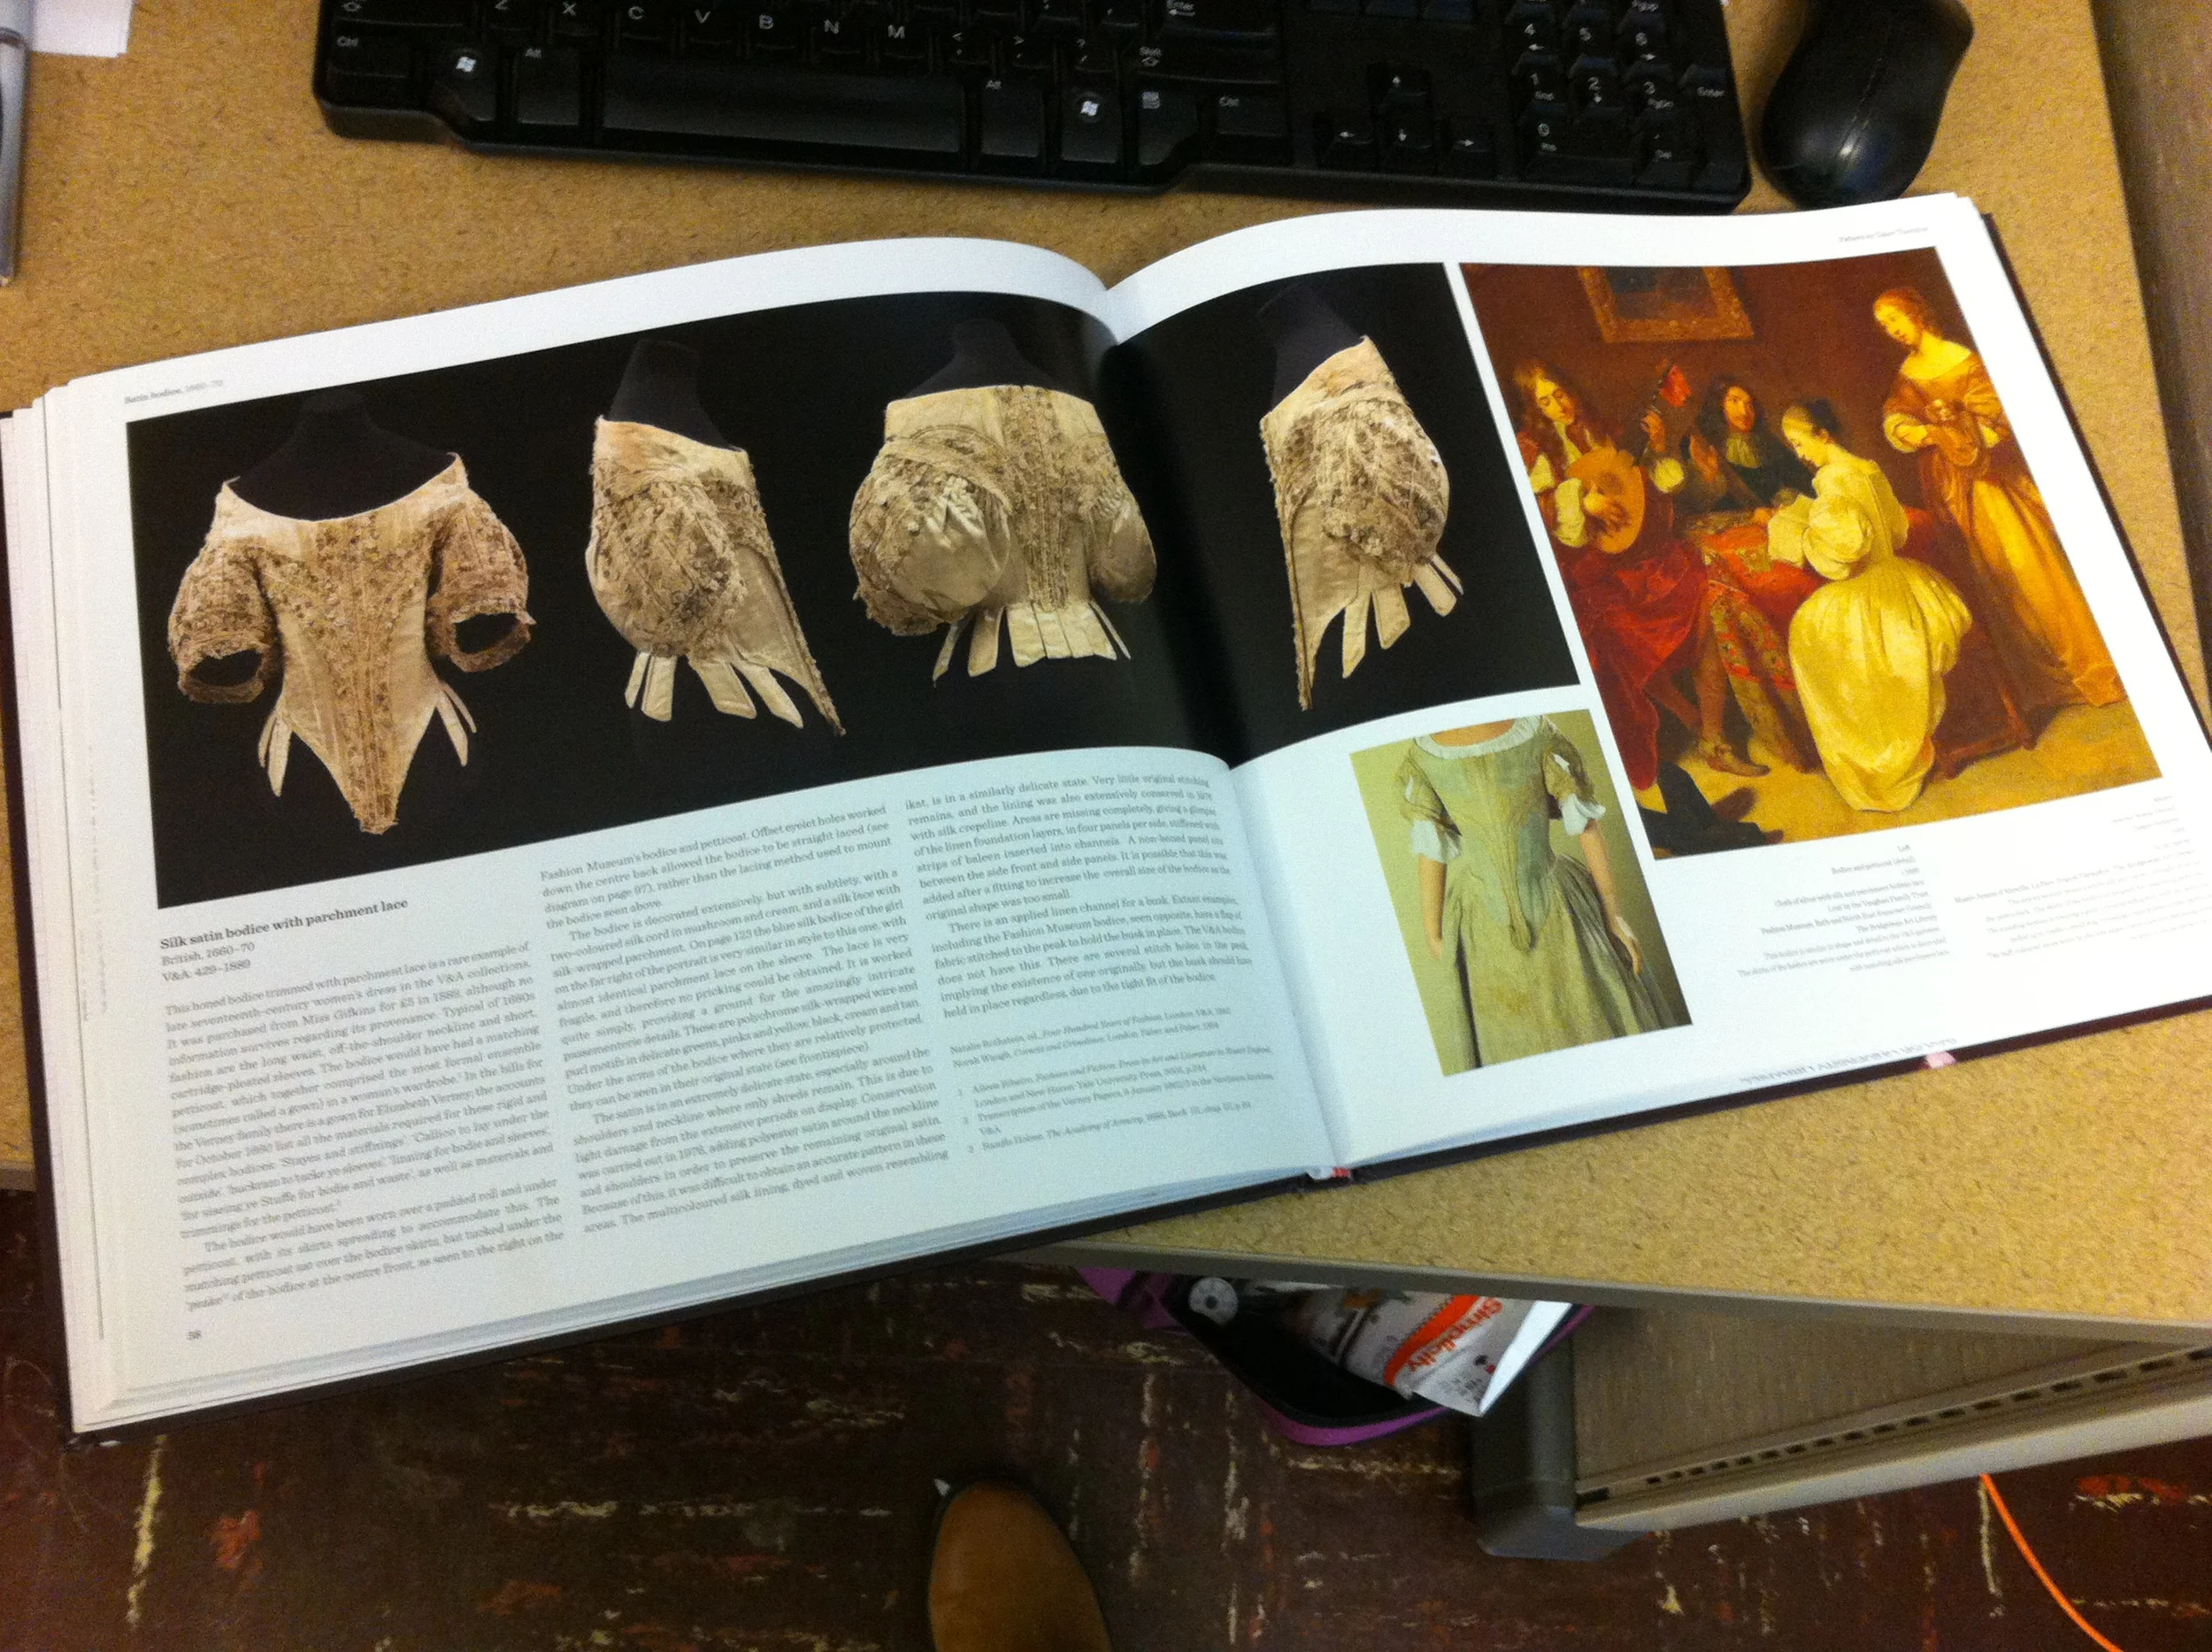
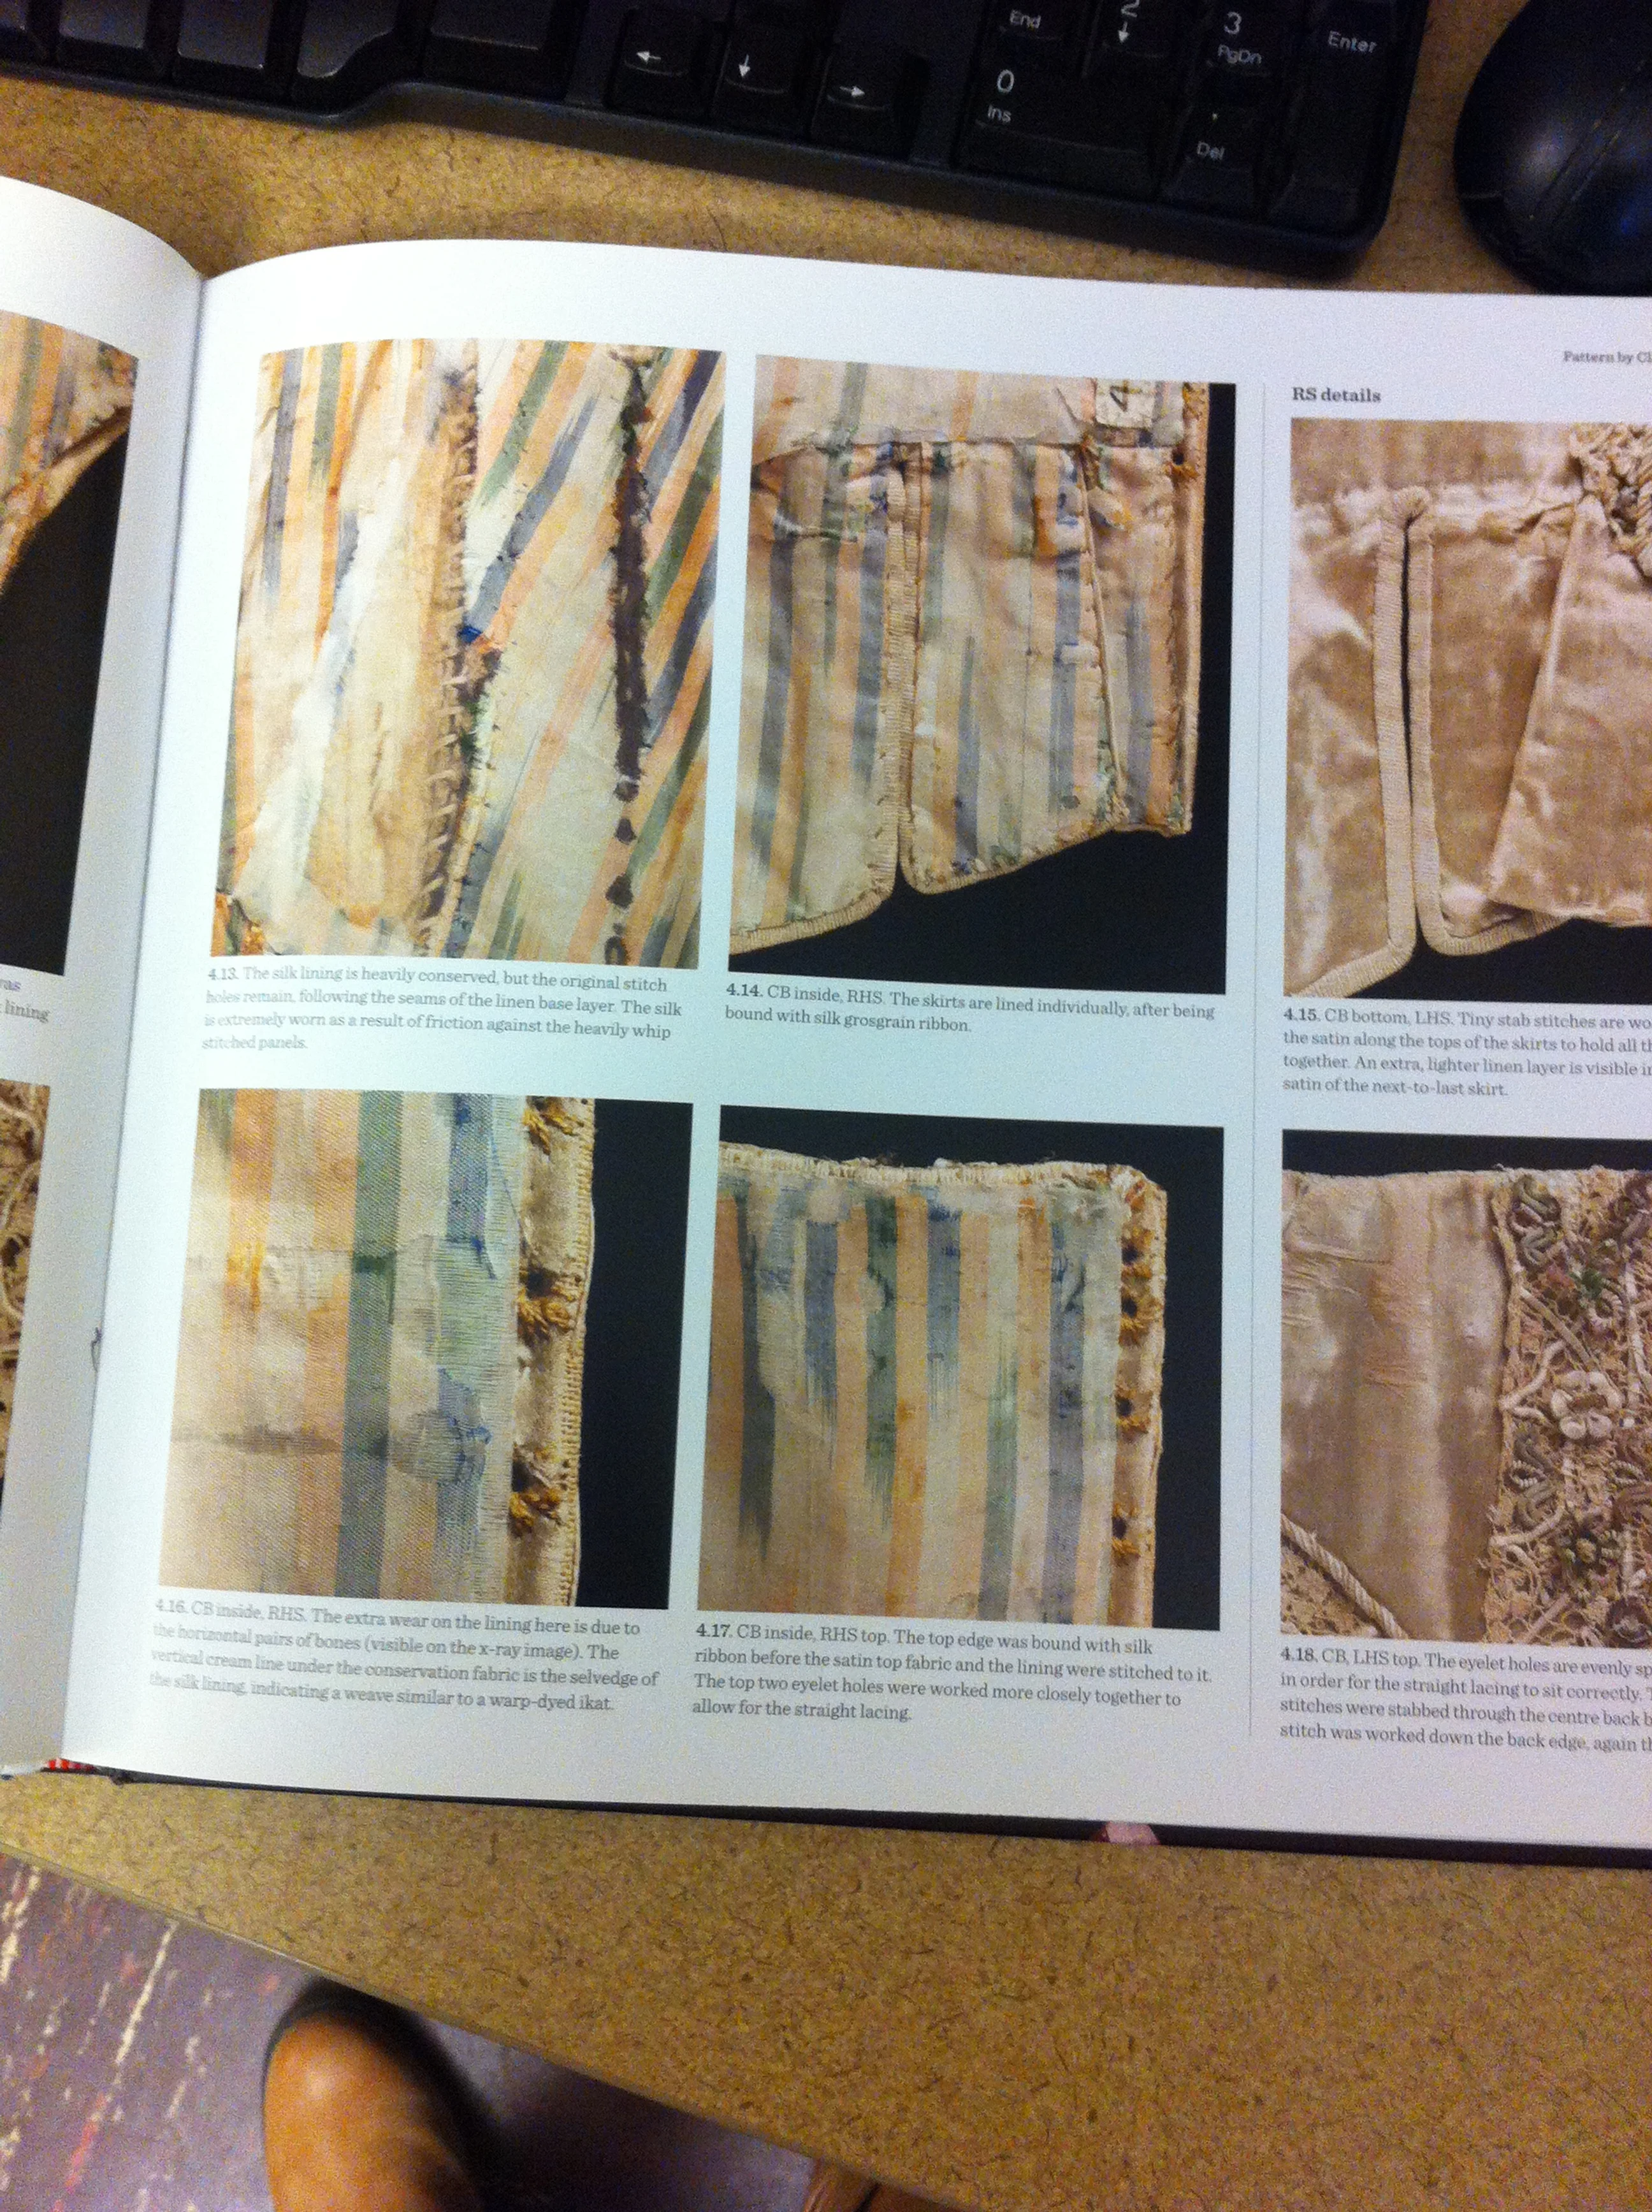
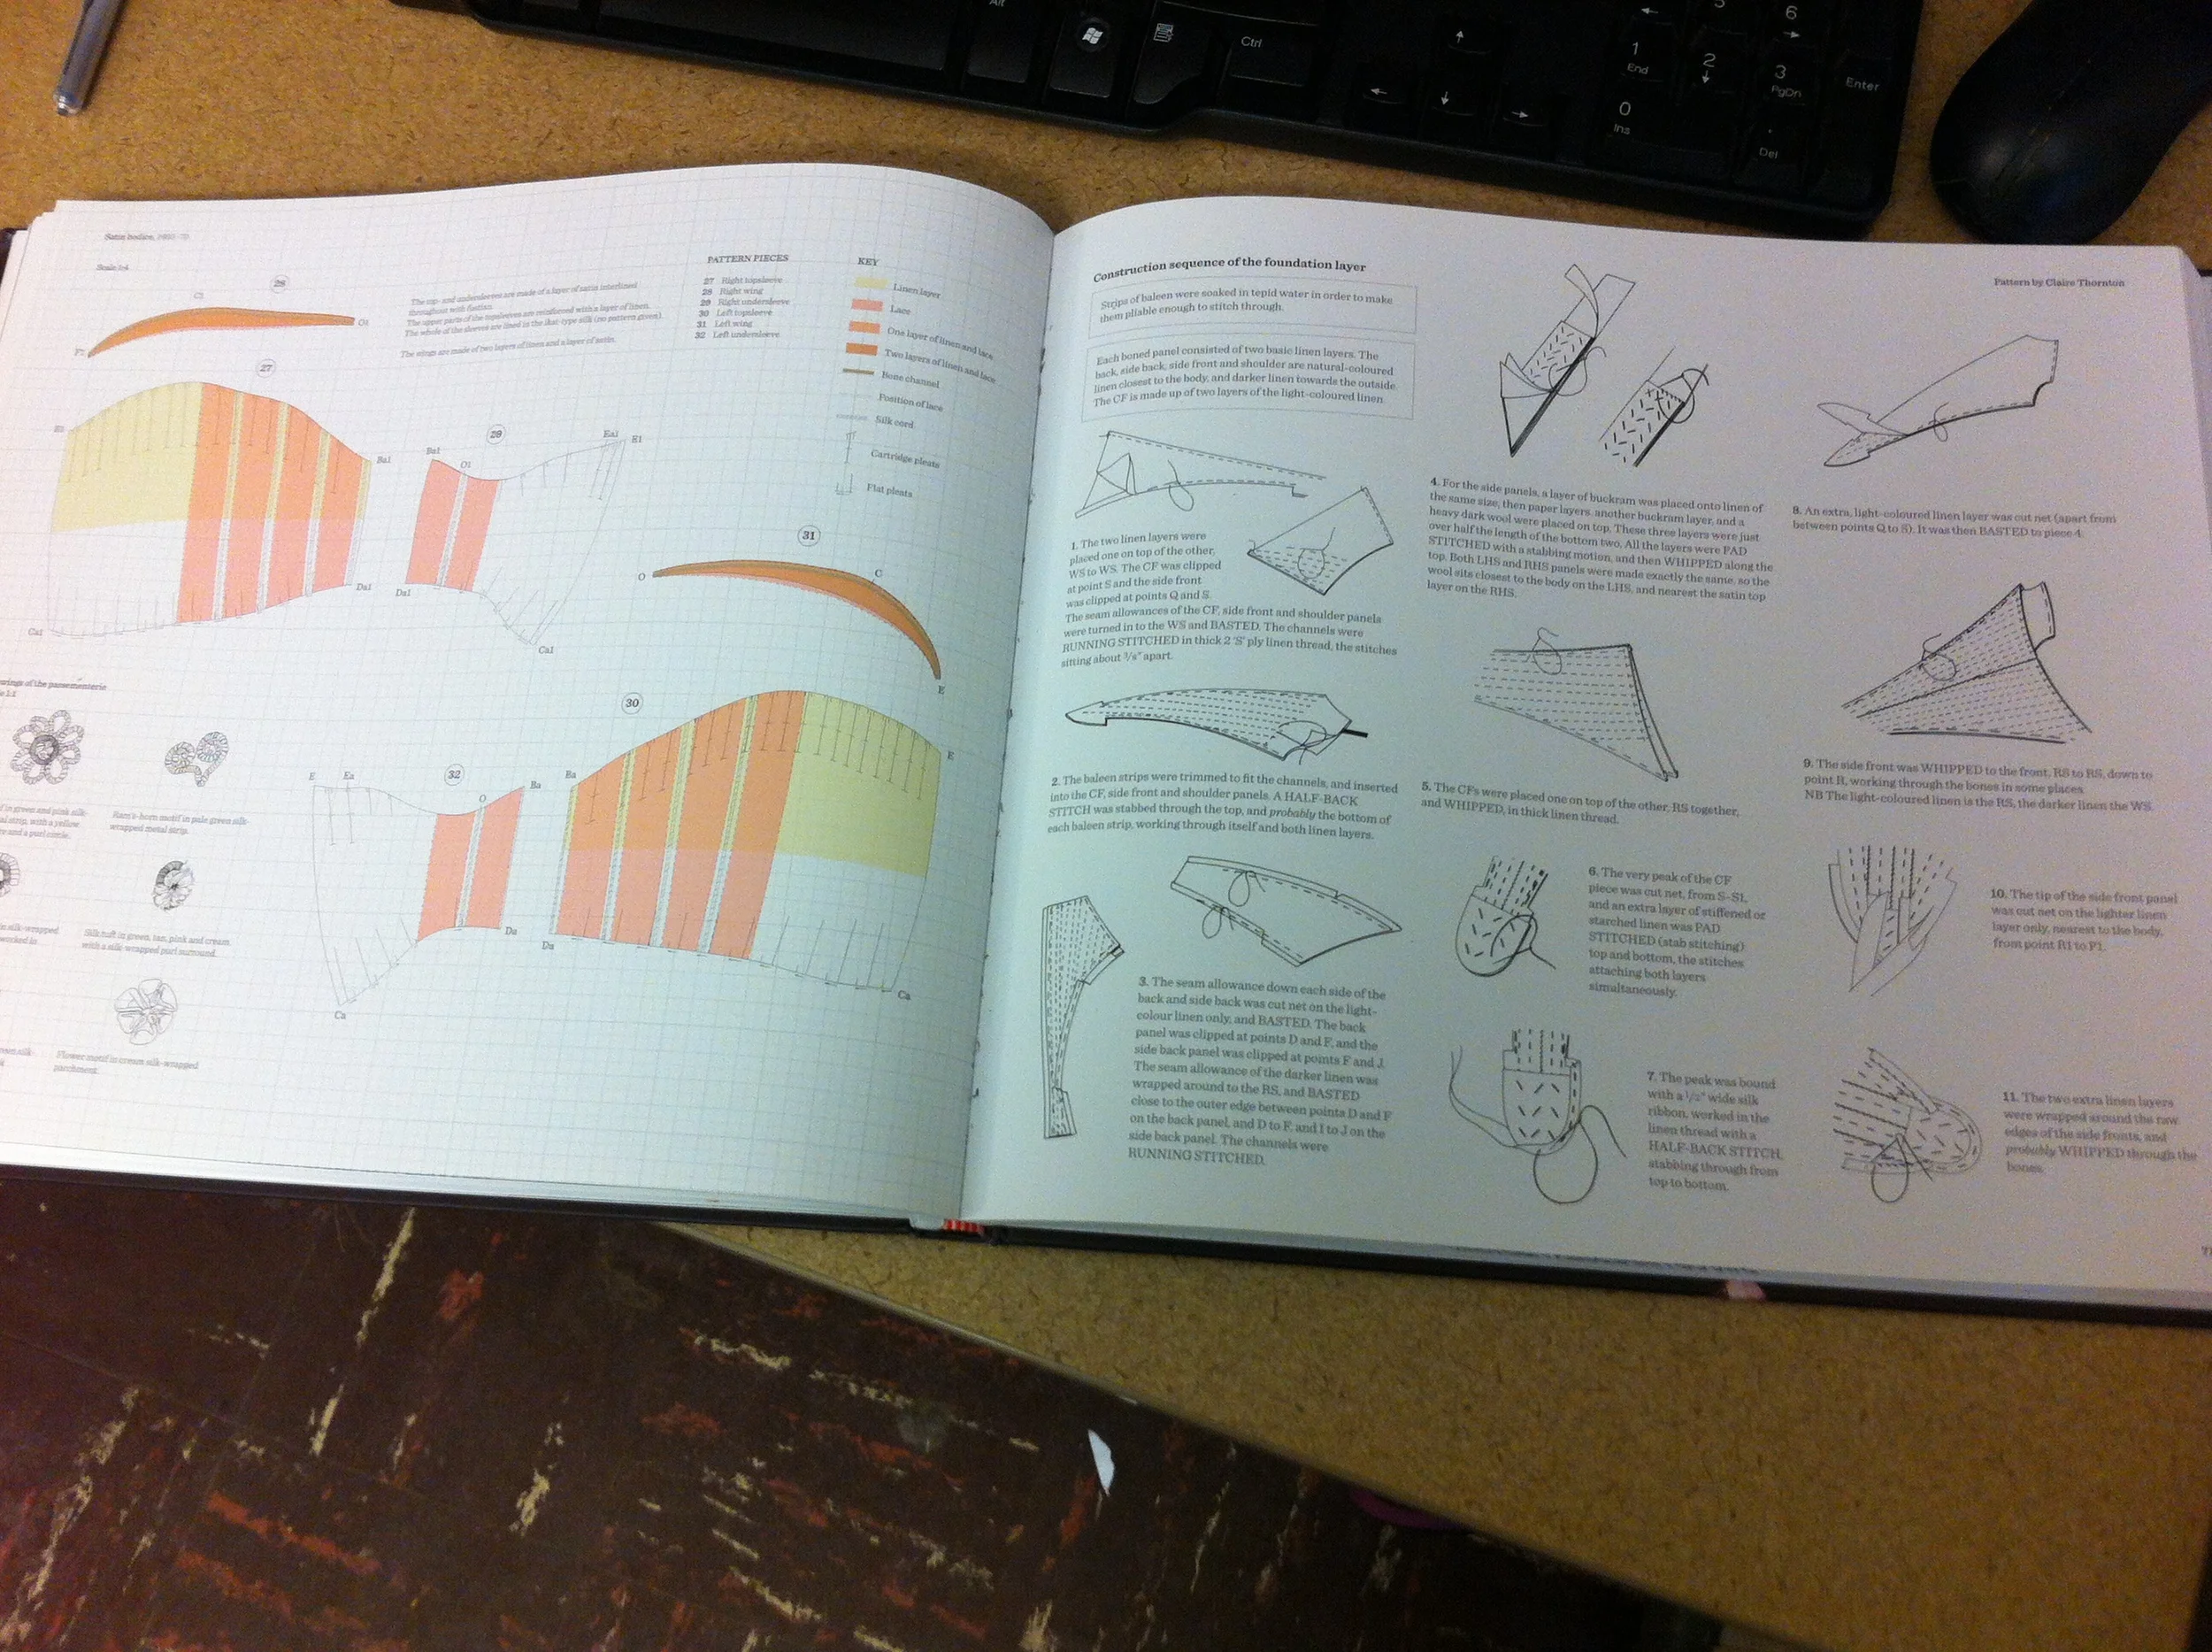
Now before I get into what I came up with I'd like to share my resources with you. There are a number of amazing books out there that detail historical costume patterns. Two of the best books on 17th century costume patterns are Jenny Tiramani and Susan North's (2013) Seventeenth Century Women's Dress Patterns: Book Two and Patterns of Fashion 1 (2005) by Janet Arnold. Both book authors use extant garments and developed very accurate patterns for garments from the 17th and 18th centuries. I relied heavily on Tiramani and North's (2013) book. The photos inside were gorgeous and the construction details were great!

While both books had patterns that could be scaled up, I decided to drape the bodice since I was working with the half scale form and some padded stick on arms. I used the books for ideas on laying out the boning, the pieces I needed, and how to shape my sleeves. 

Now the extant pieces described in the book use a number of materials that were just not suitable for a display piece. After all this project is meant to be a learning tool for students to recognize 17th century dress. Details like internal support layers were not going to be visible to the students at the first glance. For example, the bodices in the 17th century were boned with whalebone. I don't know about you, but I'd have a tough time getting my hand on whalebone today! I opted for a cheaper alternative: plastic zip ties. Plastic zip ties are my go to for many costume bodices so I already had some I could use, and they provide ample support, especially in small places. I would not recommend them for a full scale version of this bodice or any corset that will be worn for long periods of time because over time they do warp with heat, but for photoshoot garments I think they're great.

The downside to choosing the plastic zip ties is that you cannot sew through them. Several steps described in the Tiramani & North (2013) book require stab stitching through the bones (which one could theoretically do with whale bone) so I had to change some of the construction to deal with this. The largest change was the placement of the eyelet holes. In the case of the extant pieces the eyelet holes are very close to the edge of the garment and are sewn through the bones. I could not do this so I placed the eyelets in a small strip between two bones as if I were making a more modern steel boned corset. 

The photo below is from the Bath Dress Flickr Gallery and it shows how the eyelets are sewn through the bones.


The extant pieces also involve a number of other small construction materials that were just not practical for my purpose. The Bath bodice and the bodice in the Tiramani & North (2013) book was underlined in layers upon layers of paper for stability. I could have theoretically done this, but I spoke to Dr. Pedersen and we both agreed that we'd like the option to be able to launder the piece if necessary and the paper would not have held up well in that case. We decided to omit it. For such a small scale garment there would be plenty of support with just the boning layer, the lining and the outer taffeta layer. 

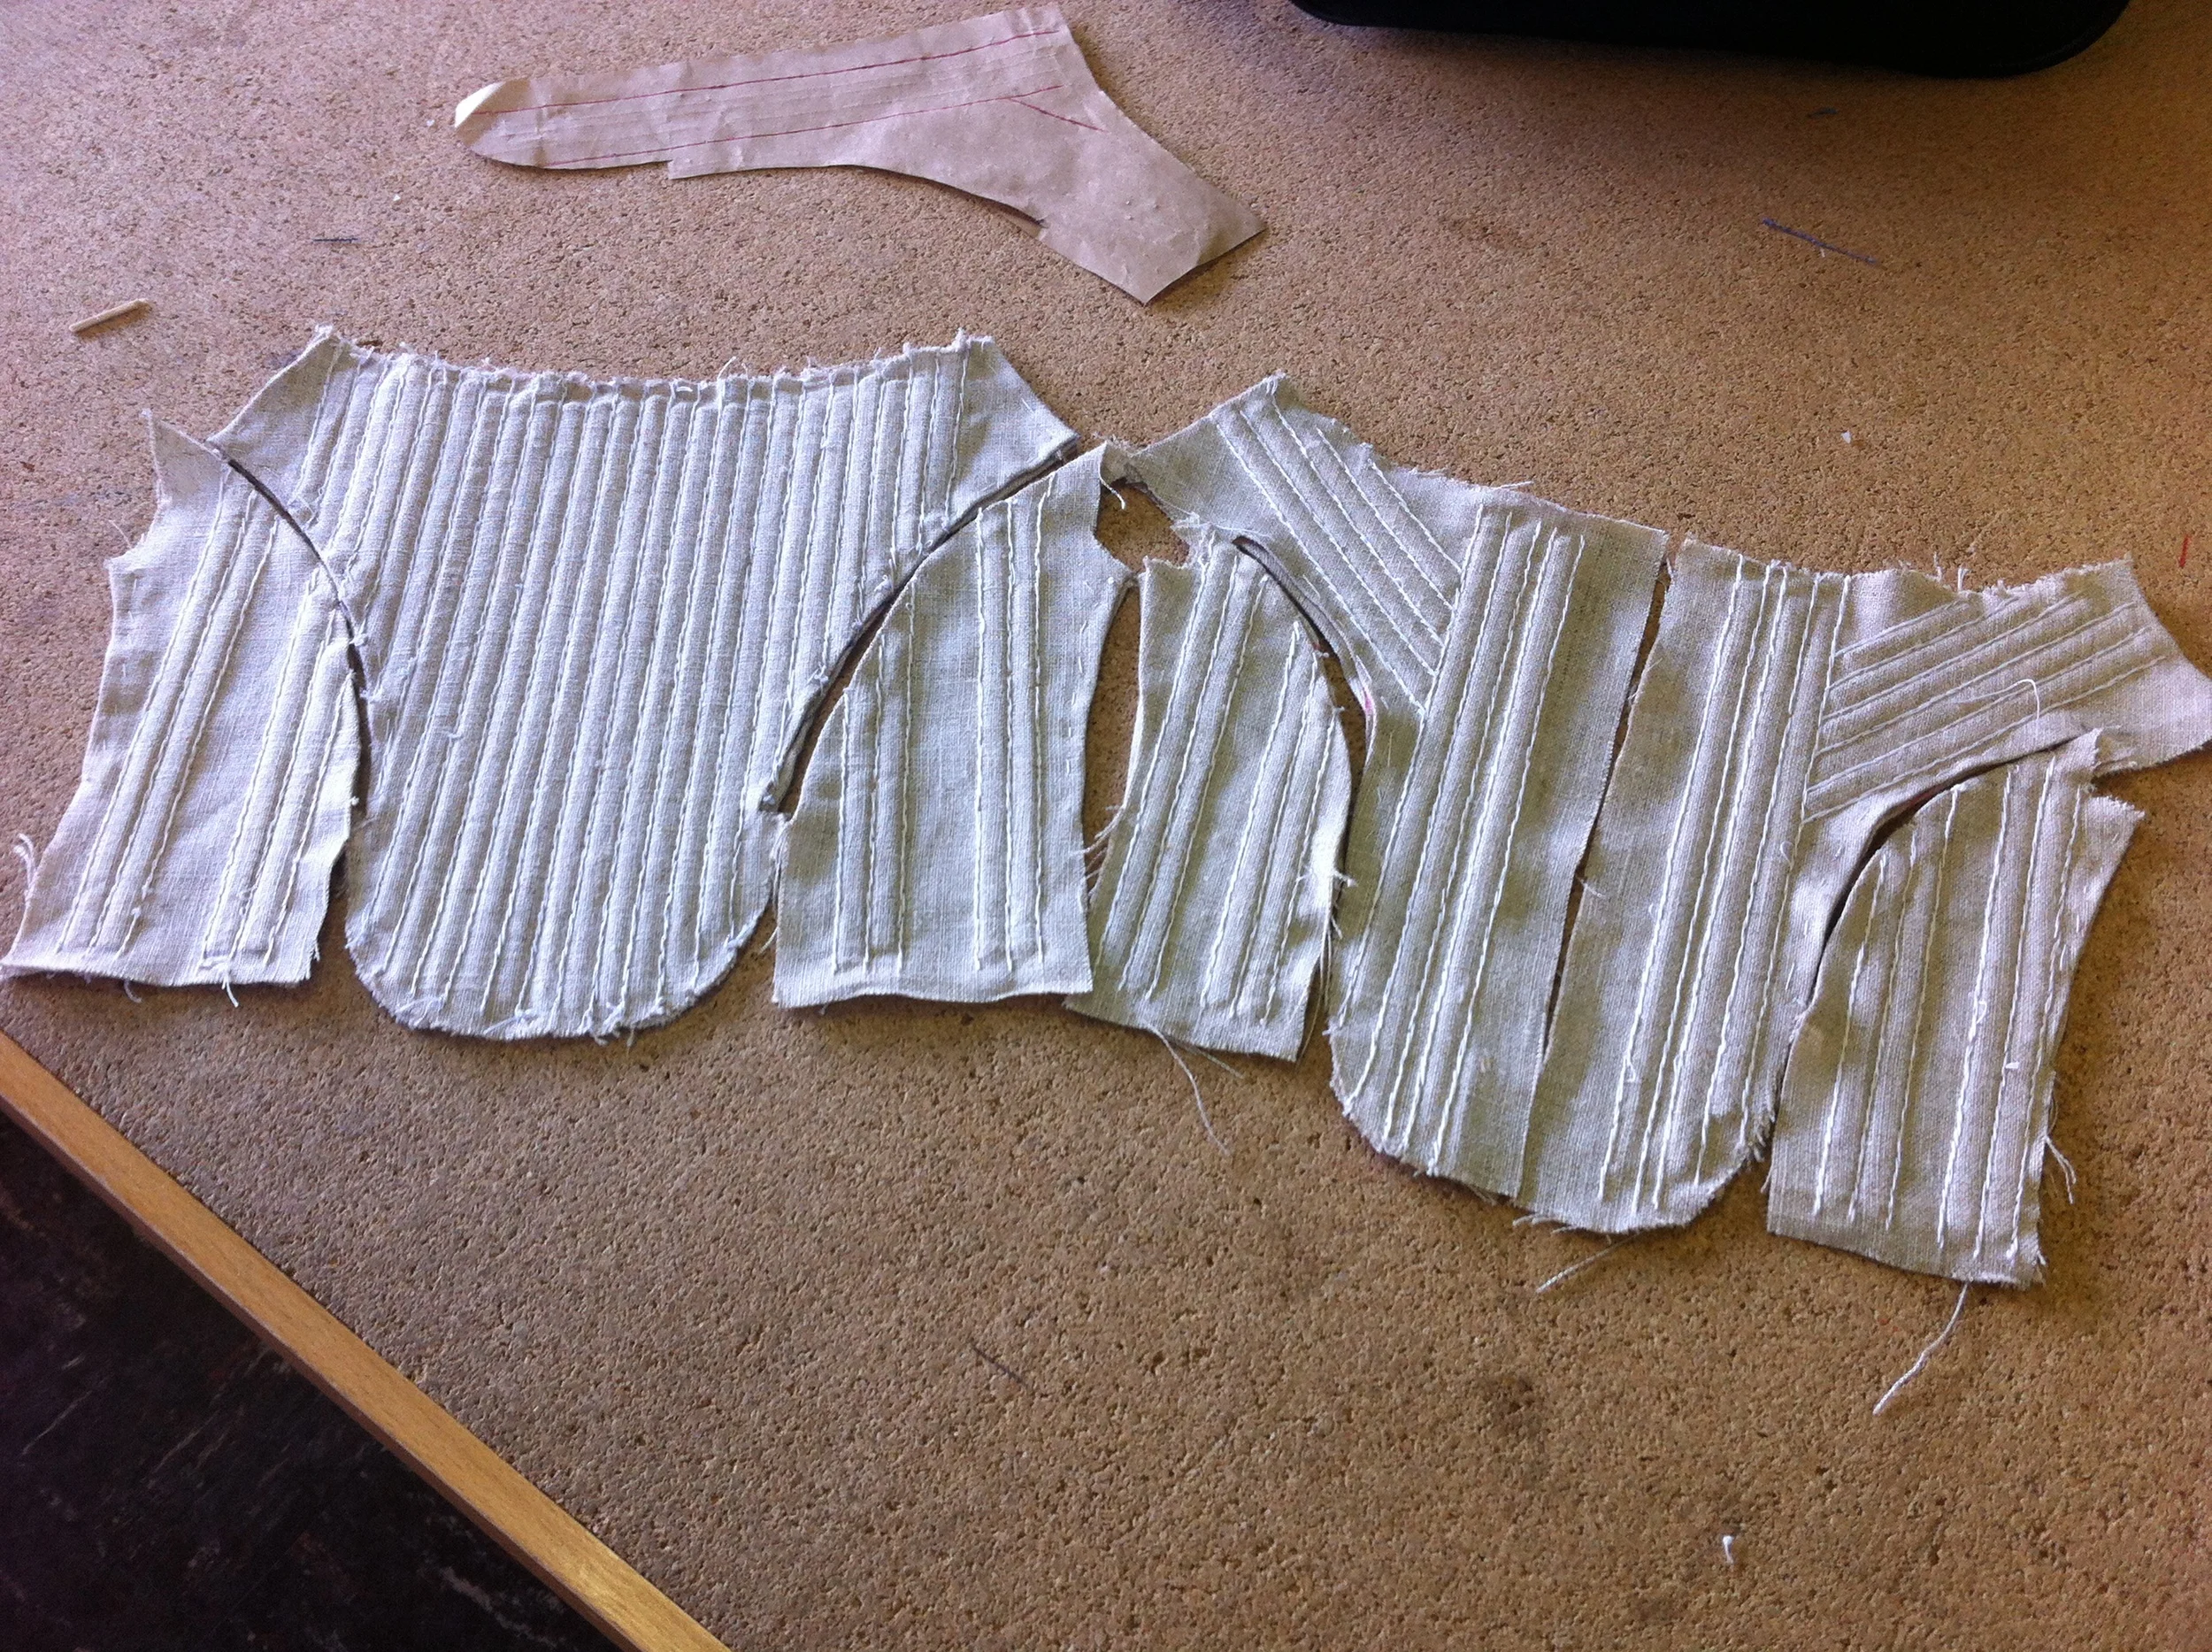
So once I had my materials I drafted the bodice, checked the fit, and then cut out the material for the boning layer. The boning layer is 100% linen. I sewed the boning channels with a hand sewn backstitch, turned each seam allowance to the inside, then whip stitched each piece together along the seam lines. 

When I had the linen layer all sewn up I applied the outer layer by laying it flat over the bodice, turning under the seam allowances, and stab stitching it through all the layers. This follows the construction method outlined in the Tiramani and North book.

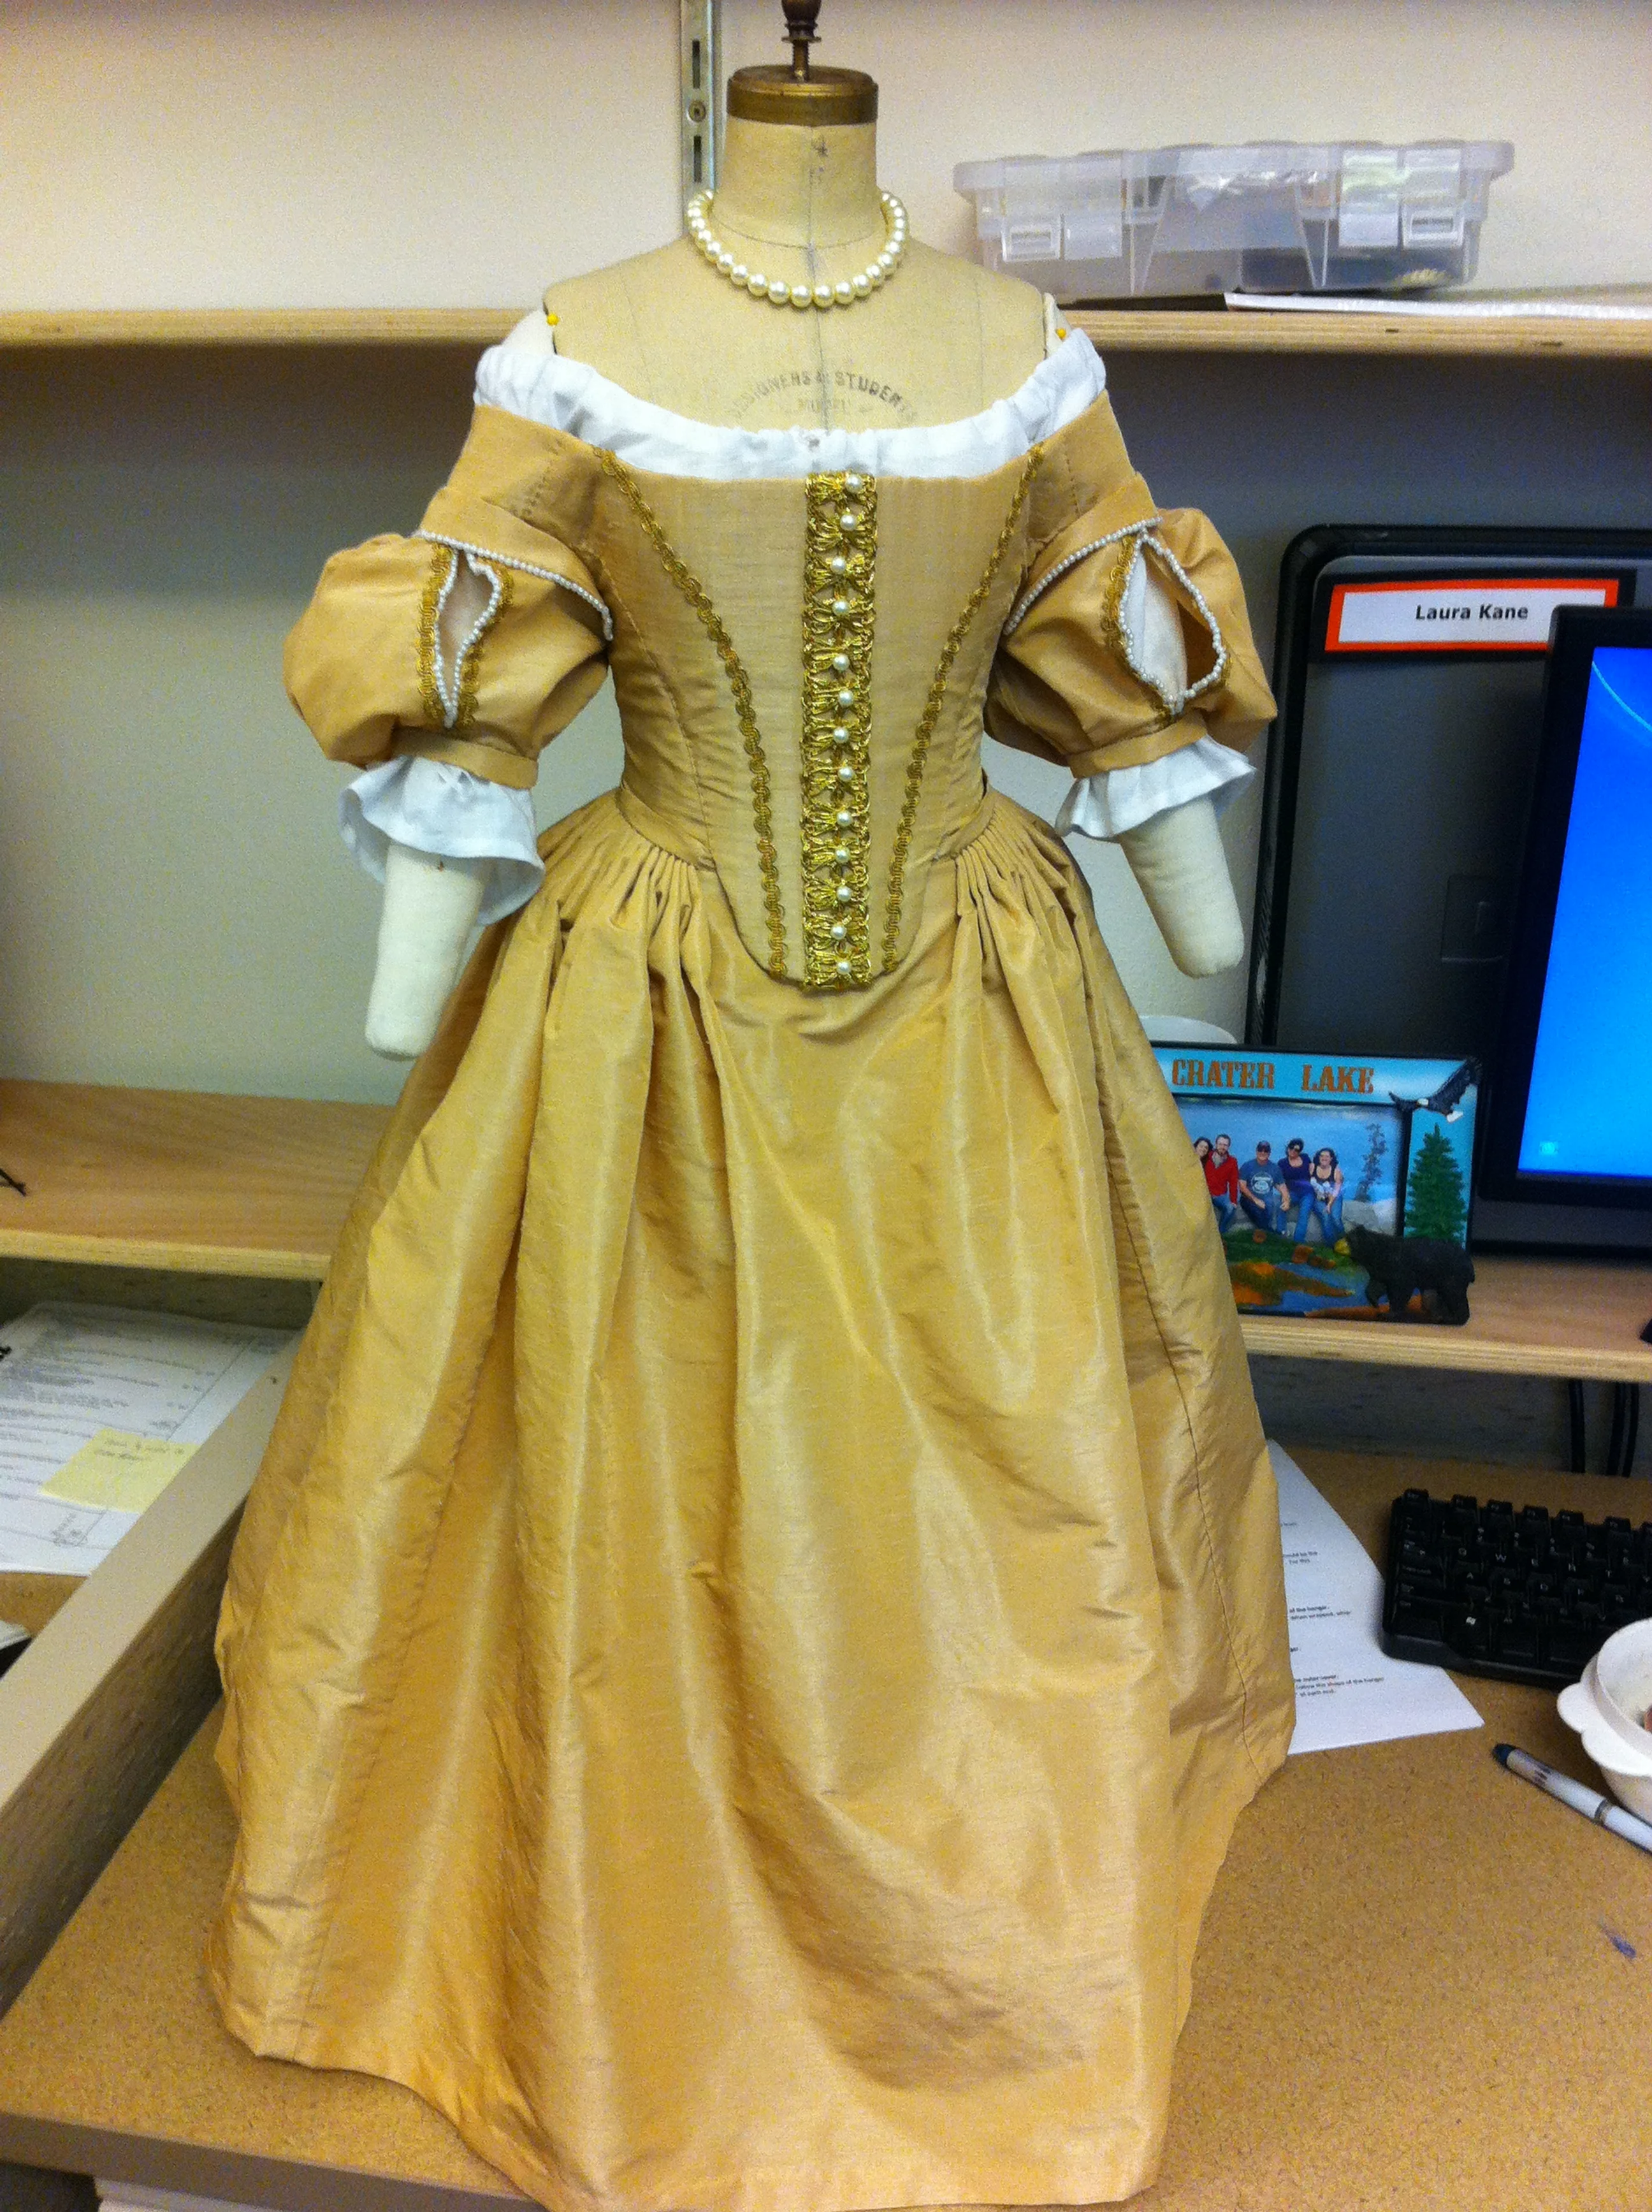
After this it came time to bind the tabs. Now on the Bath dress and in the Tiramani and North (2013) book they show the tabs bound with silk grosgrain ribbon before the lining is applied. The binding is only applied to the side tabs. In some places there is also binding along the neckline. I believe the binding for the neckline was mostly decorative so I decided to omit it and just bind the tabs. I did not have access to silk grosgrain ribbon and I find the ribbon offered at JoAnns to be kind of crunchy so I decided to just bind the tabs in the linen used for the interior boning layer. 

As you can see my tabs are kind of funny shaped. They're part rounded and part square. I had some trouble with keeping the edges nicely shaped. I've certainly got some room for improvement. I'll talk more about my shortcomings later since I think they're important to address. 

At this point I applied the decorations to the front of the bodice. In an attempt to keep this project inexpensive, I dug into my stash of metallic ribbons and trims. What I came up with were the only trims that looked appropriate and were similar colors. I also went back and looked at paintings and saw several paintings that used pearl decorations so I broke some of those out as well. 

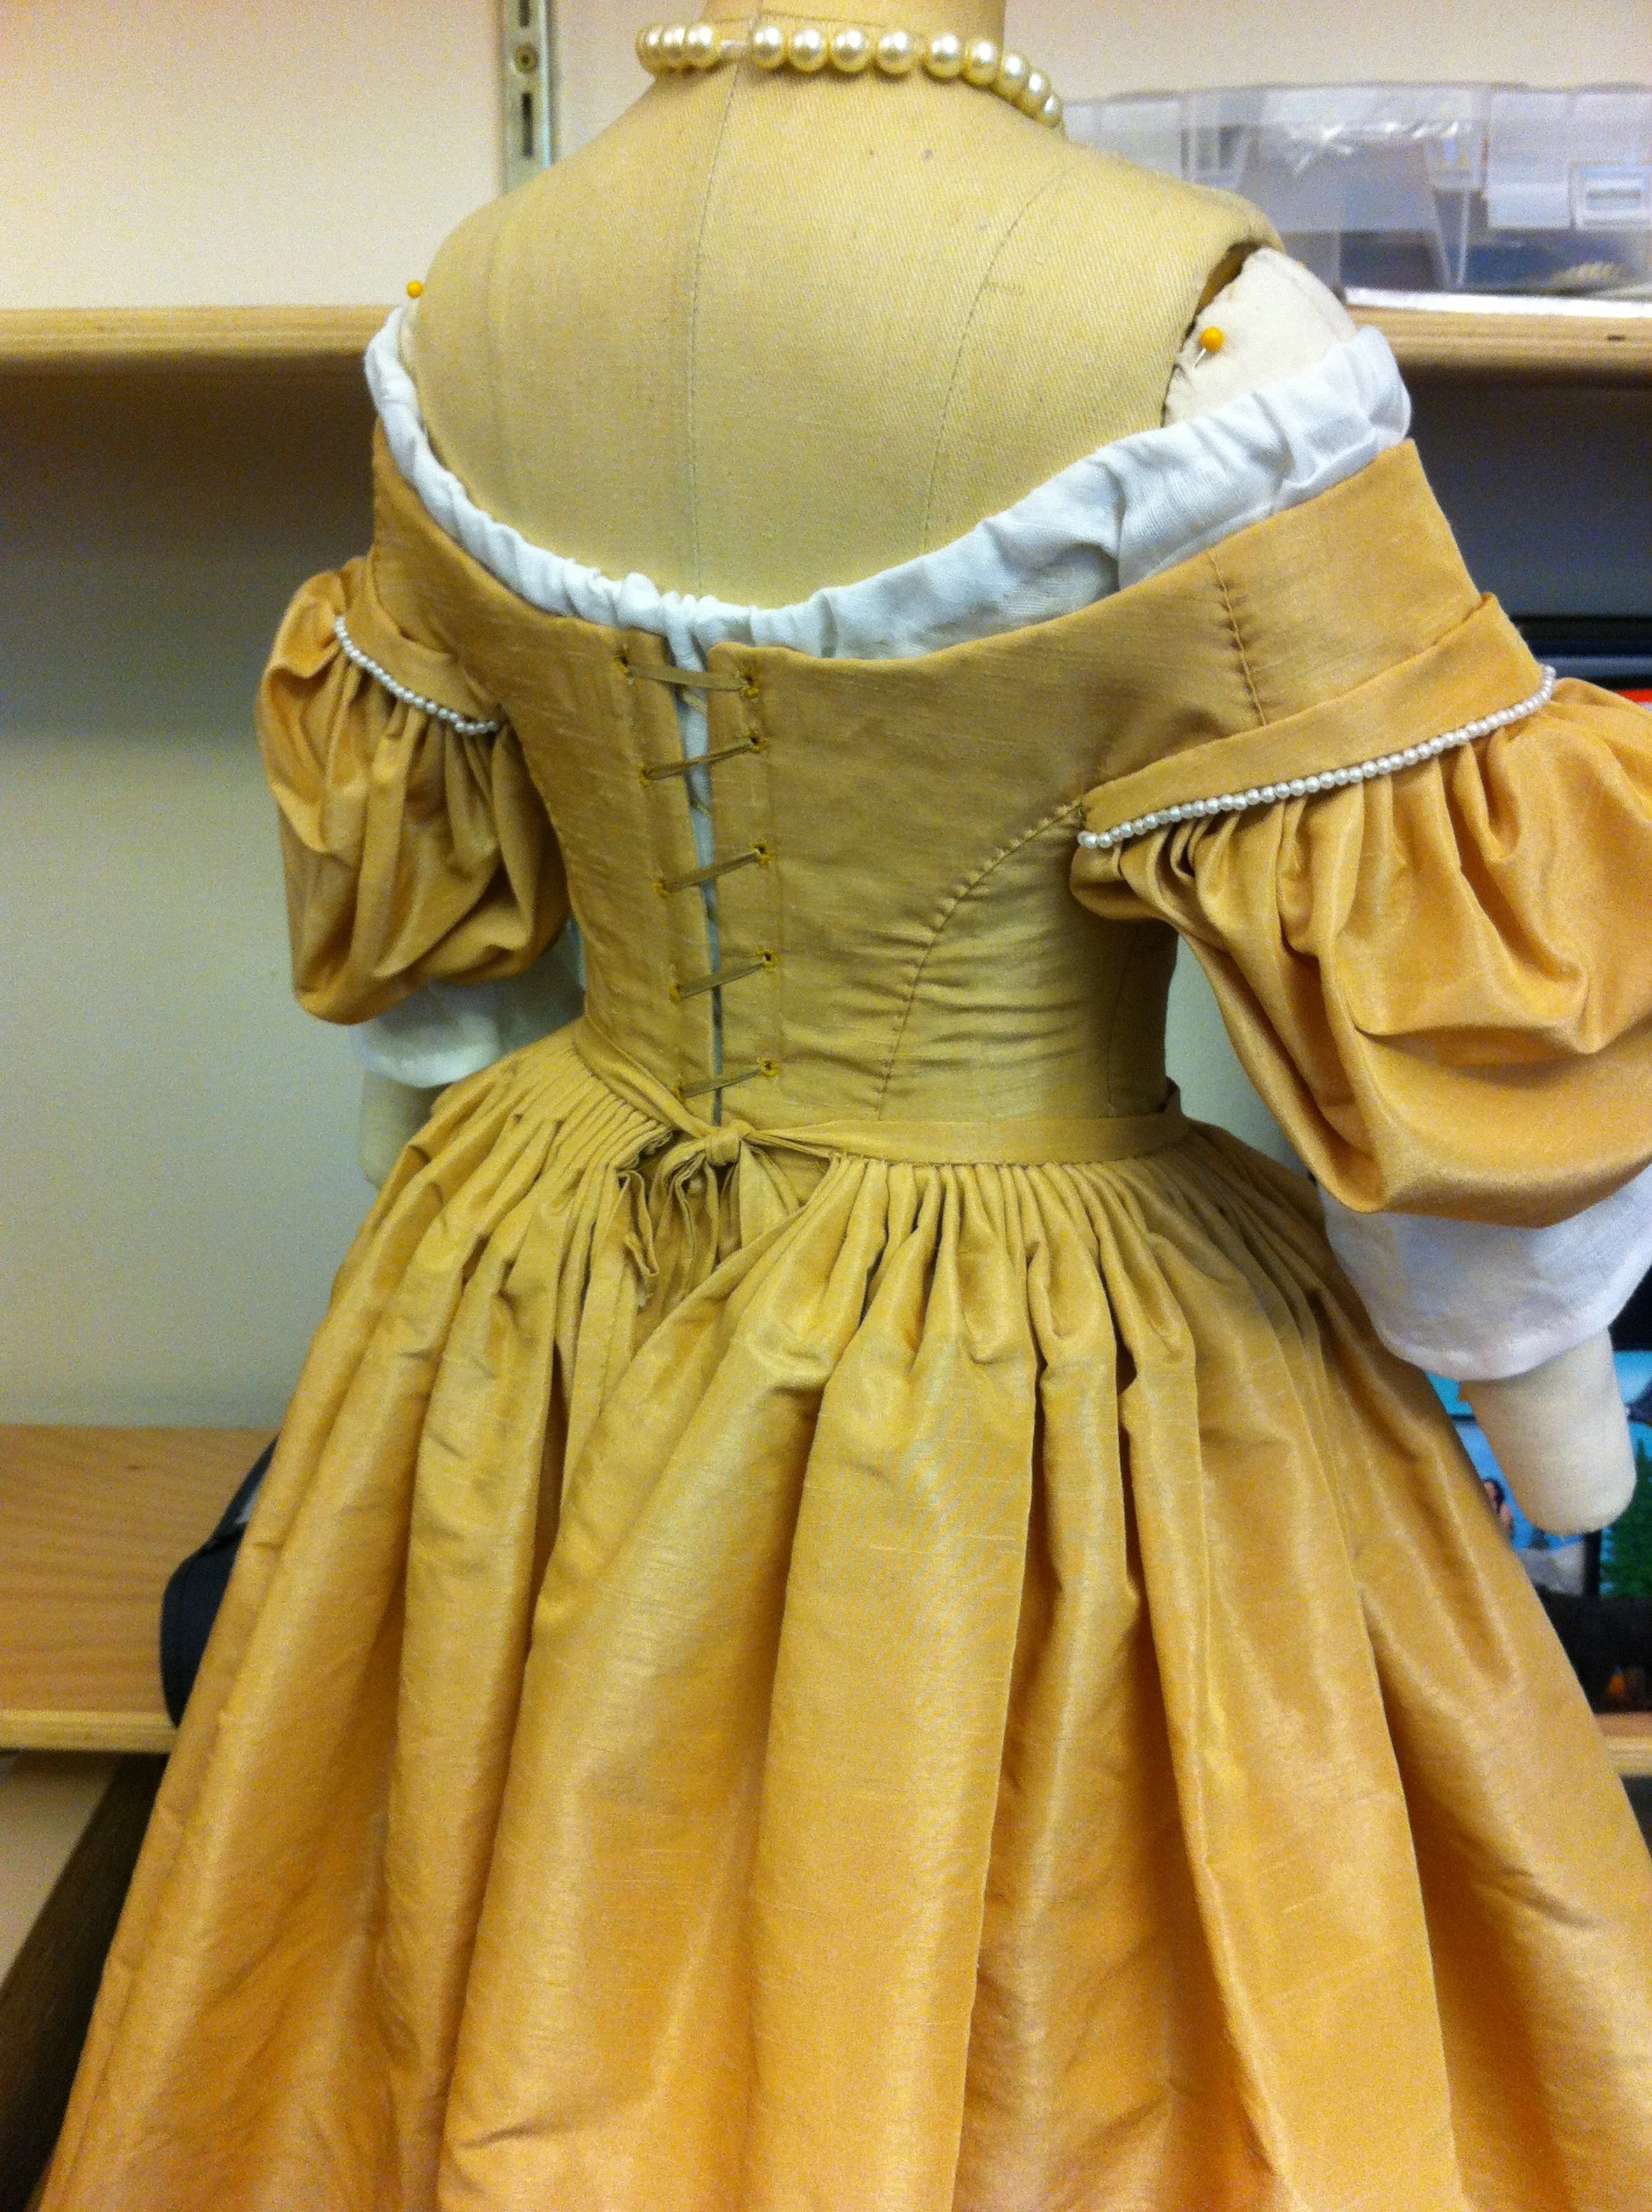
For the draping of the sleeve I went off of the pattern in the Tiramani and North (2013)  book, made a mock up, made them even more full, lost my pattern piece, had to remake it, then finally ended up with something I liked. The construction of the sleeve is also a place where I deviated a bit from the historical methods. In the Bath bodice and in the Tiramani and North book the cartridge pleats by the top of the armseye are reinforced with paper and some added layers of muslin. The taffeta I was working with has a lot of body to it, and was poofing out quite a bit without any added layers. I also did not want to weigh down this poof with layers I felt weren't needed, so I omitted them.

Finally it came time to line the bodice. The lining was applied in a similar way to the out layer but instead of stab stitching through all layers, I  placed one piece flat on top of the other and whip stitched the seam allowance to the piece next to it. I also used the lining construction detailed in the book, wherein each tab is lined individually. I used the same white handkerchief cotton I used for the chemise. 

Once the piece was lined I applied hand sewn eyelets down the center back in a spiral lacing layout. That finished off the piece!

Now onto my thoughts of the finished piece and what I'd change. I'm constantly critiquing my own work looking for places to improve. The first thing I'd change is the shape of the front point. I simply made it too rounded and not pointy enough. I should have really exaggerated it. This time period is really defined by the super pointed jutting out front point and I could have gone to town!

Secondly I think I made the shoulder piece over the sleeve about a half an inch too wide. I think that piece is just too big. The proportion of that piece to the shoulder wing is off and it bothers the crap out of me. 

Finally when I made the skirt I was using a different half scale form and when the waist tie closed the opening of the skirt in the back closed all the way. That dressform was just an extra in the sewing lab and not one of Dr. Pedersen's from the collection. The one from the collection ended up slightly larger so the skirt does not quite meet up together in the back. It's not super noticeable but still. Rawr.

Overall I'm really happy with it and I can't wait to see it all set up in a display case! The next step is putting together a more in depth research abstract and submitting it to Costume Society of America's next symposium! Wish me luck!

References:

Arnold, J. (2005). Patterns of fashion 1: Englishwomen's dresses & their construction c. 1660-1860. London: Macmillan.

Tiramani, J., & North, S. (Eds.). (2013). Seventeenth-century women's dress patterns: Book Two (Hbk. ed.). London: V & A Pub.


Disney Princess Aprons and an Elsa Cape- Merry Christmas!

I am the lucky Auntie to two cute little girls (Addison and Alexa) and just like most little girls they love love love Disney Princesses. I wanted to spoil them this Christmas and make some custom Disney Princess inspired gifts they could play with. They love dressing up in cute little costumes and accessories and also love helping their Grandma in the kitchen. My sister in law sent me a picture of some cute Disney princess aprons on Etsy and I knew I should make them some of my own!

Their favorite princesses right now are Anna, Elsa, and Rapunzel so I knew I had to make those. Their newest movie of choice to watch is Sleeping Beauty so Aurora was a good fourth choice. 

Each apron has a sweetheart neckline so I was able to use one pattern and change out the skirt for each princess and add extra embellishments here and there. 

The Anna apron was decorated with puffy fabric paint. I did the scallops by heat n bonding the darker blue panel to the lighter blue panel. It's not something I would do for a full size version of the costume but for a small piece and for playtime it worked out nicely.


Aurora has the small diamond yoke at the waistband that I just sewed into the waistline seam. There is also the pointed white band at the top.

Rapunzel had the same sweethear neckline but before I cut out the bodice I made two small tucks in the fabric and sewed in ribbon to make the faux lacing panel. The skirt is cut in three pieces and pink satin ribbon was topstitched down on top of the seams.

For Elsa I drafted an extra panel on the top to mimic her sheer sleeve. I decided on a solid panel of fabric since these are aprons after all and a sheer fabric wouldn't make much sense to block stains. The sequin fabric is actually something I bought at JoAnns and I ended up using the wrong side of it since the sequins were way too bold otherwise. I really like how it came out. The fabric choices could have been better but trying to find decent Elsa fabric a week before Christmas was impossible since everything was sold out. 

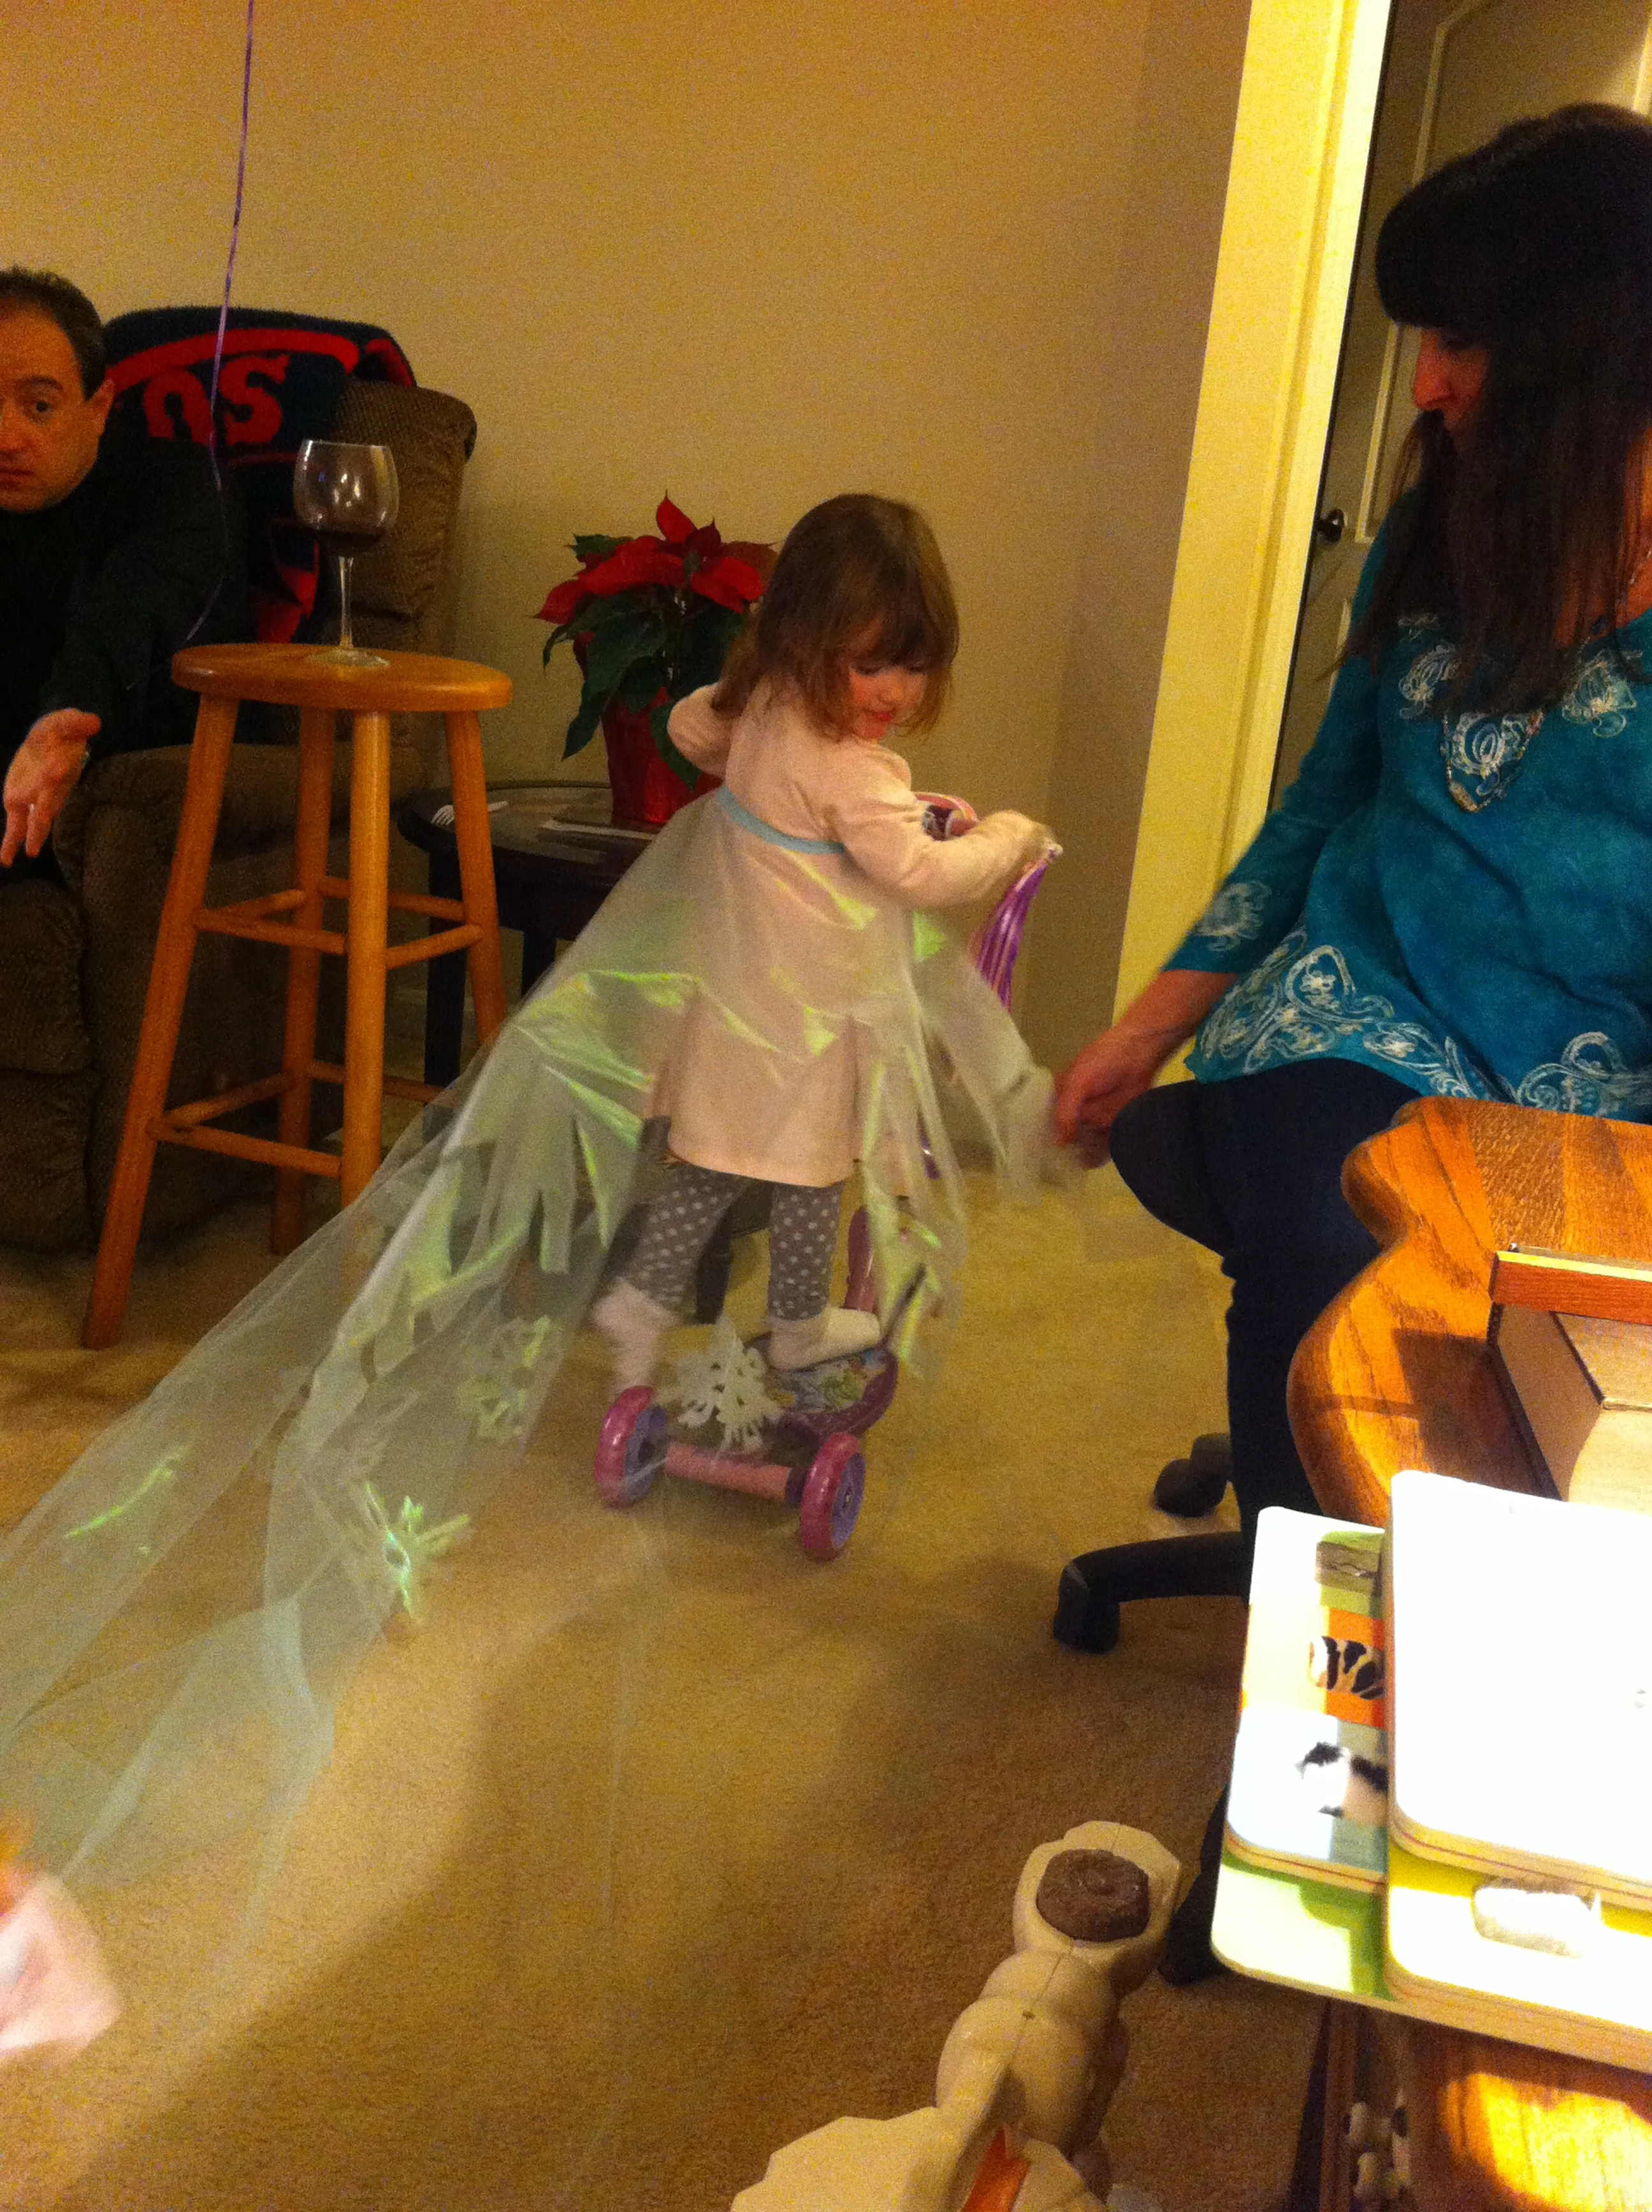
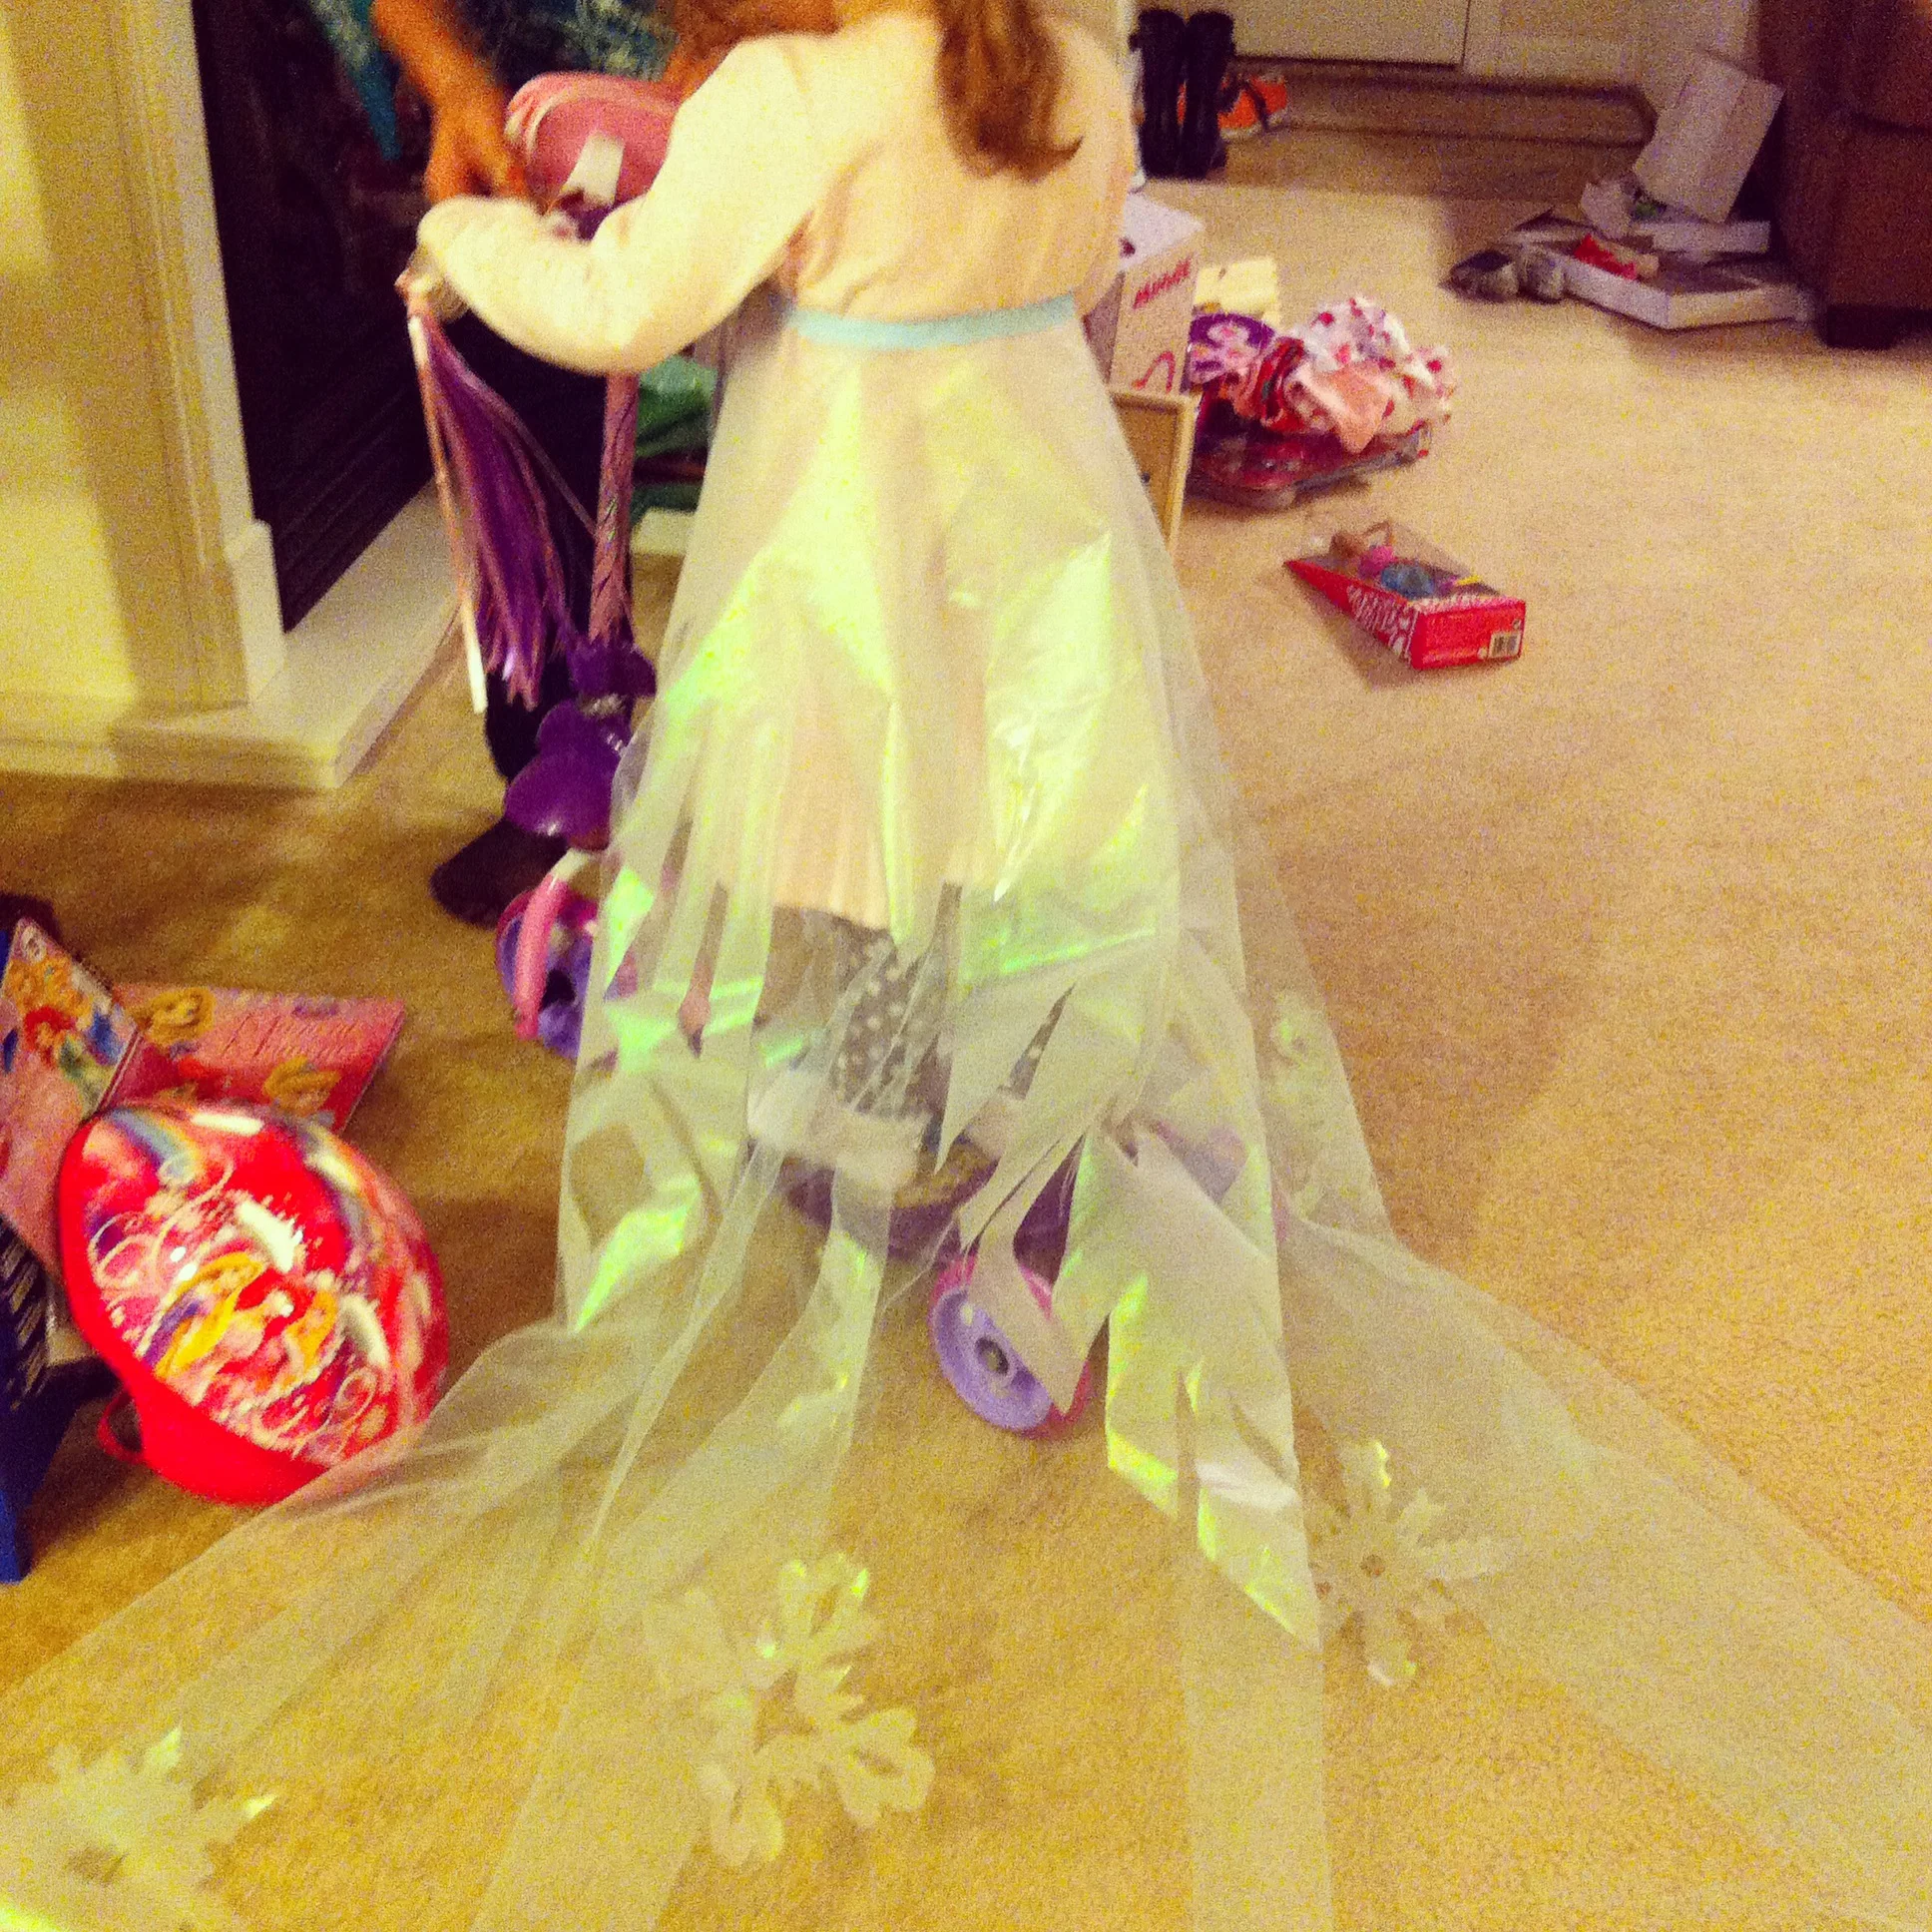
Addison was born on Christmas Eve so for a birthday present I made her an Elsa cape to wear with her Elsa dress up costume. She's been tying blankets around her shoulders pretending to have a cape with a long train so I purposely made the cape very long so it would trail behind her. I didn't want to go too crazy with accuracy since she's 3 years old and it would probably just get trampled on. I made the cape with blue tulle and a sheer shiny metallic fabric. I found a layout of an Elsa cape online (just google Elsa cape and there are lots of renderings to borrow) and I resized it in Illustrator to match the length of fabric I had. The snowflakes and the large snowflake panel were cut out of heat n bond and ironed onto the sheer metallic fabric. The whole piece was then ironed on to the tulle. It made the fabric a little crunchy but I really like the finished look. 

I'm excited to see if she wears the cape to the Frozen Sing Along they have tickets for next month! 

And here she is on her birthday wearing her cape!


More updates for the half scale dress coming soon!

Happy Holidays!

Half Scale Seventeenth Century Dress Recreation: Part 3- The Skirt

Hi all! Time for another update!

Once I had the chemise finished I decided to move on to the skirt so that when it was time to drape the bodice I would be able to drape it over the skirt. Now before I go into the skirt lets talk about fabric.

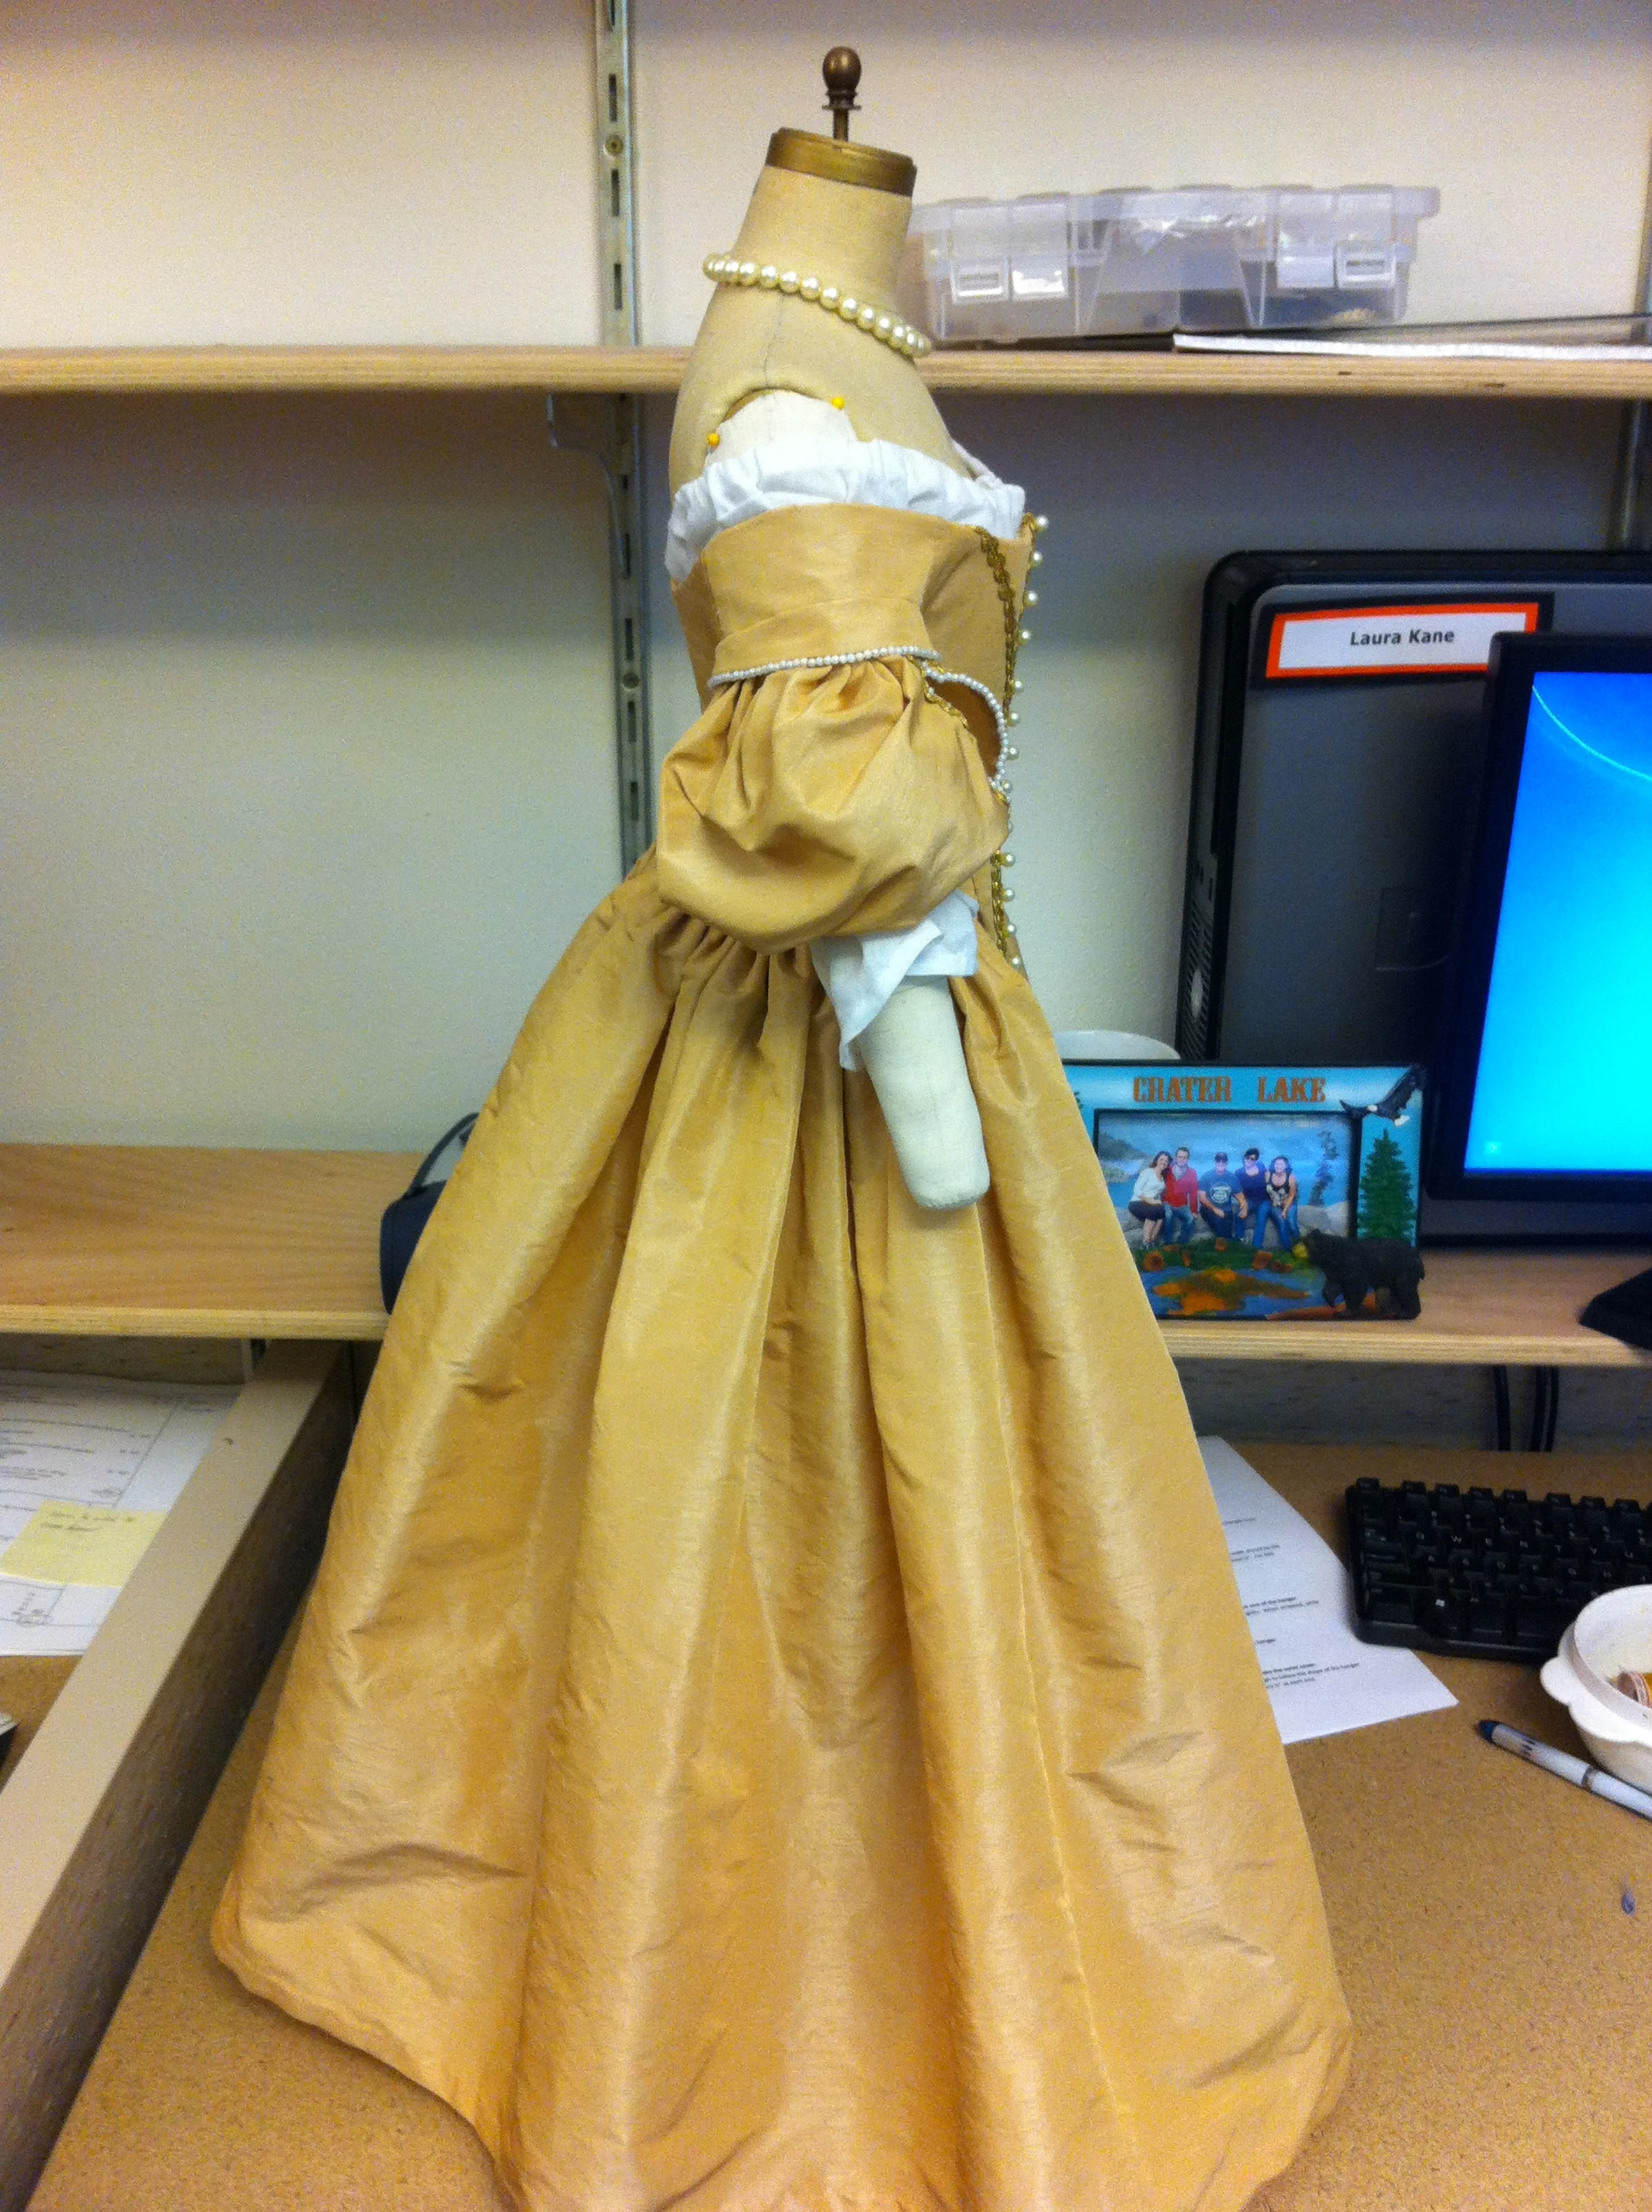
Historically the formal dresses in the 1660's would have been made out of silk. Extant garments in the V&A and the Museum of Costume are both made of silk: one of a silk satin and the other of silk tissue. According to The Evolution of Fashion: Pattern and Cut from 1066-1930 (Hill & Bucknell, 1967) the fabrics used during the 1660's were "taffetas, velvets, silks and satins- some substantial, others soft and capable of being finely pleated" (p. 102). Now note that silk is a fiber not a weave, so those taffetas, velvets and satins were likely made of silk. Now this being a project for school and meant to be easy to maintain and relatively inexpensive to make I opted to not use silk for this project. I did however want to use something that would hold pleats well, look similar to the texture in the paintings and resemble a silk taffeta or silk satin. Also, I was pretty limited to whatever my local JoAnns store had to offer. I ended up finding this really pretty gold polyester taffeta in the red tag section and snatched it up. It has a slight sheen and nubby texture so it resembles silk dupioni a little bit but most importantly it pleats beautifully! I also think it would look gorgeous with some pearls sewn onto it!

So looking at some of the paintings I posted earlier some skirts appear to have a series of small knife pleats at the waistline and others appear to have cartridge pleating. The two different pleat types are sewn differently, with cartridge pleating being able to use more fabric in a smaller amount of space.  Hill & Bucknell (1967) describes the skirts of the 1660's as "bullet-pleated" (p. 102), which is a type of cartridge pleat. Period Costume for Stage and Screen: Patterns for Women's Dress 1500-1800 describe the skirt of the 1660's as cartridge pleated (Hunnisett, 1991). The extant garment from Bath has a skirt made of knife pleats with a double tied waistband. Interesting!

These images are all from http://smg.photobucket.com/user/sapphorama/library/Z%20research/1660s-silver-tissue?sort=6&page=3


Since I've never done cartridge pleating and have always wanted to, I decided to go the catridge pleating route! Whoohoo!

I used the cartridge pleating method outlined in Period Costume for Stage and Screen (Hunnisett, 1991) and this seriously awesome website: How to Sew Cartridge Pleats

In order to figure out how large I wanted my skirt to be a made a small section of cartridge pleats and gathered them up to see how much fabric I'd need to cover an inch. About 6-7" pleated up into an inch so I needed quite a bit of fabric.

Now I wanted to have an easy opening in the back with a waist tie so Dr. Pedersen could easily take the skirt on and off from the form. Since the whole dress is relatively small and light, I decided to omit the second waist tie like the Bath dress has and just go with a simple slim waist band that ties in the back. I made my skirt in three sections, with a larger front panel and two back side panels so I would have a center back seam. 

Now if I were making this a full scale garment I would have likely also made a bum roll to go under the skirt to poof out these pleats. However this garment is simply for teaching purposes and with the body of my fabric it was becoming clear that I would not need the bum roll to hold the weight of the skirt out so I decided to omit it. 

To give the pleats some more oompf (that's a technical term you know) I put a strip of cotton muslin in between the folded back top edge of the skirt. I handsewed it in with a running stitch and then turned it under so it also served as a finish for my edge. 

Now in the photo above you can also see how I stitched the side seams. I used a hand sewn running stitch, trimmed one seam allowance, then folded it over and sewed a small prick whipstitch to anchor it down. I used the same whipstitch to finish the hem as well.

I decided I wanted to leave a 4 inch flat panel on the front of the dress for the point of the bodice to lay over. I started my pleating from that point and went towards the center back.

For the waistband I took a long strip of the gold and made a small tube turned it inside out, finished the ends, and then stitched the underside of the pleats to the waistband. 

And voila! Finished skirt! I'm very happy with the way it came out. Cartridge pleating was much much easier than I always thought it would be and I really love the finished look. I can imagine it being a little more difficult with heavier fabric and in full size but really, it just takes patience. 

As you can see the photo below also has the mock up of the bodice, which will be talked about in another post! 

Stay tuned for more! 

 Hill, M., & Bucknell, P. (1967). The evolution of fashion: Pattern and cut from 1066 to 1930. London: Batsford;.Hunnisett, J. (1991). Period costume for stage & screen. Studio City, CA: Players Press.


Hill, M., & Bucknell, P. (1967). The evolution of fashion: Pattern and cut from 1066 to 1930. London: Batsford;.

Hunnisett, J. (1991). Period costume for stage & screen. Studio City, CA: Players Press.


Half Scale 17th Century Dress Recreation: Part 2- The Chemise

When doing historical recreation it is important to keep in mind all the layers that went under the garment. This is especially important when corsets, hip pads, and hoop skirts change the silhouette of the human body. The silhouette of dress in the 1660's was mostly controlled by a heavily boned bodice, hip pads, full skirts and full sleeves. Before I can go about draping the bodice and skirt on the form I need to create the bottom most layer: the chemise.

The chemise was worn next to the body and protected the delicate fabrics of the outer dresses from sweat and bodily odors. Since bathing was not common practice the chemise was usually heavily perfumed to combat unpleasant body odors

 In the 1660's the neckline of the chemise was visible above the top edge of the bodice and the sleeves could be seen through slits of the sleeves on the outer dress and at the bottom edge by the elbow.

Linen was the most common fiber used for the chemise, so in my recreation I will be using a lightweight tissue linen. 

For my reference on how to make the chemise I consulted several books: Period Costume for Stage and Screen, The History of Underclothes, and Underwear: Fashion in Detail. There are no surviving examples of chemise's (chemi!?!?) from the 1660's in particular so my design is a combination of several different descriptions of the chemise style worn in the 17th century. 

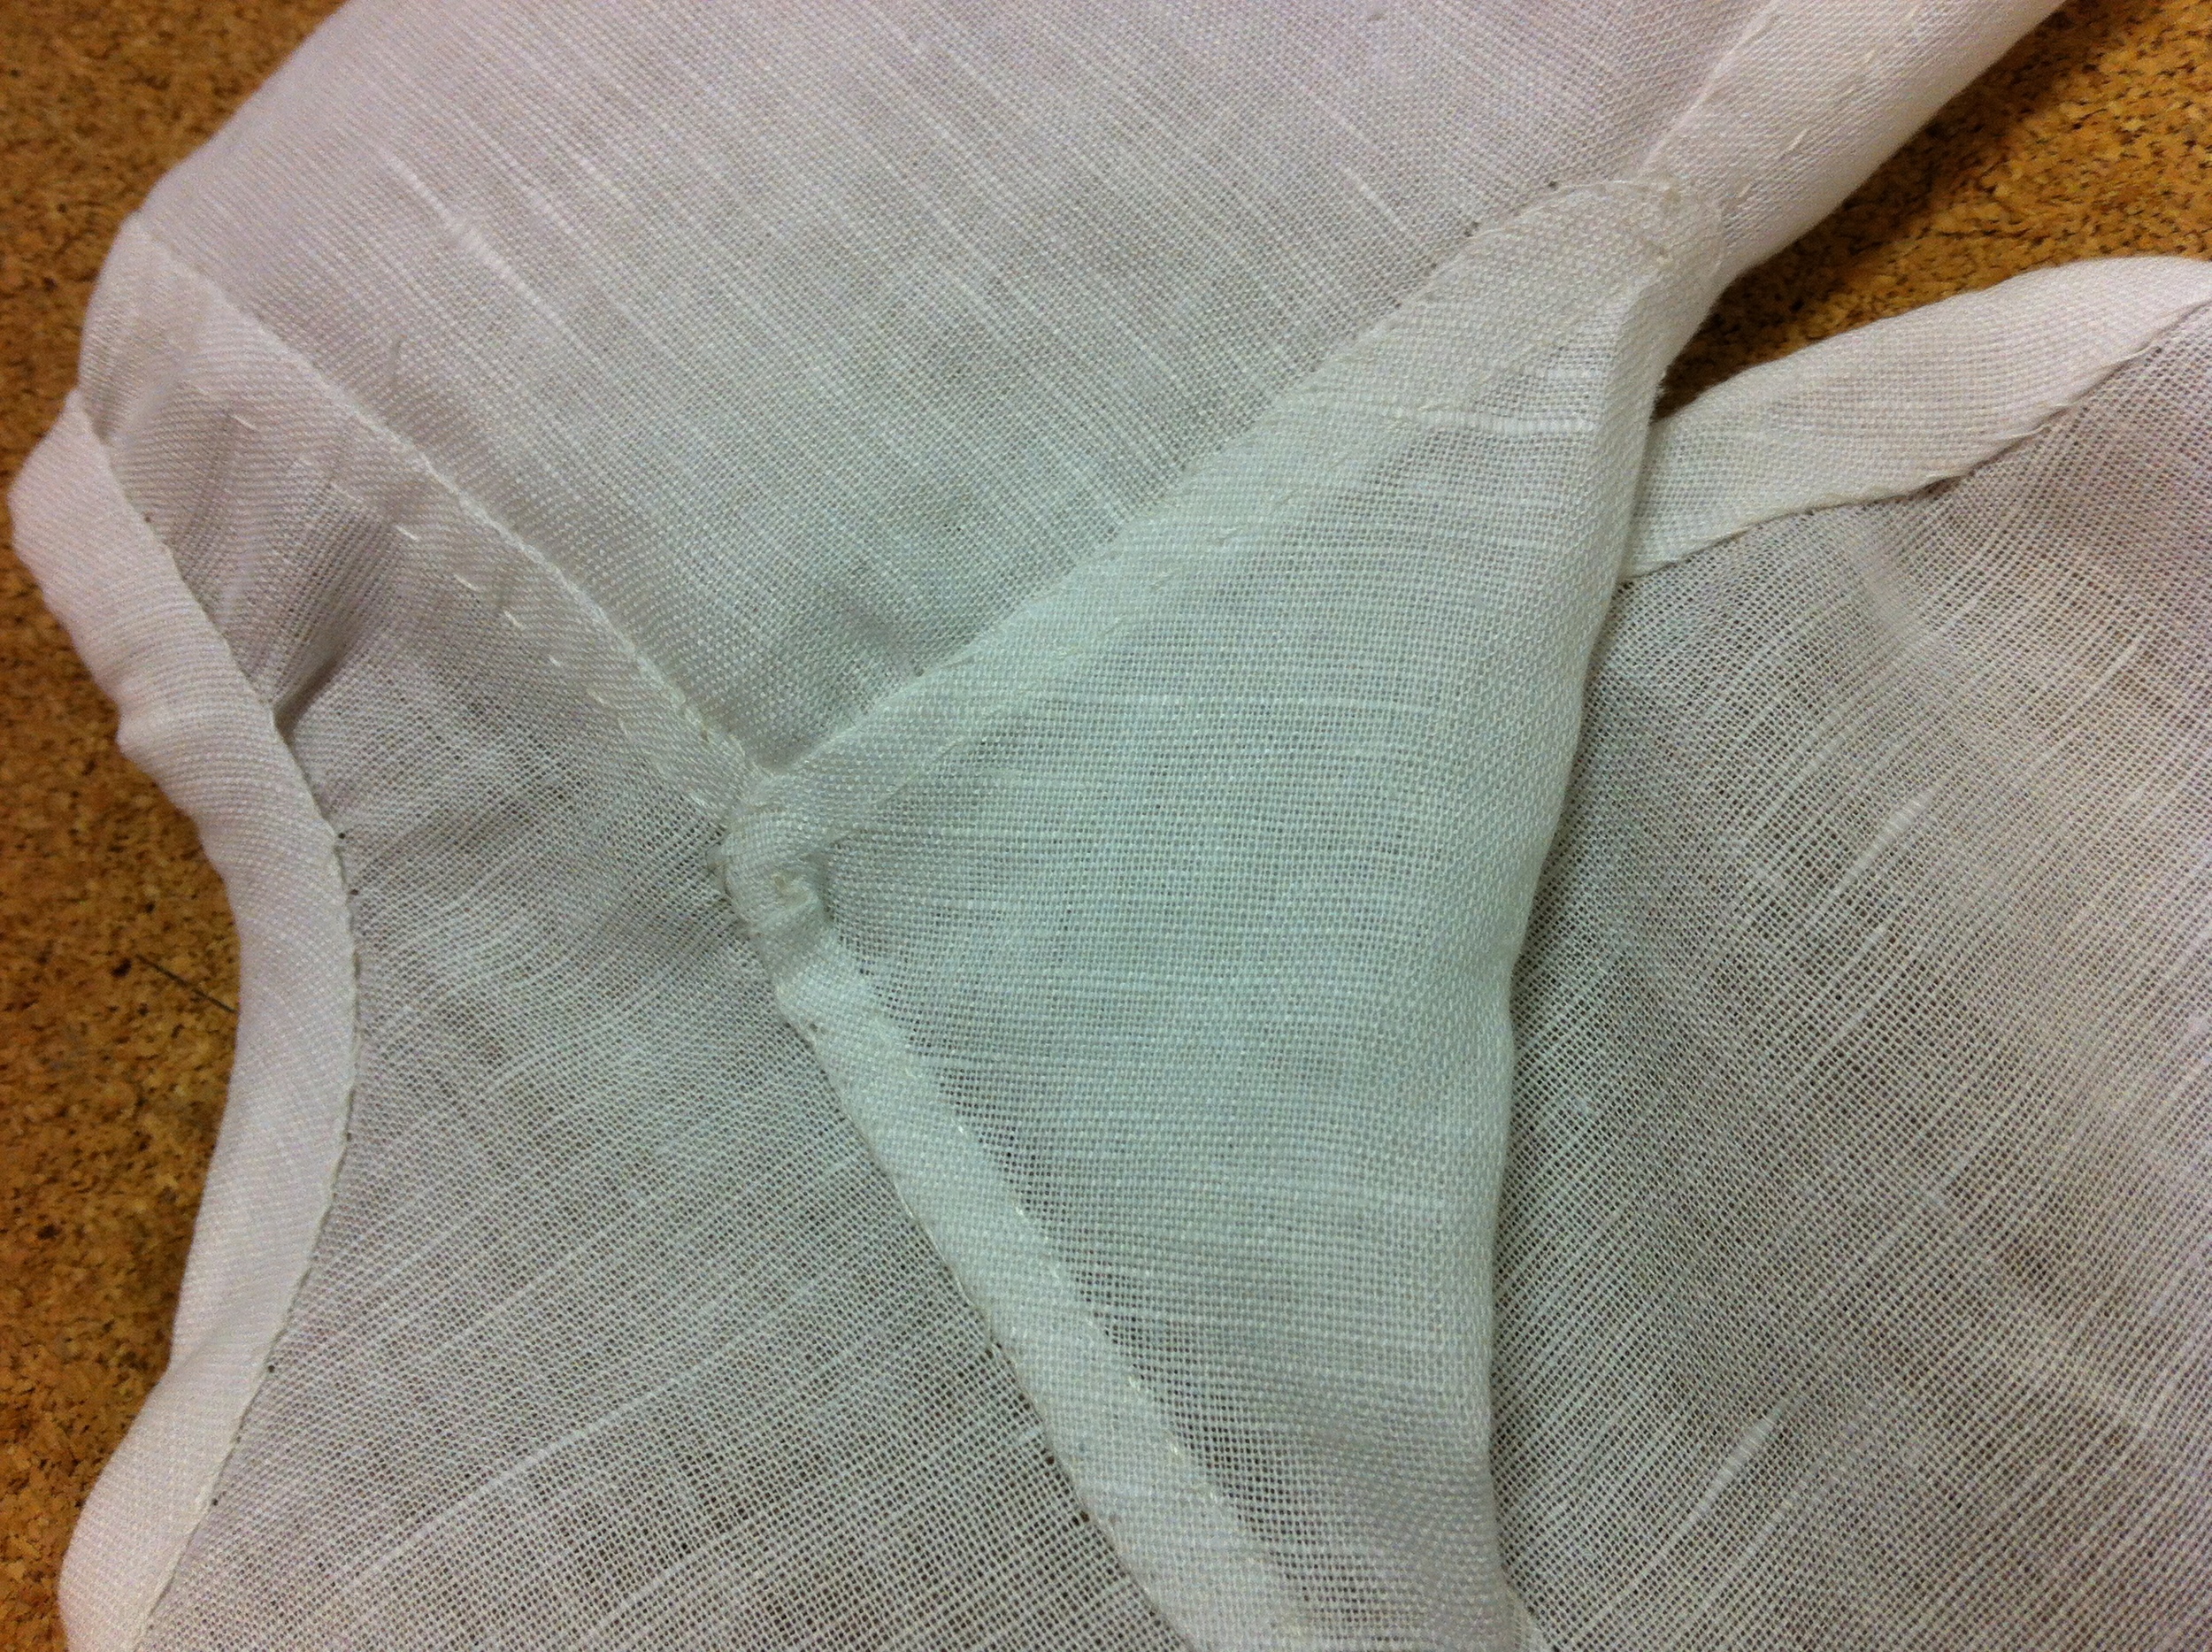
Period Costume for Stage and Screen details a chemise with underarm gussets, side godets, and a drawsting neckline with a small ruffle. The sleeves are gathered on the upper edge by the armseye and gathered into a bound cuff that falls around elbow length. The History of Underclothes details that chemise sleeves were eventually left plain and were tied around the arm with ribbon in order to make a small ruffle. 

I decided to base my design mostly on the pattern detailed in Period Costume for Stage and Screen, with a few small changes. I created a drawstring neck opening without a ruffle since I liked the plain look of the chemise shown on the neckline of several of the gowns in the paintings I posted earlier. I also tried out both the ribbon tied sleeve and the bound sleeve. I decided I liked the look of the ribbon tied sleeve more.

I created a mock up in plain cotton muslin to check the fit and the sleeve styles and then made up the final version in white handkerchief linen. The final version was sewn by hand with a running stitch for the seams. I used a small whip stitch to tack the seam allowances down. The drawstring at the neck is drawn through two hand worked lacing holes. 

And now the final finished chemise! Next will be the draping of the skirt!


Half Scale 17th Century Dress Recreation: Part 1

Hi All!

For the winter term at Oregon State I am working as a GTA for Dr. Elaine Pedersen, editor for the Clothing and Textiles Research Journal, the teacher of the costume history classes, and the curator of the historical costume collection here on campus. As part of the collection she has a number of half scale historical garment replicas that she uses as a teaching tool for assignments in her classes. For the next month I will be working on a new addition to her half scale garment collection! This will be my first time delving into historical garment design and I will be documenting some of my research process here. 

Dr. Pedersen requested a 17th century garment of my choosing for this project. The costume collection only has female half scale forms so that restricts me to garments worn by women during this time period. The book used for the historical costume classes is Survey of Historic Costume by Totura and Eubank (2005) (There's a new edition available on Amazon) and will help aid me in the choice of costume to recreate. For this blog I will be referring to the 4th edition. The section on 17th century women's dress in my edition is fairly brief, with a handful of illustrations of 17th century dress and some textual descriptions. While it is easy to find other sources on 17th century dress (which I will be using) the students in the history classes will only be using the Survey book. For this reason I am choosing to make a garment that fits the typical description of dress for women that the students should be able to identify using the information from their textbook.

In Survey of Historic Costume the discussion of women's dress is broken up into three time periods: 1630-1660, 1660-1680 and 1680-1700. The dress in the period of 1630-1660 had many elements similar to the time period before hand, and the dress of the time period from 1680-1700 was already beginning to show transition to the more commonly known silhouette of the 18th century. The dress in the time period of 1660-1680 was the most unique of the period, with a distinct exaggerated bodice and full sleeves. However, this style of dress is the least discussed in the book. Due to the unique shaping of the dress however, the silhouette of the garments from 1660-1680 should be the easiest for the students to be able to identify. 

Totura and Eubank (2005) describe the silhouette of women's fashion from 1660-1680 as "bodices lengthened and narrowed, becoming long-waisted and more slender with an extended V-shaped point at the front...frequently edged by a wide lace collar or band of linen called a whisk, necks tended to be low, wide and horizontal or oval in shape. Most sleeves were set low on the shoulder, opening into a full puff that ended below the elbow" (p. 213). Looking at paintings from the time period like the Portrait of a Married Couple in the Park from 1662 by Gonzales Coques, and Abraham del Court and his wife Maria de Kaersieter from 1654 by Bartholomeus van de Helst the women in the painting are wearing the silhouette Totura and Eubank describe as typical noble dress of the mid 17th century. 

Totura and Eubank (2005) stress that much evidence of costume from the 17th century comes from paintings, and that is is important to note that paintings could be misleading, and are not always reliable sources of information on dress. Painters made up garments and painted people that had long been dead in modern garments (p. 204). For this reason I will be using more than one source for this project, namely the information on the extant 17th century dress housed at a The Museum of Costume in Bath, England. The image of the Bath dress below is courtesy of The Dreamstress, who made her own recreation of a 17th century dress and has so generously provided a number of links to sources on dress in this time period. 

The best thing about doing historical recreation is that there are so many people that are into it that it is so easy to find amazing sources of information!  For example this photo gallery posted by Cathy Hay shows all of the detail and construction on the Bath garment: Warning: Costume Porn. Feast your eyes! This garment is one of only a handful of surviving pieces from this time period and is in wonderful condition. One of the first things to notice is the clear two piece construction of the garment. The bodice is worn over a chemise and has a tabbed bottom. The tabs are all worn below the waistline of the skirt, except the front point which is pulled to up over the waistband.  The half scale garment I create will be made the same way.

While this is going to be a historical recreation that I eventually intend to submit to Costume Society of America as a design scholarship project, I am limited on certain aspects of the design. First of all, this project is to be completed as a GTA assignment, so I am limited on the cost and time of the project. My aim is to use period accurate materials where I can and historical sewing techniques when possible. I am working on a half scale so things like boning and size of embellishment will need to be adjusted so the garment looks balanced to the size of the form. Garments of this time were usually made of silk satin. Because this garment will have to last a long time and is to be done as an assistantship research project, I will likely choose a less expensive fabric to keep the cost of the project as low as possible. I will likely need to choose other fiber contents besides silk for the body of the dress. 

There is much much more to go through with this project so keep an eye out here for more updates! 

Tortora, P., & Eubank, K. (2005). Survey of historic costume: A history of Western dress (4th ed.). New York: Fairchild Publications.


Cruella deVil, the finished costume

A couple of blog posts ago I talked about how my sister was interested in making a recreation of the tiger print outfit worn by Glenn Close in the 101 Dalmatians live action movie for Halloween. Well here is an update with some progress and finished pictures of her outfit!

When my family came to visit in September, Melanie and I spent an afternoon in the sewing lab working on the draft of her cape. The final pattern pieces ended up slightly different than the original sketch. We changed the underarm portion of the cape to tie around her shoulders in the back to support the weight of the cape. Melanie also decided she wanted to have a traditional cape shape with slits for her arms instead of the folded over sleeve we talked about in the original post. I developed the patterns by draping excess fabric on her shoulders and drawing in the lines I wanted. I then had her make paper versions of the muslin pattern pieces. 

Now Melanie has some sewing experience, having worked at the University of Rhode Island's costume shop while she was in college. The only hand I had in the creation of her costume was the development of her pattern. Once she had the pattern she took it back to Rhode Island with her and sewed the costume on her own. She did an amazing job and I am so proud of her!

She used a commercial corset pattern (McCalls 5797) and altered the bottom for the correct shape. The corset is made out of velboa, lined in black denim, edged in faux leather, and boned with plastic zip ties. It zips up in the back. She found fake plastic bird talons, painted them and attached them to the front of the corset. The corset has a "faux" black panel on the front to make it look like it opens. 

She made the cape out of two types of velboa, and lined the edges with the faux pleather. The collar has boning sewn into it to maintain its shape. 

She also made the skirt out of the pleather and the amazing bracelet out of various metal findings! I love all the detail work she put into it!

Here are some pictures! (That's my mom in the Elsa shirt!) 

Not pictured: Melanie as Cruella with my two nieces (3 years and 2 years old) dressed up as dalmatians for Halloween!!


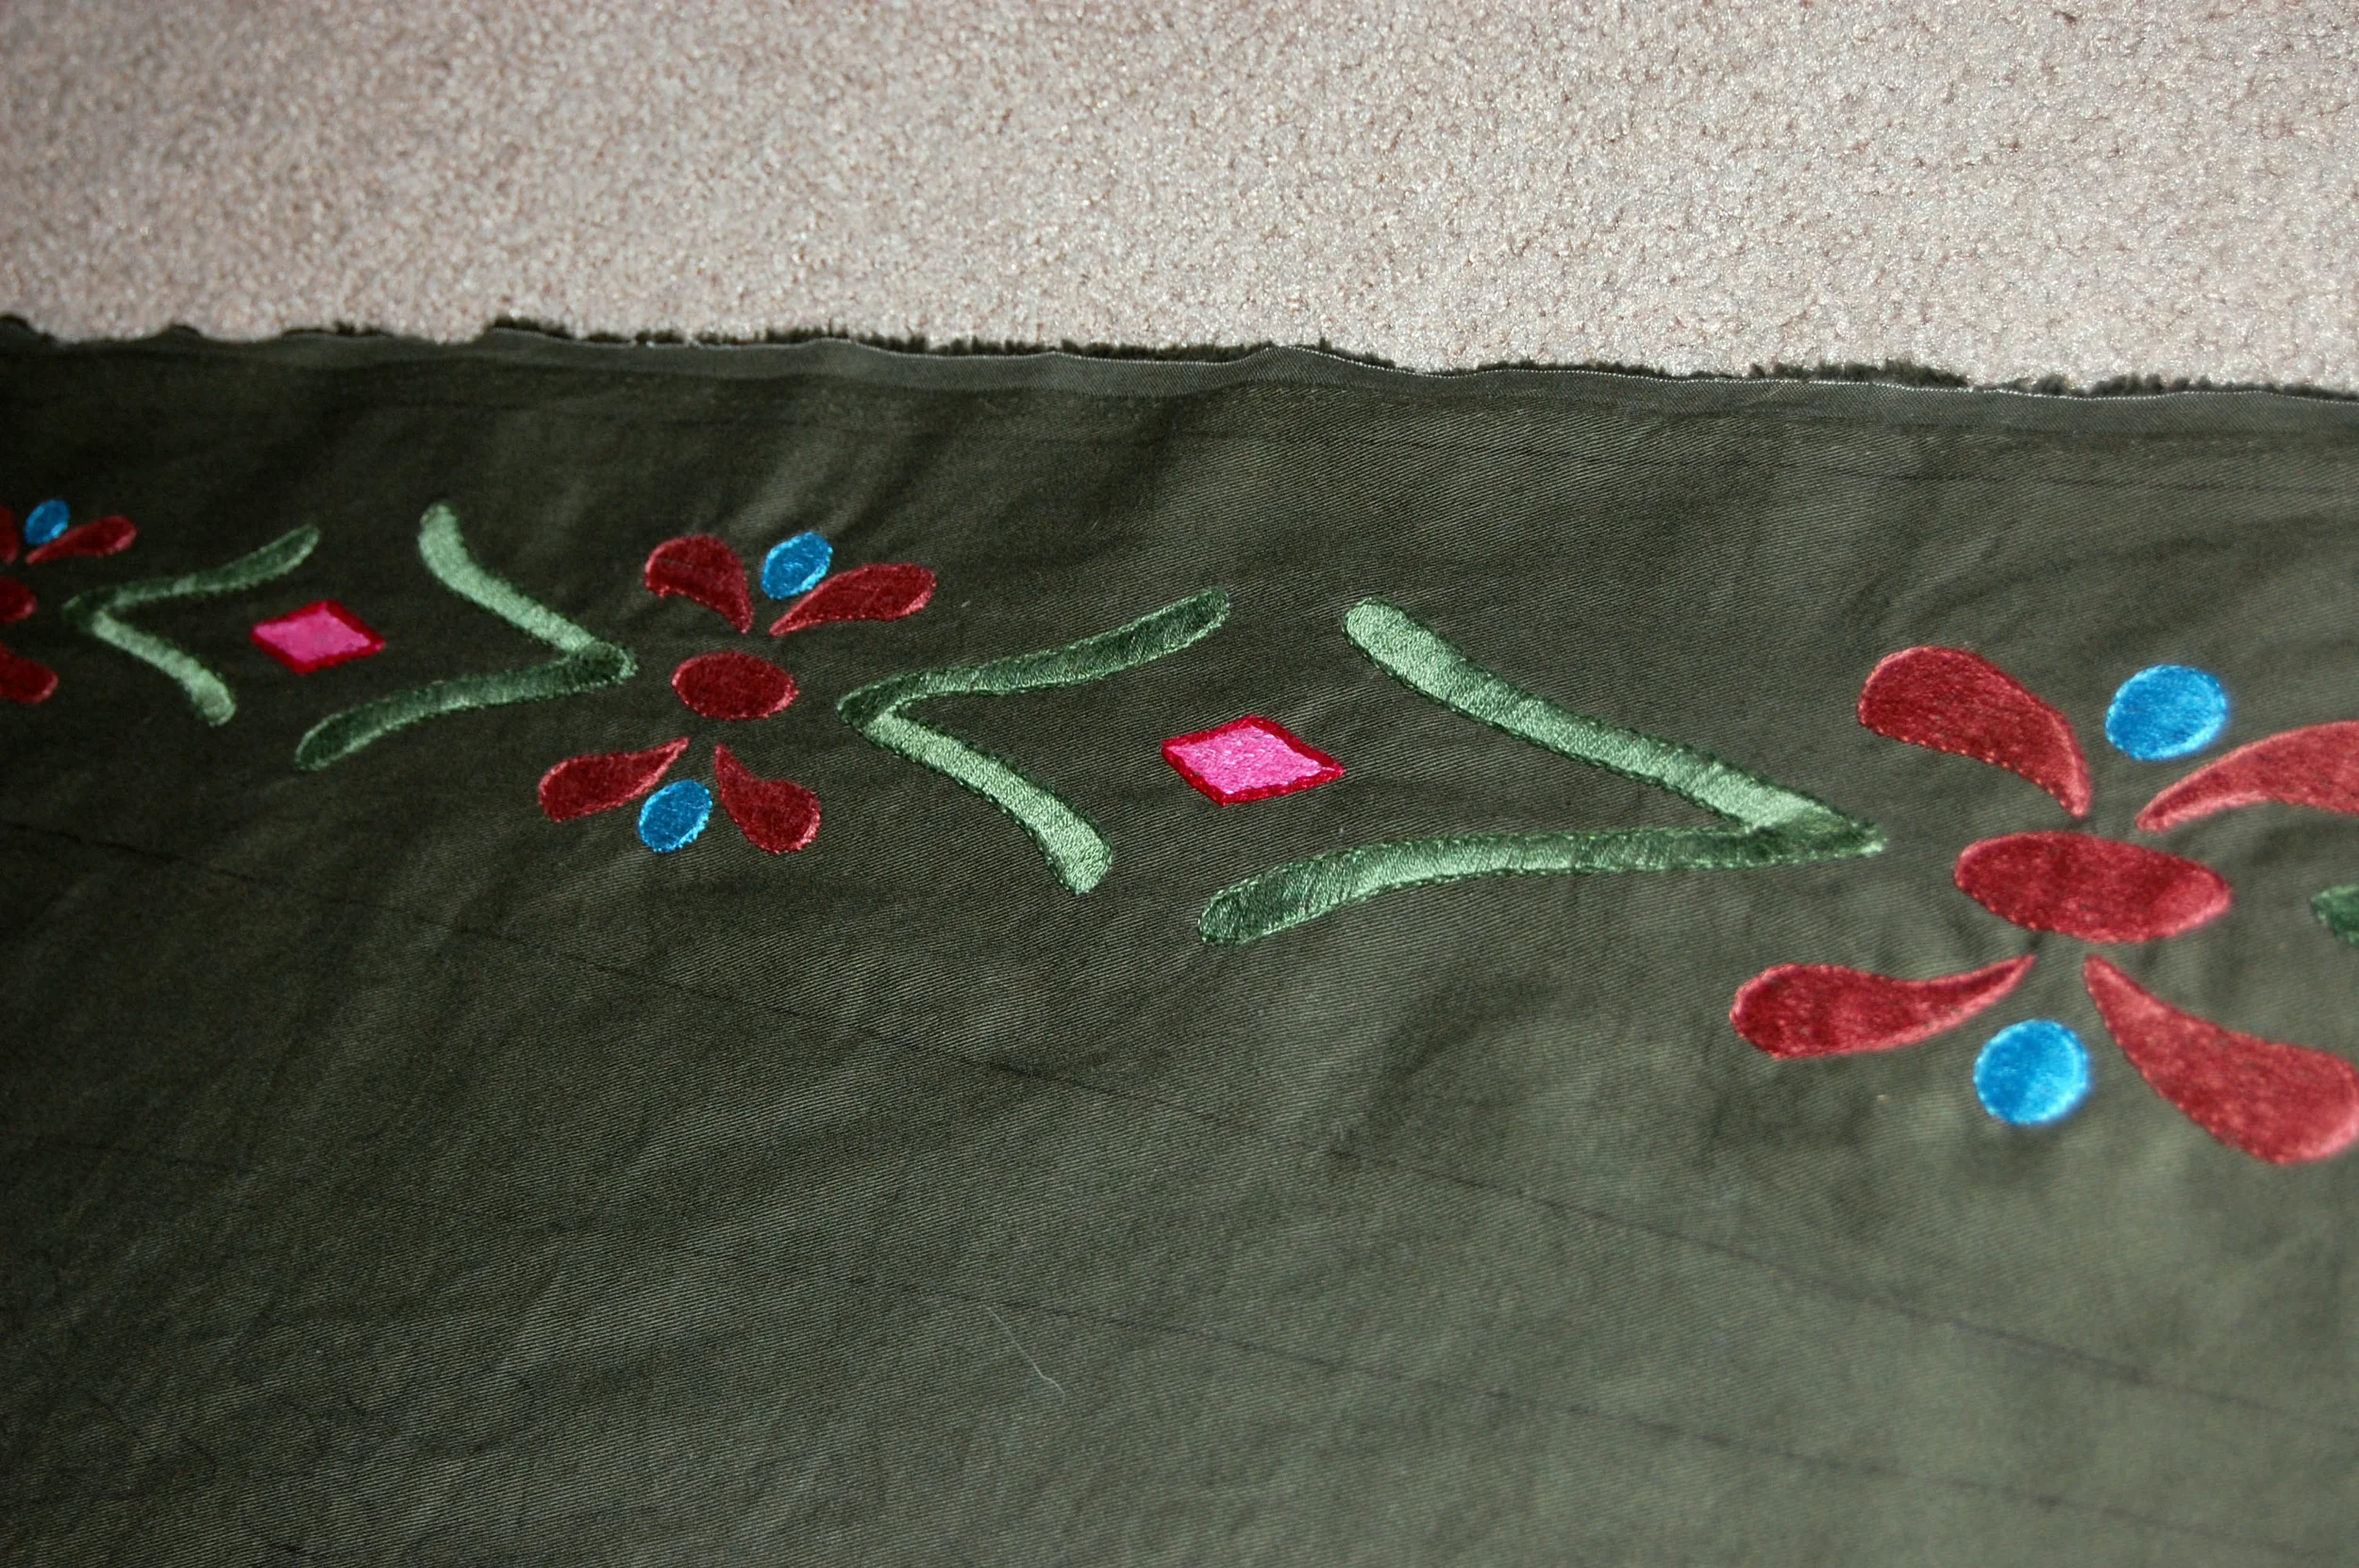
Anna Coronation Dress- Part 3

Hi everyone!
This installment of my Anna Coronation costume progress will be detailing how I drafted the skirt and the designs for the embroidery. There is a bit of math involved so I will try to be clear and concise!

Anna’s skirt is made up of a series of box pleats. A box pleat is formed by making folds in the fabric like this:

Anna's skirt is made of three different colors of fabric, a forest green for the embroidered panels, a lighter lime green edging, and a dark green inside pleat. 

You will need four pattern pieces for the skirt:

1. The embroidered panel

2. Light green side panel

3. Inside underlay for the pleat

4. Back of the pleat

Now in order to draft the skirt we will need a few measurements to start. The first you will need is your measurement around the place on your body where you want your skirt to start. If you are planning to wear any kind of shapewear or corset underneath your costume you should get this measurement while you are wearing the shapewear. I am going to have my skirt start slightly below my natural waistline. The finished measurement I want plus a little bit of ease (I added about an inch) is 31.5. 

You will also want the finished length of your skirt. If you are going to wear a petticoat and flats (which Anna wears in the movie) then measure the distance from your desired waistlineto the floor, over the petticoat. Record this. My skirt will be 40 inches long. We will add seam allowances and hem depth later.

Now determine how many pleats you want. I based my count on this image and decided on 12 panels total, three for each quadrant of my body. This will also allow me to install a zipper at center back inside of the center back pleat. 

Now we are going to start by drafting pieces 1 and 2 at the same time. When folded up, the 12 panels should equal the width of our waist. So to figure out how big each panel should be we can take out waist measurement and divide it by 12.

31.5 / 12 = 2.625 or 2 5/8 

Each panel (which includes piece 1 with two piece 2's next to it, should measure 2.625" total across the top. 

Now we need to know how wide the panel should be at the bottom. If you have your petticoat take a large piece of string or a measuring tape and measure around the width of your petticoat to estimate how wide the skirt should fall when worn. I made mine 120" so each of my panels would need to be 10" wide at the bottom.

Now take a large piece of paper that is at least 5 inches longer than your desired length and 5 inches wider than your desired width and fold it in half lengthwise. Take the top width of your panel and divide it by two. (2.625/2=1.3) and draw a perpendicular line at the top edge of your paper that equals this distance. Measure along the foldline your desired length of your skirt. From this spot draw a line that is half the desired width of the bottom of your panel (in my case 5 inches). Connect these lines. 

Now looking at the picture of Anna, the width of the light green panel is not the same at the top as it is on the bottom. However it should be noted that the width of the two side panels equals the width of the center panel. So for example if the bottom of my panels is a total of 10 inches, the center of the panel should be 5 inches (where the embroidery will go) and on each side there should be a 2.5" green stripe. At the top my green stripe is 5/8" wide and tapers to 2.5" wide at the bottom. Draw this on the inside of your panel that you drew.

Now cut out your panel without cutting out the green striped section. Keeping the piece folded, trace it onto another piece of paper. This newly traced piece will now become piece 3, the inside of the pleat. Open up your folded outer pleat and trace around it on another sheet of paper, this is now piece 4, the back of your pleat. Now you can cut the green striped section off (you should end up with two since your piece is folded in half, I just discarded one) I decided to just combine piece 3 and 4 so when I cut out piece 3 I will just fold piece 4 in half. You can make two separate pieces or just make one. 

I added some notches onto my pattern so I can keep track of which panel gets sewn to which when I go to put it together. It is very important to note that these pieces DO NOT have seam allowances or hem allowances included. You can retrace them and add seam allowances, cut some extra paper and tape them on, or mark the seam allowances directly onto your fabric. 

Now here comes to tough part- figuring out the placement of the motifs on the skirt panels!

I think one of the most important things to consider when making cosplay costumes is taking the proportion of the original design and scaling it to your body correctly. The way I like to do this is to measure a reference image and scale it up to fit my desired garment measurements. Looking at the photos of Anna from the movie the motifs on her skirt are not the same size at the top as they are at the bottom.

I wanted the proportion of my motifs to reflect the proportion of the motifs in the original reference. In order to figure this out I used this image for reference.

From here I measured the length of the skirt in the picture and figured out what percentage each motif was of the length. For example, in the picture I measured, her skirt measured three inches total, the length between each diamond shape starting from the top was 1', then 5/8" then 1/2", then 1/3" then 1/4" then 1/8" So when I did the math the first motif made up 33% of the total length, the second made up 20.8%, the third 16.67%, the fourth 11.11%, the fifth 8.33% and fifth 4.17%. I was then able to take these percentages and figure out the total length of each motif by multiplying these percentages by my 40" length. I marked them on my original pattern piece and wrote each distance on the pattern.

Now from this point your prefered method for making the motifs may differ. Since this costume is fairly popular, there are a number of people who have already posted files of what Anna's embroidery looks like up close. Dokitude is one of those people! She posted up vector files of the basic embroidery for Anna's dress.  They need to be sized appropriately in order to be ready to use. I do not have an embroidery machine, so I used her file as a basis for creating my own pattern in Adobe Illustrator that I could print out and trace onto my fabric. 

I used Adobe Illustrator to create a full size version of my skirt panel, and boxed out the length between each motif based on the scaled measurements. I then scaled and moved the motifs until I was satisfied with the layout. I was then able to print out the panel in full size, add seam allowances and trace it directly onto my fabric.

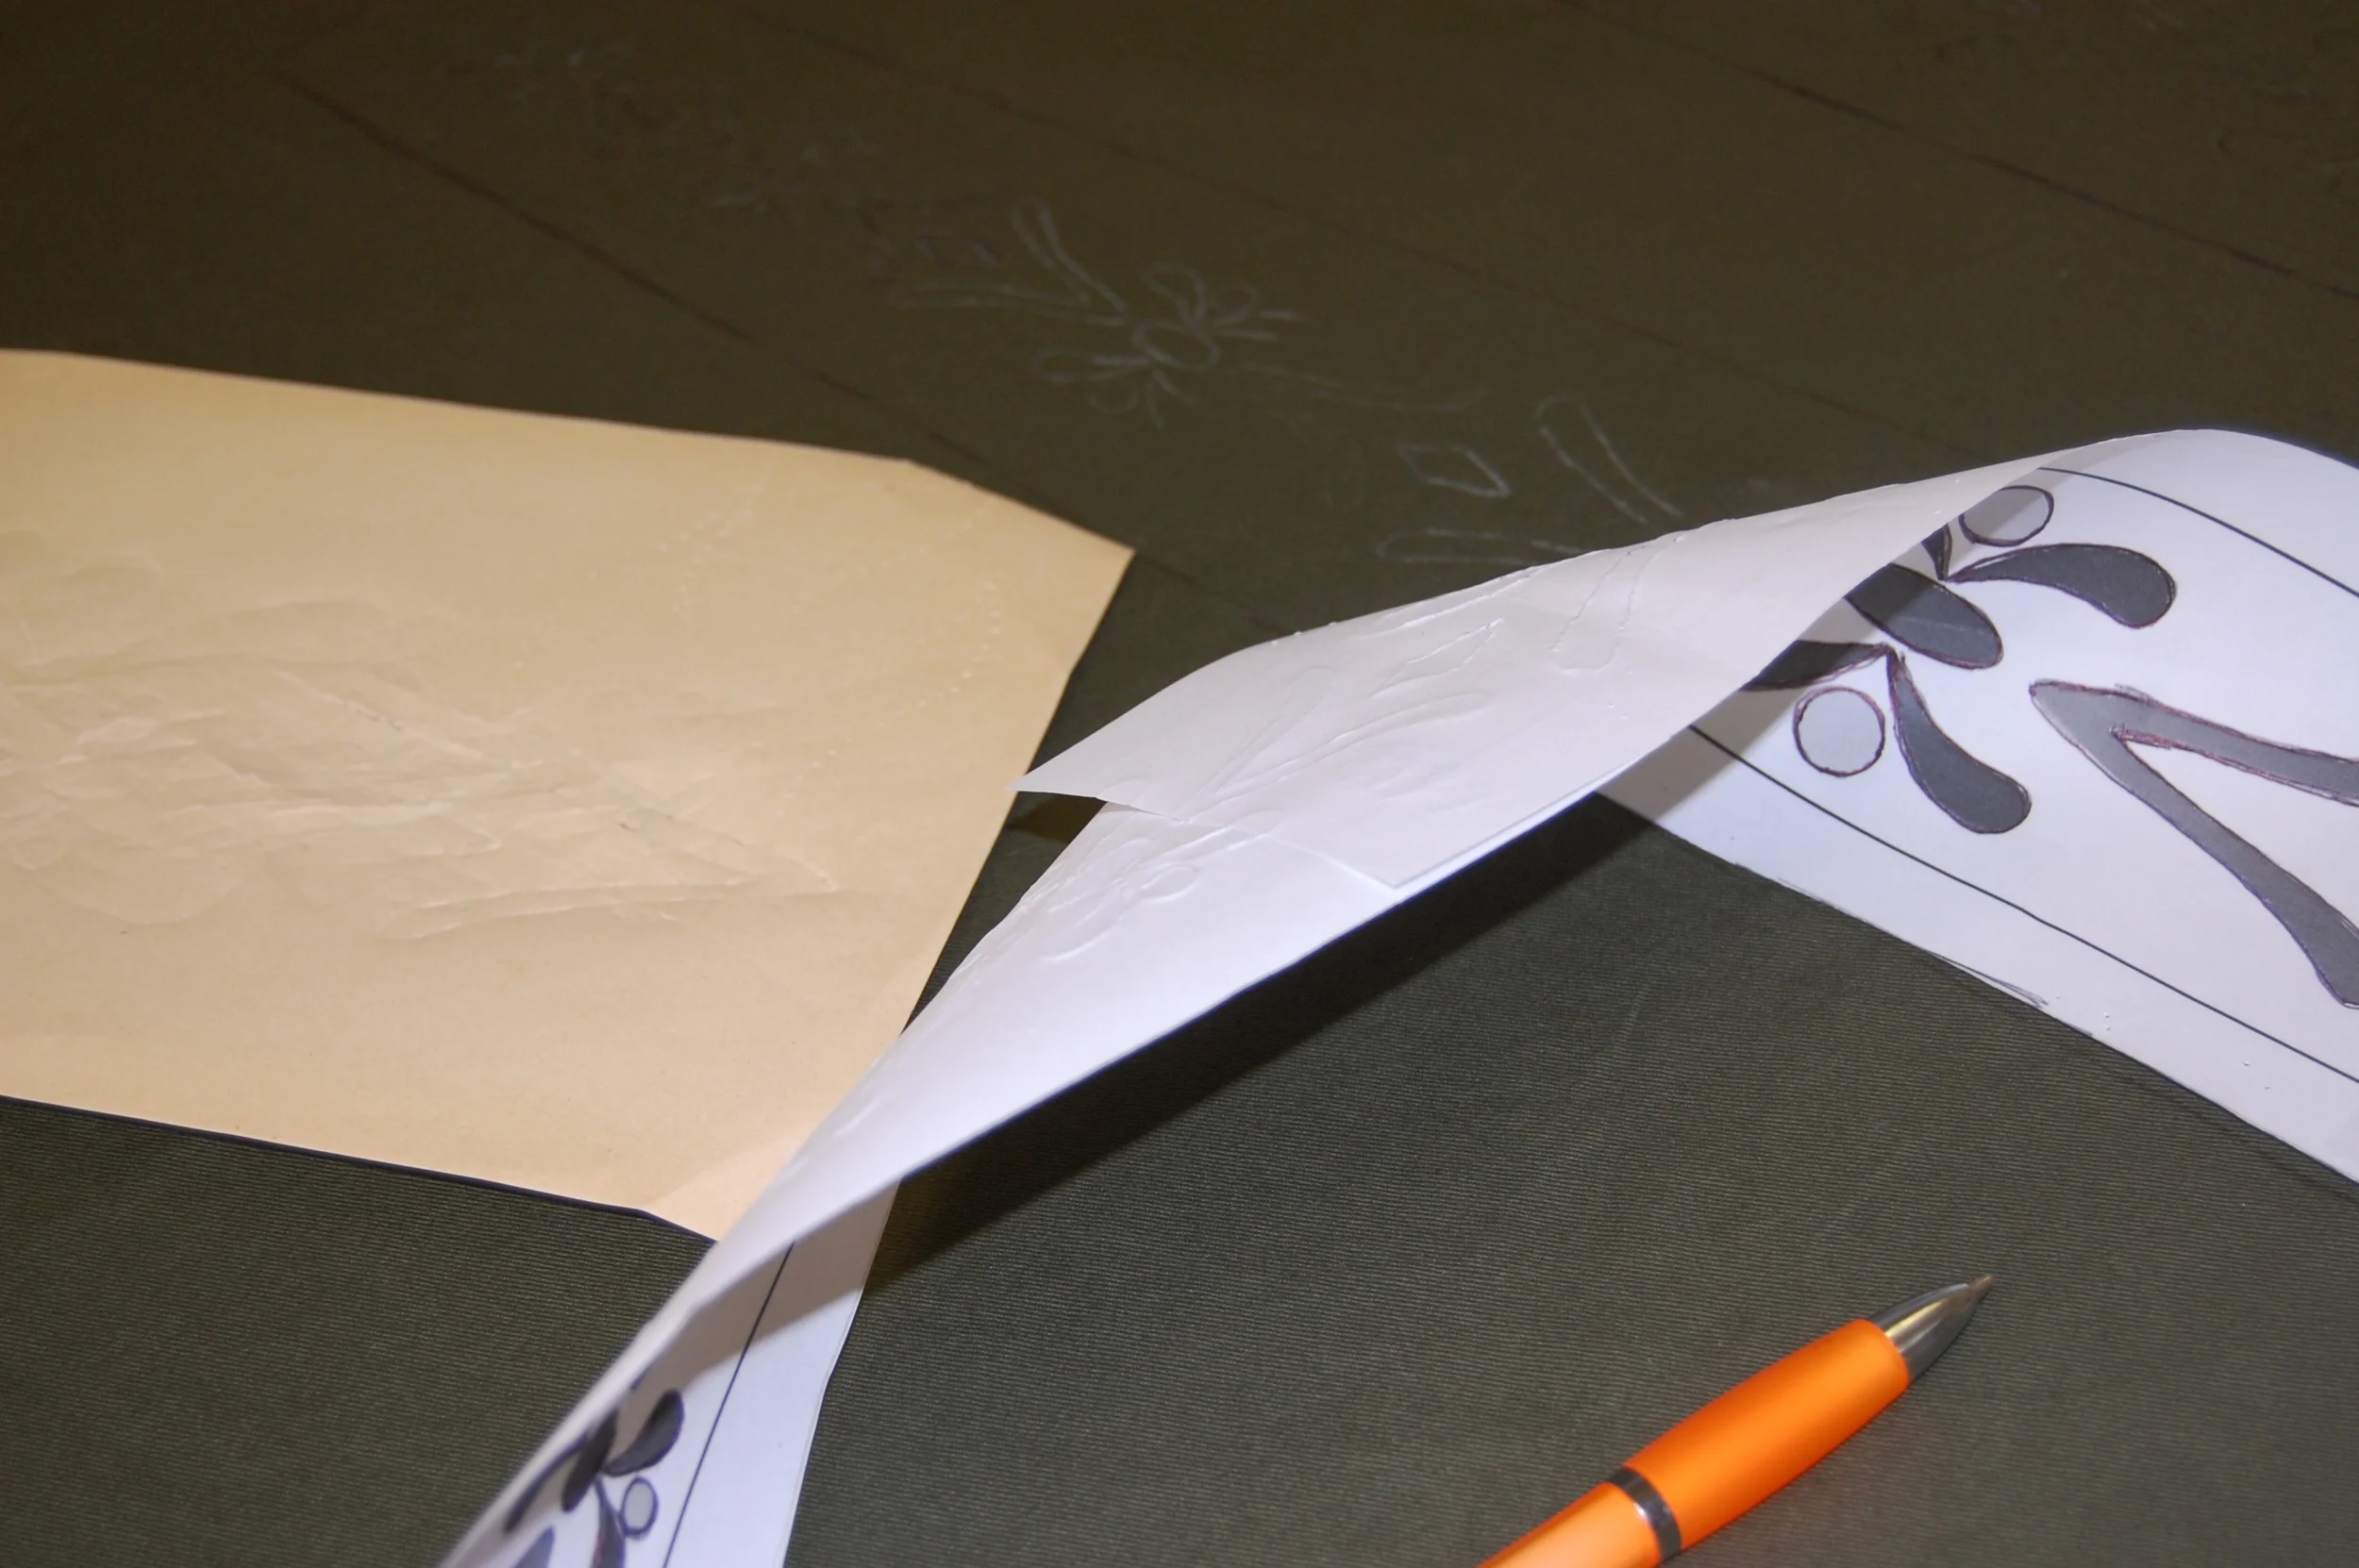
Using tracing paper I marked the placement of the motif on my fabric and marked each one with a ball point pen. 

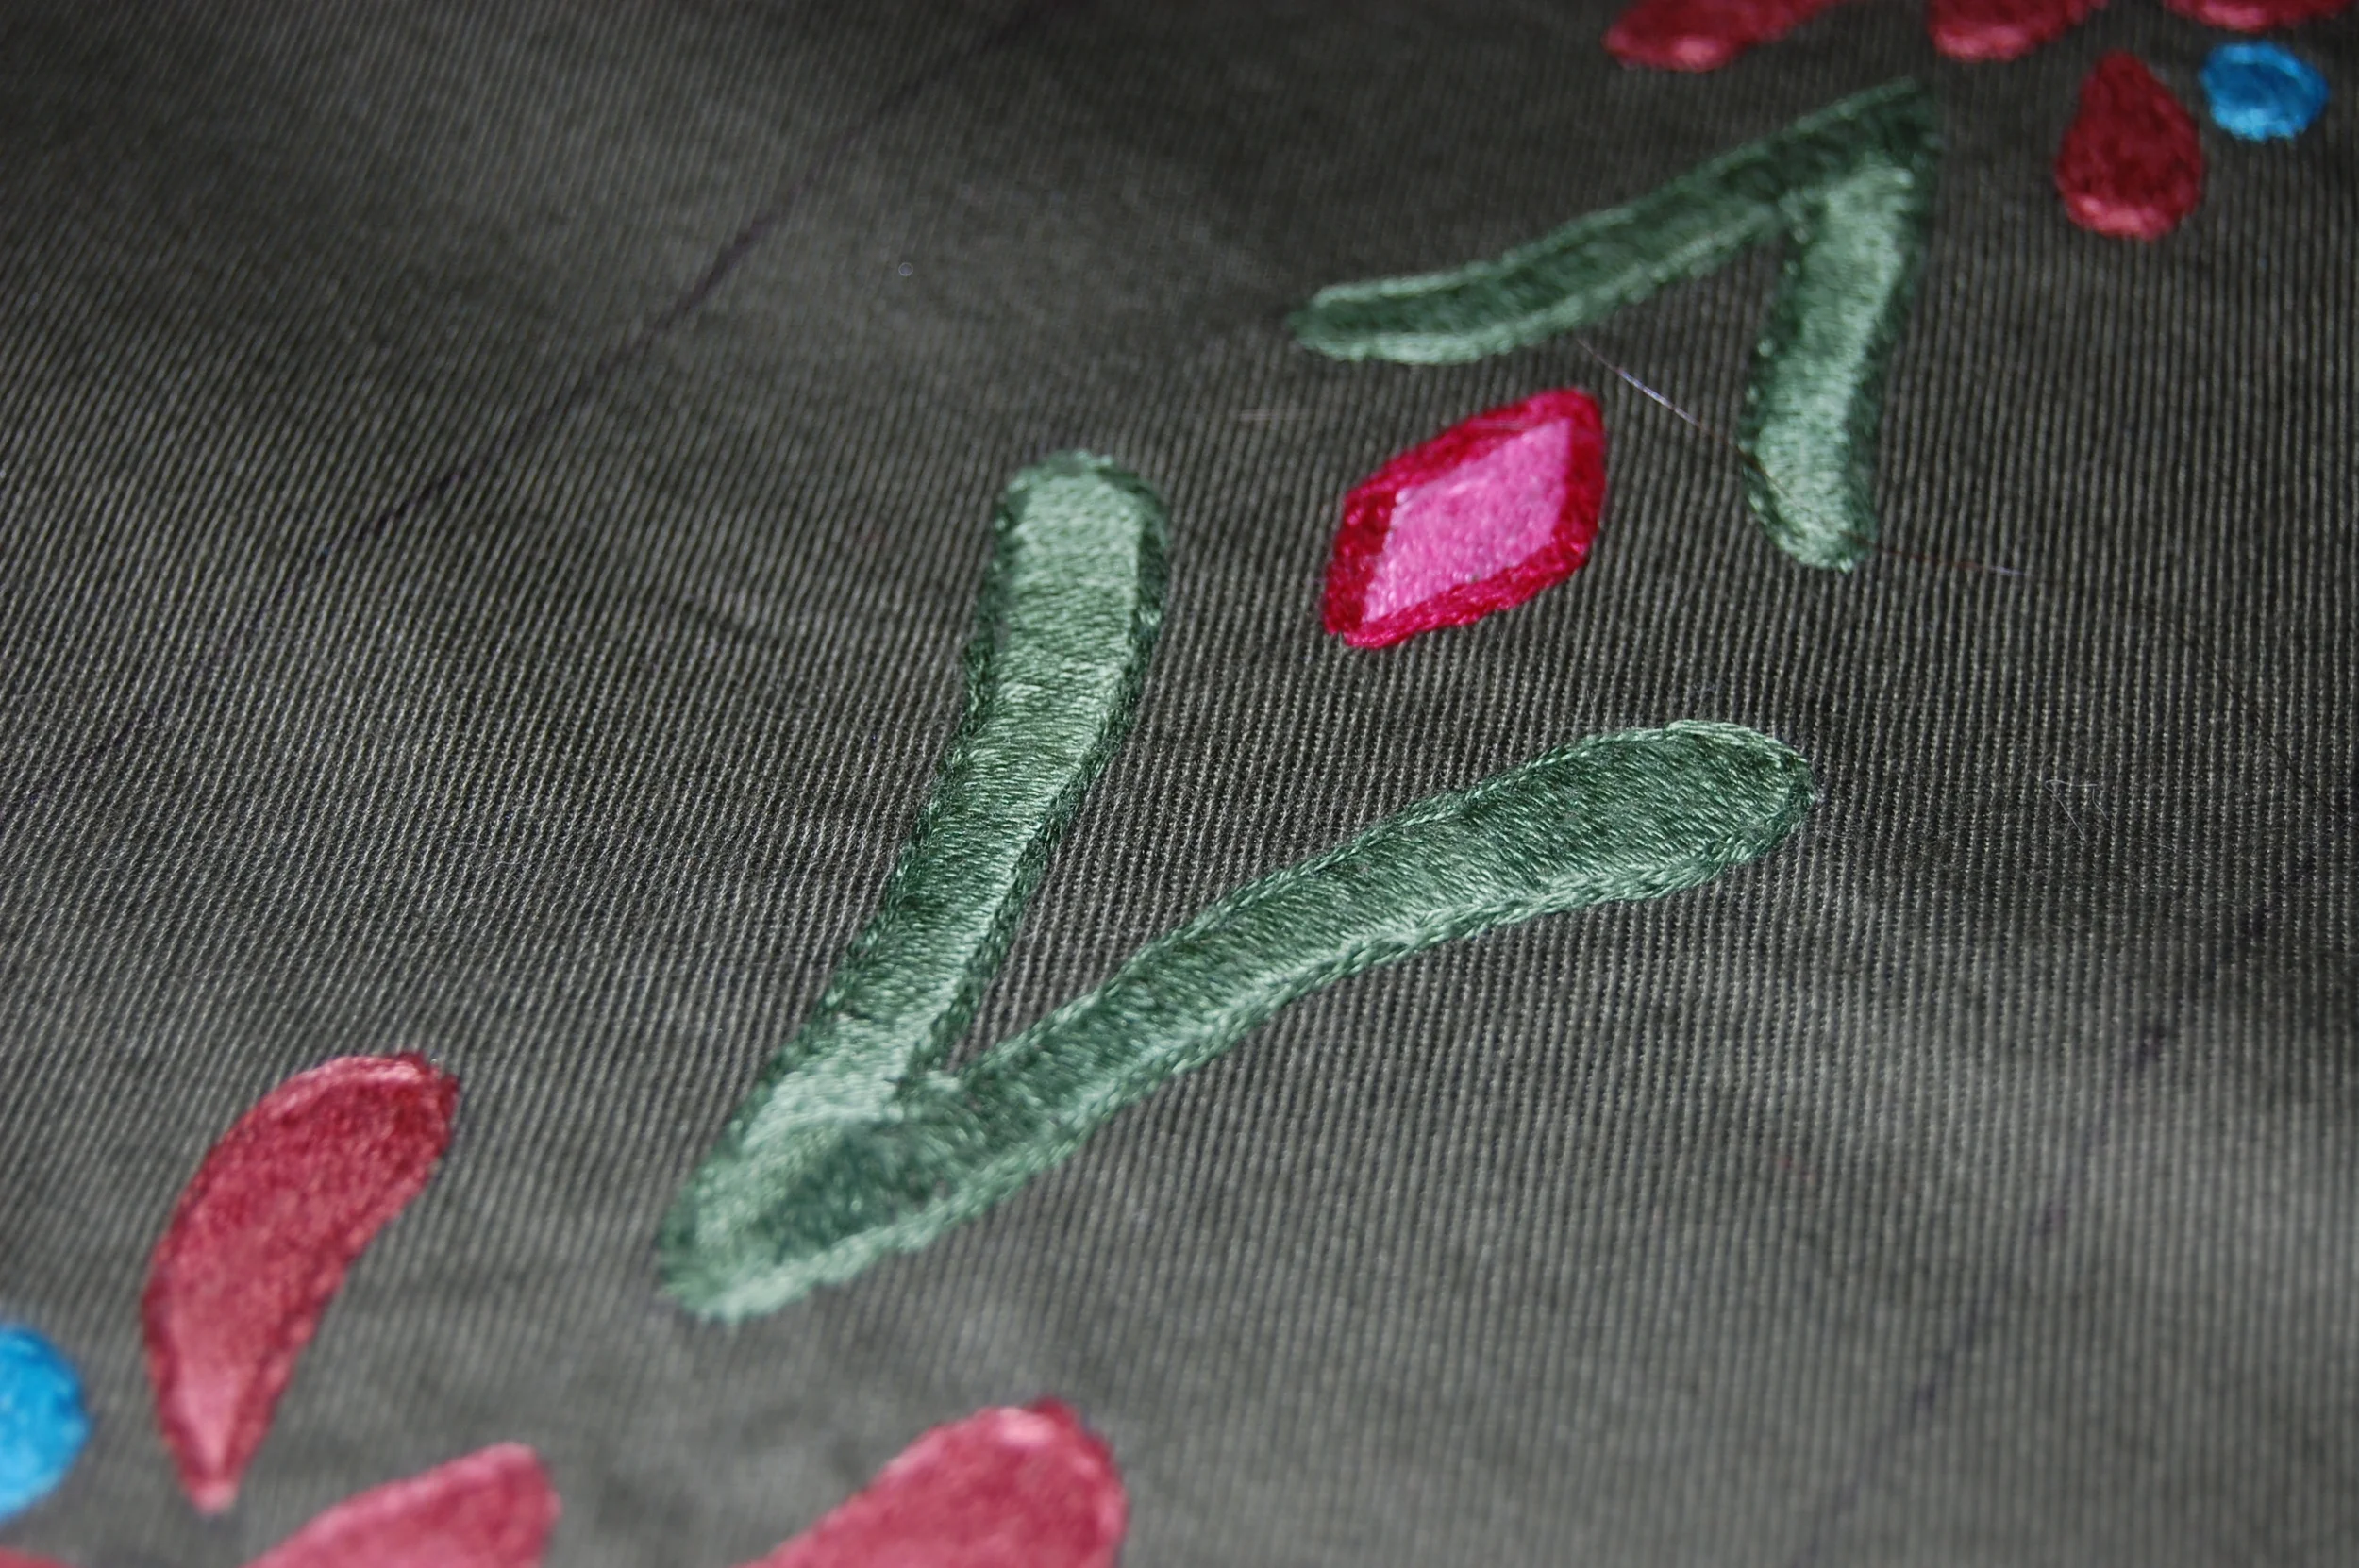
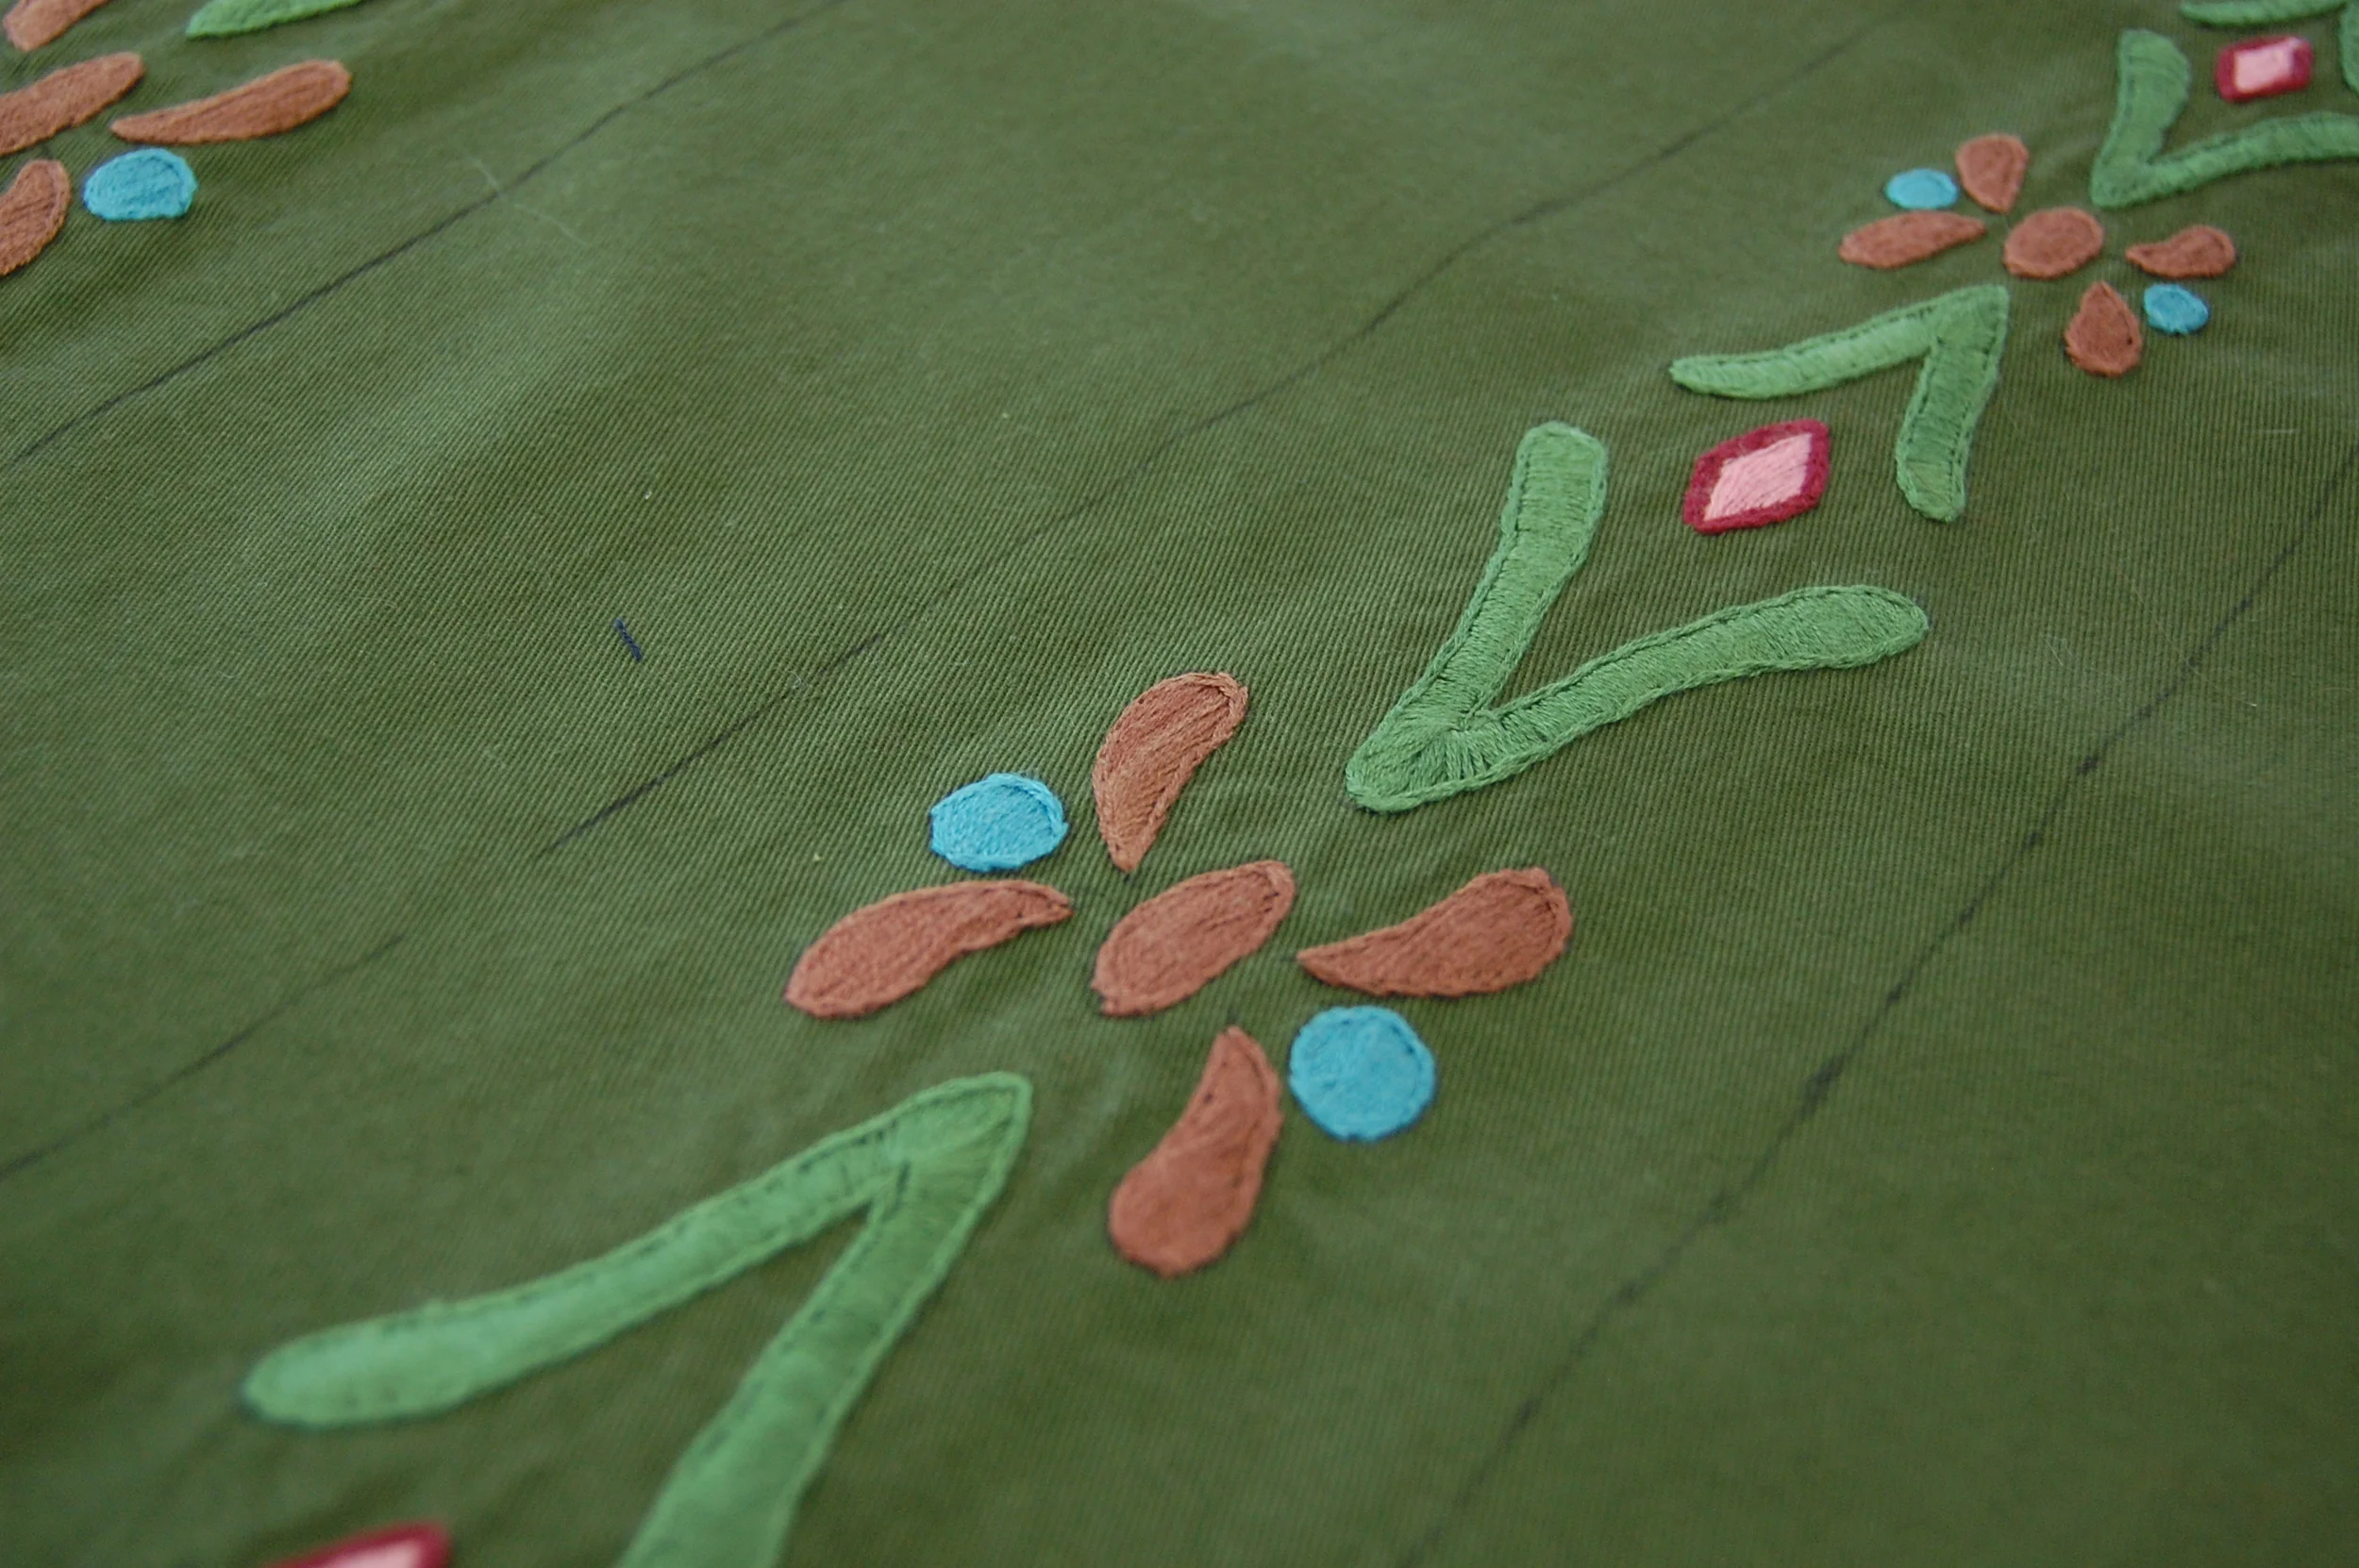
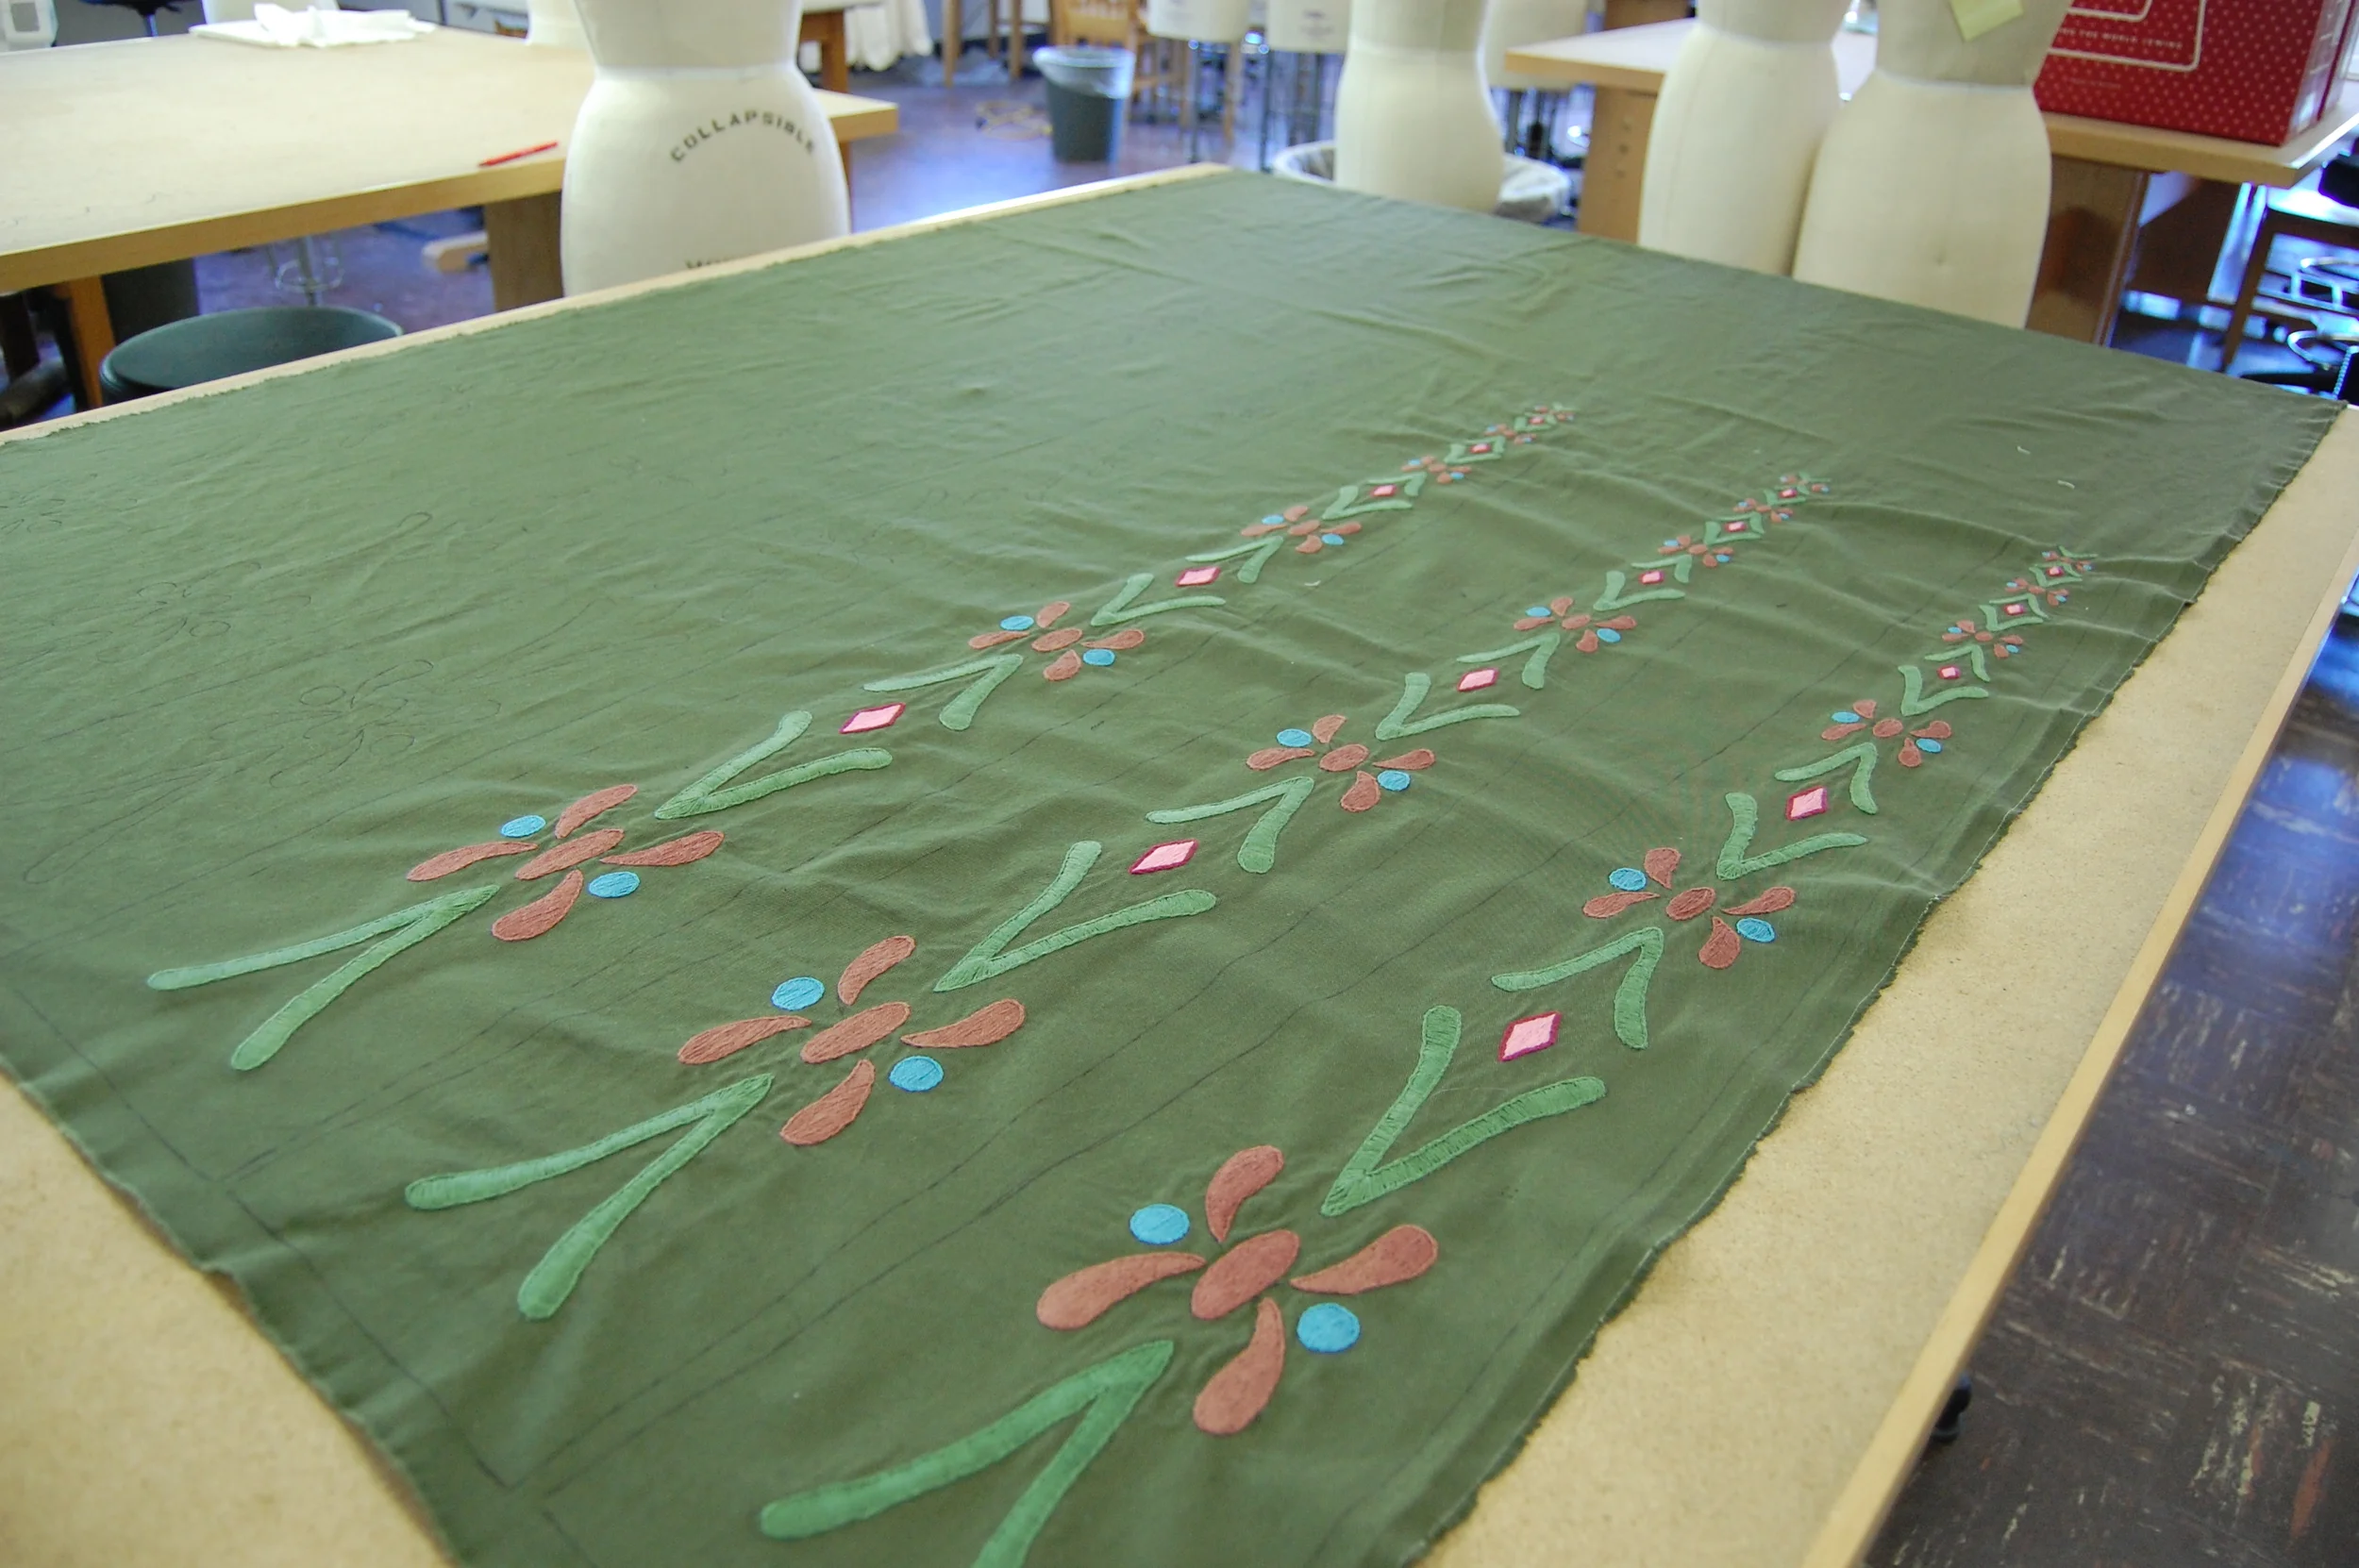
I chose to make the motifs by hand embroidering them using satin stitches outlined in split stitches. I am using water solulable backing and an embroidery hoop. Each panel takes about a week so I will working on the skirt for the next couple of months. As of this post I have 3 of 12 of the panels done!

Feel free to ask me any questions about the draft or the construction of my skirt so far!

Until next time, happy sewing!


Costume Research-Cruella deVil

Hi All! 

For those who don't know, I have a younger sister who is CRAZY about Glenn Close, Maria Friedman, Julie Andrews and Gertrude Lawrence. She runs her own blog dedicated to these ladies and more over on Tumblr under the name LadyLizaElliott. She has some sewing experience, having worked with the University of Rhode Island's costume shop for a number of years, and having me as a sister :) She does not cosplay much, but she has always wanted to make one of the gorgeous costumes Glenn Close wore as Cruella deVil from the live action version of 101 Dalmatians. She decided to finally tackle making one of the costumes this year after my sister in law agreed to dress her two adorable daughters (1.5 and 2.5 years old) as dalmatians for Halloween if my sister dresses as Cruella. 

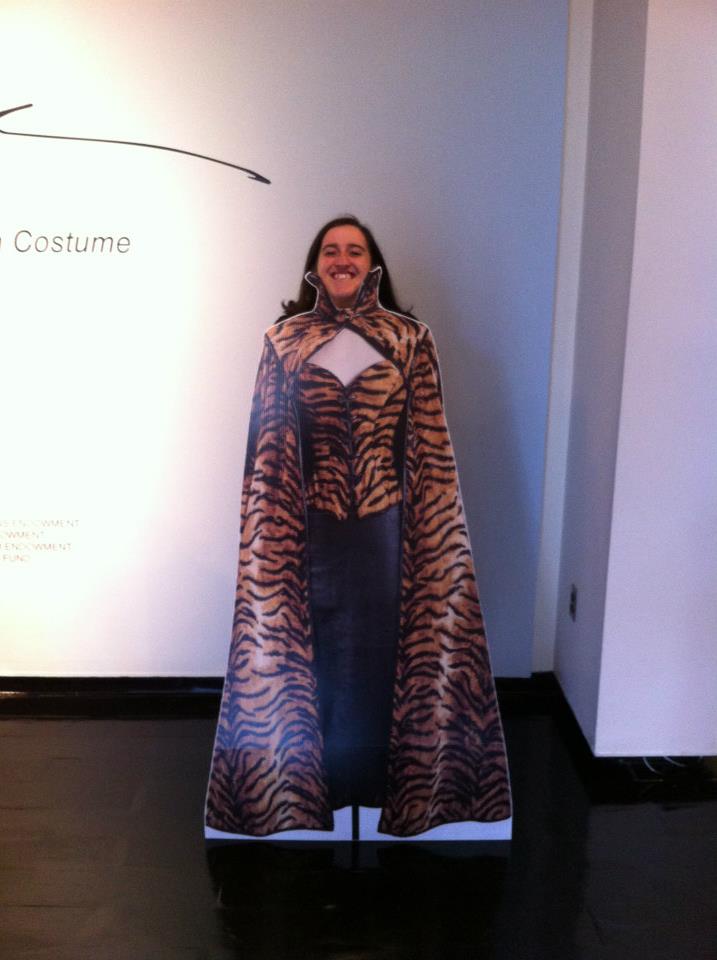
My sister had the chance to visit the Glenn Close costume exhibition on display at the Muscarelle Museum of Art at the William & Mary University earlier this year. She was able to see a number of Cruella costumes up close, and came away with her own costume notes and was generously given one of the full sized cardboard cutouts of the tiger printed corset and cape. It now sits displayed in her closet in her room.

After much debate she decided she'd like to recreate the tiger printed outfit for her Halloween costume. She contacted me asking tips on how to construct the cape of the ensemble. As I began to break it down I decided to document my findings here for others to see!

The original costumes were designed by Anthony Powell and have a number of beautiful design details. There are a number of great promotional shots of Glen in the costume. Here are most of them:

The first thing I'd like to point out is the way the sleeves on the cape are constructed. The first two photos are the best for viewing how they are put together. Take note of the binding surrounding the end of the sleeve. It looks like the back of the cape is tacked to the front of the sleeve at a corner in the front. If you follow the pivot of the binding at the wrist towards the underarm or bottom of the armseye you can see that the binding ends under her armpit. Looking at the picture of the back of the cape there is no indication that the binding is attached to the back anywhere but at the wrist and underarm. To get a better idea of this imagine draping a towel over your arm with one edge hanging longer than the other. Then pinch the shorter corner to the part draped over the back. I think this is how her cape is constructed.

For the yoke portion of the cape it is pretty straightforward. There are some seriously padded shoulders happening, which is easy to recreate by adding shoulder pads between the outer fabric and the lining. The back of the cape has some interesting seaming, which can be seen in this lightened screenshot from the movie:

In this shot it is clear that there is a seam at center back on the collar and the center of the cape. There is likely a side seam at the collar in order to get that exaggerated curved shape. Take note of the binding at the side of the armhole. It does not continue all the way around the armseye, which further points to the idea that the sleeve just wraps around and tacks down under her arm instead of being sewn in as a traditional sleeve. 

There's one more picture I'd like to share and that's this one:

This is a shot of the costume from the movie that I lightened so you can see the cape better. Take note of the direction of the tiger stripes here. There is a distinct difference in the direction of the stripes from the sleeve portion and the center back panels. This indicates that there are seams down the back of the cape. It is likely that the cape is constructed in four pieces: two sleeves and two back panels. The seam connecting the back panels to the sleeves likely runs in line with the armseye seam along the back of the yoke. 

I did not do any research into the way that the cape closes since my sister got to see the costume up close and has a much better idea of the closure and the brooch that is at the neckline.

To try and illustrate all these details a little easier I did a very rudimentary sketch. This is by no means meant as a definite illustration of what the cape actually looks like, it is just my interpretation in order to hopefully make everything a little easier to visualize.

I also did a very basic sketch of what some of these patterns would look like. Again, this is just for reference and not to scale or the exact shape. These are just for visual reference.

That's all for now. I will keep updating with new information and progress as she works on her costume!

Anna Coronation Dress-Part 2

This blog post was originally published on my old website and has been reposted here unchanged.

Hi everyone!

Sorry for the delay in updating. This post will be about how I constructed the remainder of my petticoat for my Coronation Anna costume.

So in the last installment I mentioned I was going to discuss the embroidery for the petticoat. I have a machine that does a few simple basic decorative stitches. Anna's dress has a series of dots and teardrop shapes edging the scallops of her petticoat and another line of dots about 6 inches above the hem. You can see them clearly in this shot:

I tested out a few different stitches and decided I liked a combination of straight stitches and decorative circles for the upper line, and decorative circles around the scallops. I did not have a large enough motif built into my machine to do the large teardrop shape, so I chose to free motion embroider them. If you are unfamiliar with free motion embroidery you are missing out! 

Free motion embroidery can be done on any machine that enables you to drop the feed dogs on your machine (the feed dogs are what pulls the fabric through the machine). My favorite website detailing free motion embroidery is this one. I bought an extra foot for my machine to make free motion embroidering easier to manage. I've used free motion embroidery on several of my costumes in the past including my Shoomlah Snow White and George from Paradise Kiss

So I left off last time with a stencil of the scallops I intended to trace onto the fabric. Before I began tracing them I prepared the facing for the skirt. Now I know I wanted this petticoat to have as much body as possible so I used a heavy duty fusible interfacing on the piece of fabric being used for the facing. Since the petticoat also has that decorative stitch about 6-7 inches from the hem I decided to make my facing that wide so my decorative stitch will anchor it down. 

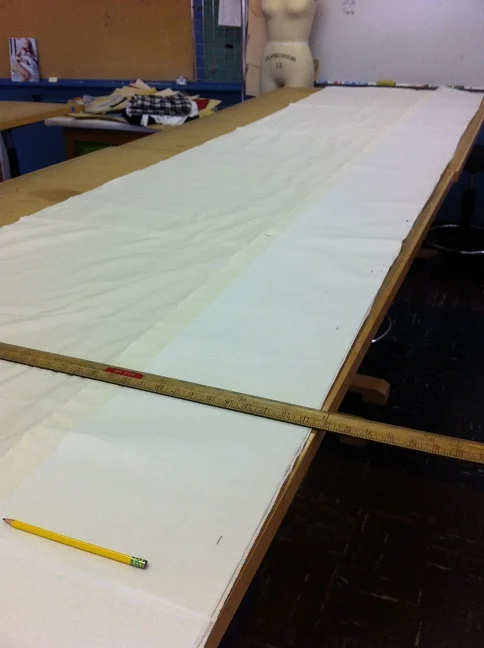
I laid out my now sewn together skirt across the big tables so I could get an idea of how long my facing would need to be.

VERY LONG is the answer!

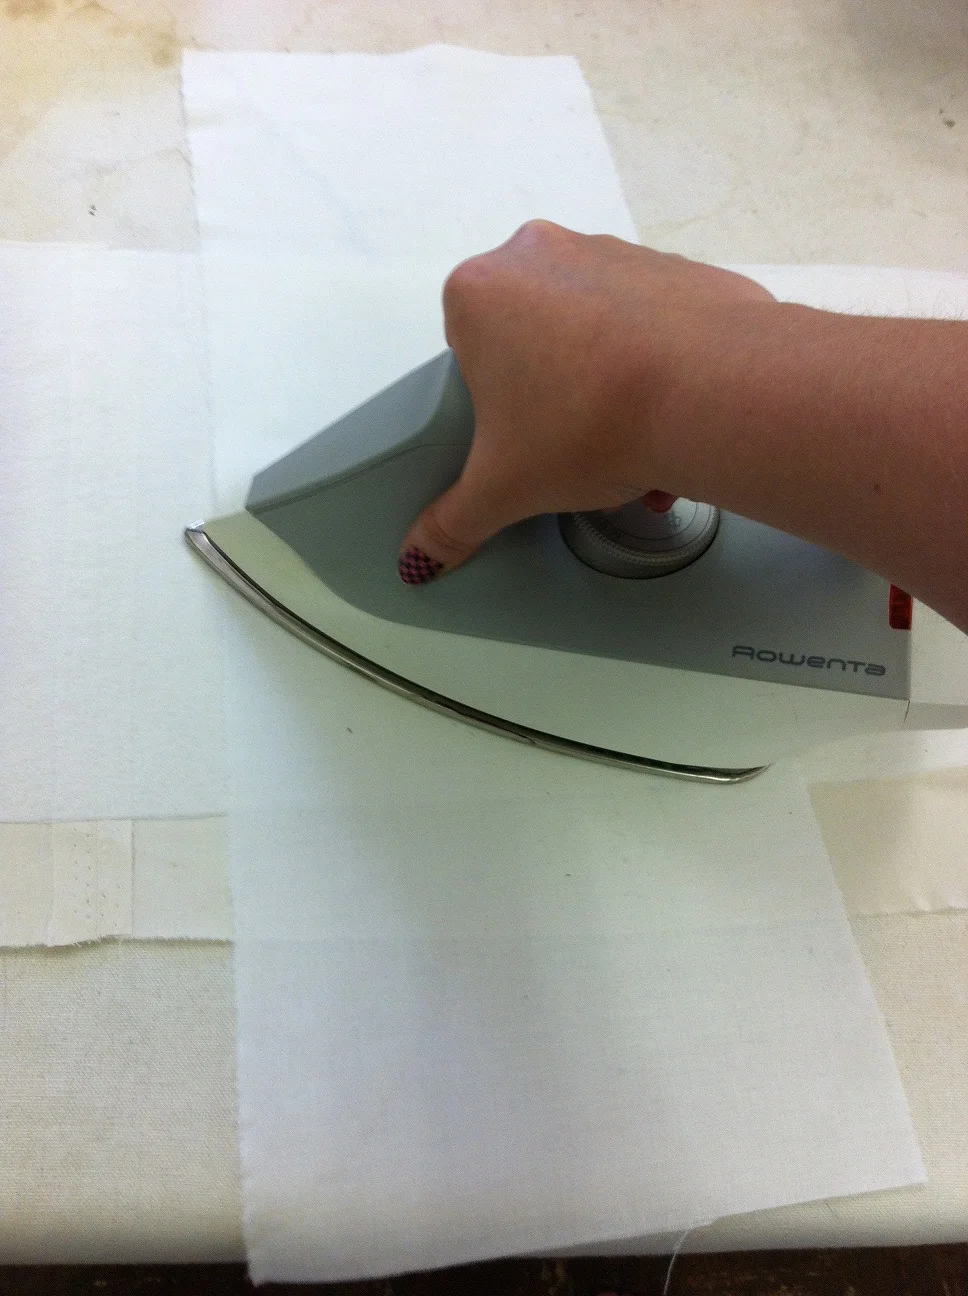
After I laid everything out on the table and got every thing straight and pretty, I measured how long of a piece I'd need to make a facing and then cut out enough panels of my extra muslin to match. I then interfaced the whole thing with a little extra at the top to eventually be folded over. 

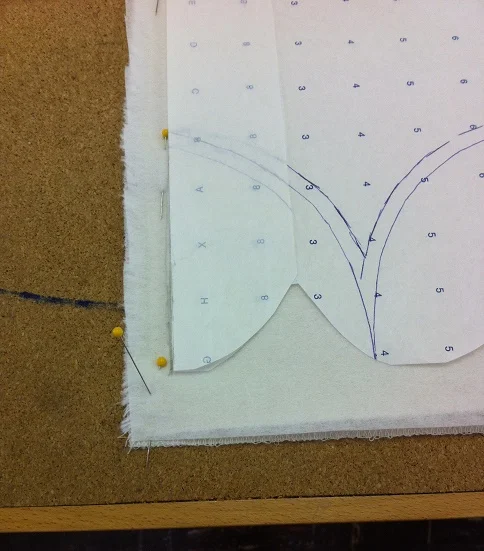
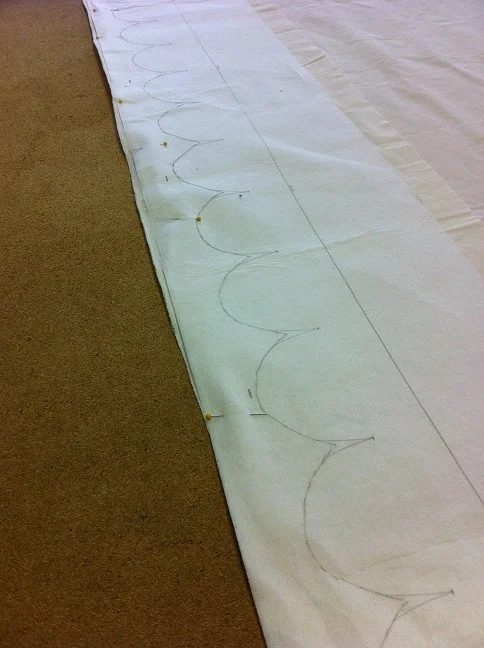
Once I had the piece interfaced and laid out flush with the edge of my skirt, I used a pencil and my scallop stencil to trace the scallops onto the interfacing. I took care to ensure that my first and last scallops were half size so that when I go to stitch the sides together I end up with a whole scallop. That extra bit off to the left is the seam allowance. 

I ended up tracing all of the scallops down and then decided they were too shallow, and went and reshaped them all. If you are doing this make sure you like the shape of the scallops before you go and trace them all!

Once I had them traced and pinned I stitched my panel into a tube at the side seam and then stitched the scallops in one by one, making sure to pivot and stitch the shapes accurately. I made my inner points pretty deep and ended up stitching a little too deep on some of them and had to restitch them when it came time to turn the facing.

Once I had them all looking pretty I trimmed my seam allowances really close to the stitching and did my best to press them out as flat as possible. 

I also turned under and ironed my upper edge so that I could stitch it down with the decorative stitching when I turn the entire facing to the inside.

I do not have any photos of the process it took to turn them all inside out. It took a lot of ironing and pinning.

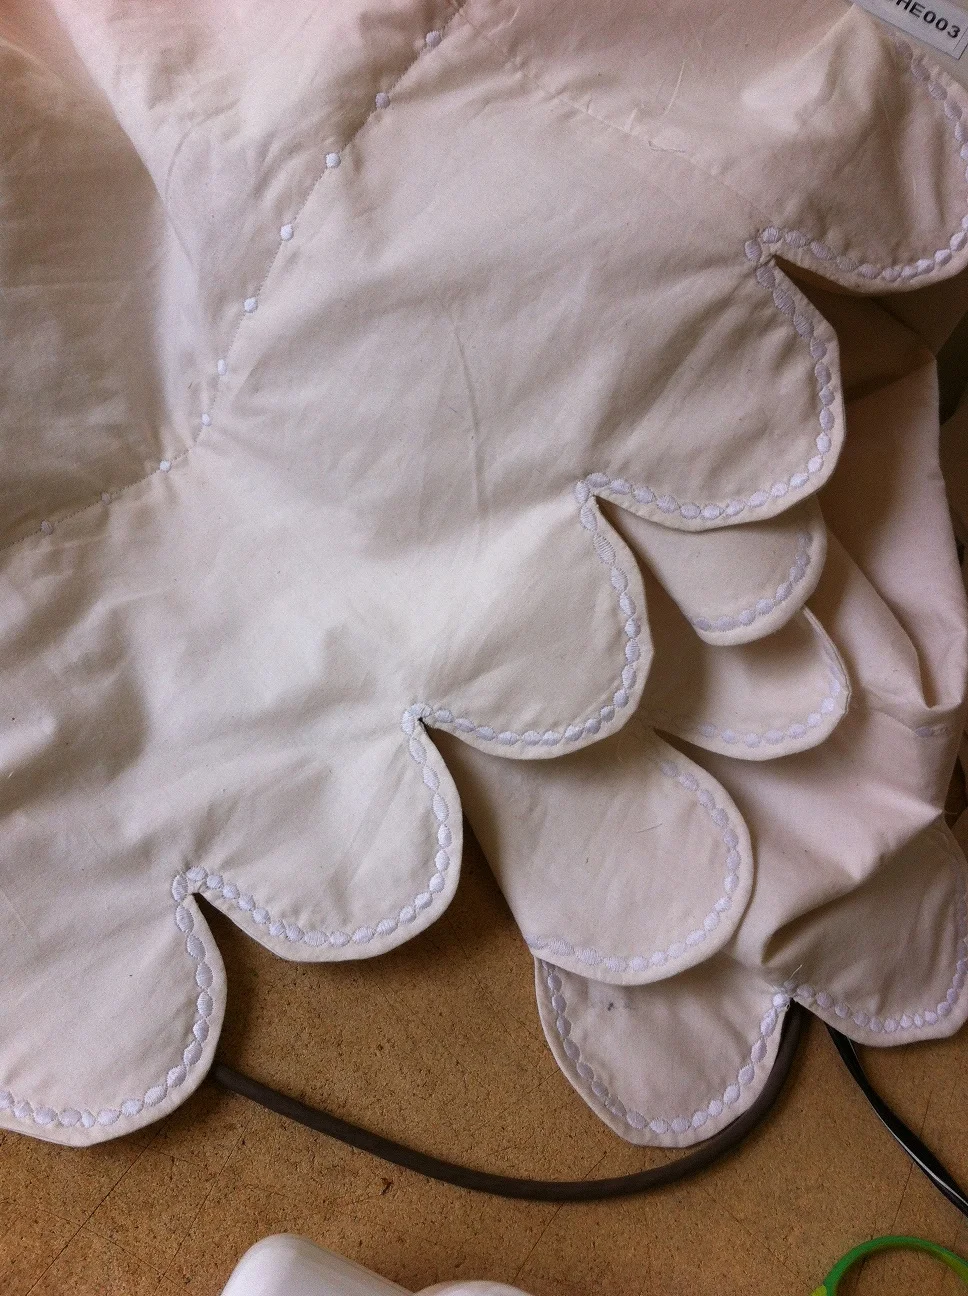
The next photos show what the scallops look like once I stitched down the facing with the decorative stitch and the scallops were edged in a decorative circle stitch. Both sets of stitches were done with my basic sewing machine.  Bear in mind this was also taken before I gave everything a crazy steamy ironing.

Once I had the decorative stitches on I moved to free motion embroidering the teardrop shapes. Now normally free motion embroidery is done with an embroidery hoop and stabilizer but my scallops were so thick from the interfacing and the tulle I decided I didn't need the hoop. 

Once the embroidery was done I was able to move onto the yoke of the petticoat. I sadly do not have and pictures at this point  I took about an 18" wide panel of my 108" wide muslin and cut a matching length of crinoline to underline it. I folded the edges in towards each other and folded the entire piece in half. This would become my upper yoke. I stitched a casing into the folded edge that I could later string ribbon through. 

It then became time to gather the skirt to the yoke. I decided to use the zig zag cord method because it's more reliable. I still ended up with my yarn breaking because it was crappy yarn but I managed to wrangle everything to the size of the yoke. I stitched the yoke to the skirt. I left a slit open at the top of the center back seam of the petticoat so I could have a small opening to pull the petticoat over my hips. The yoke edges folded over the top edge of this seam and were stitched down close to the fold. 

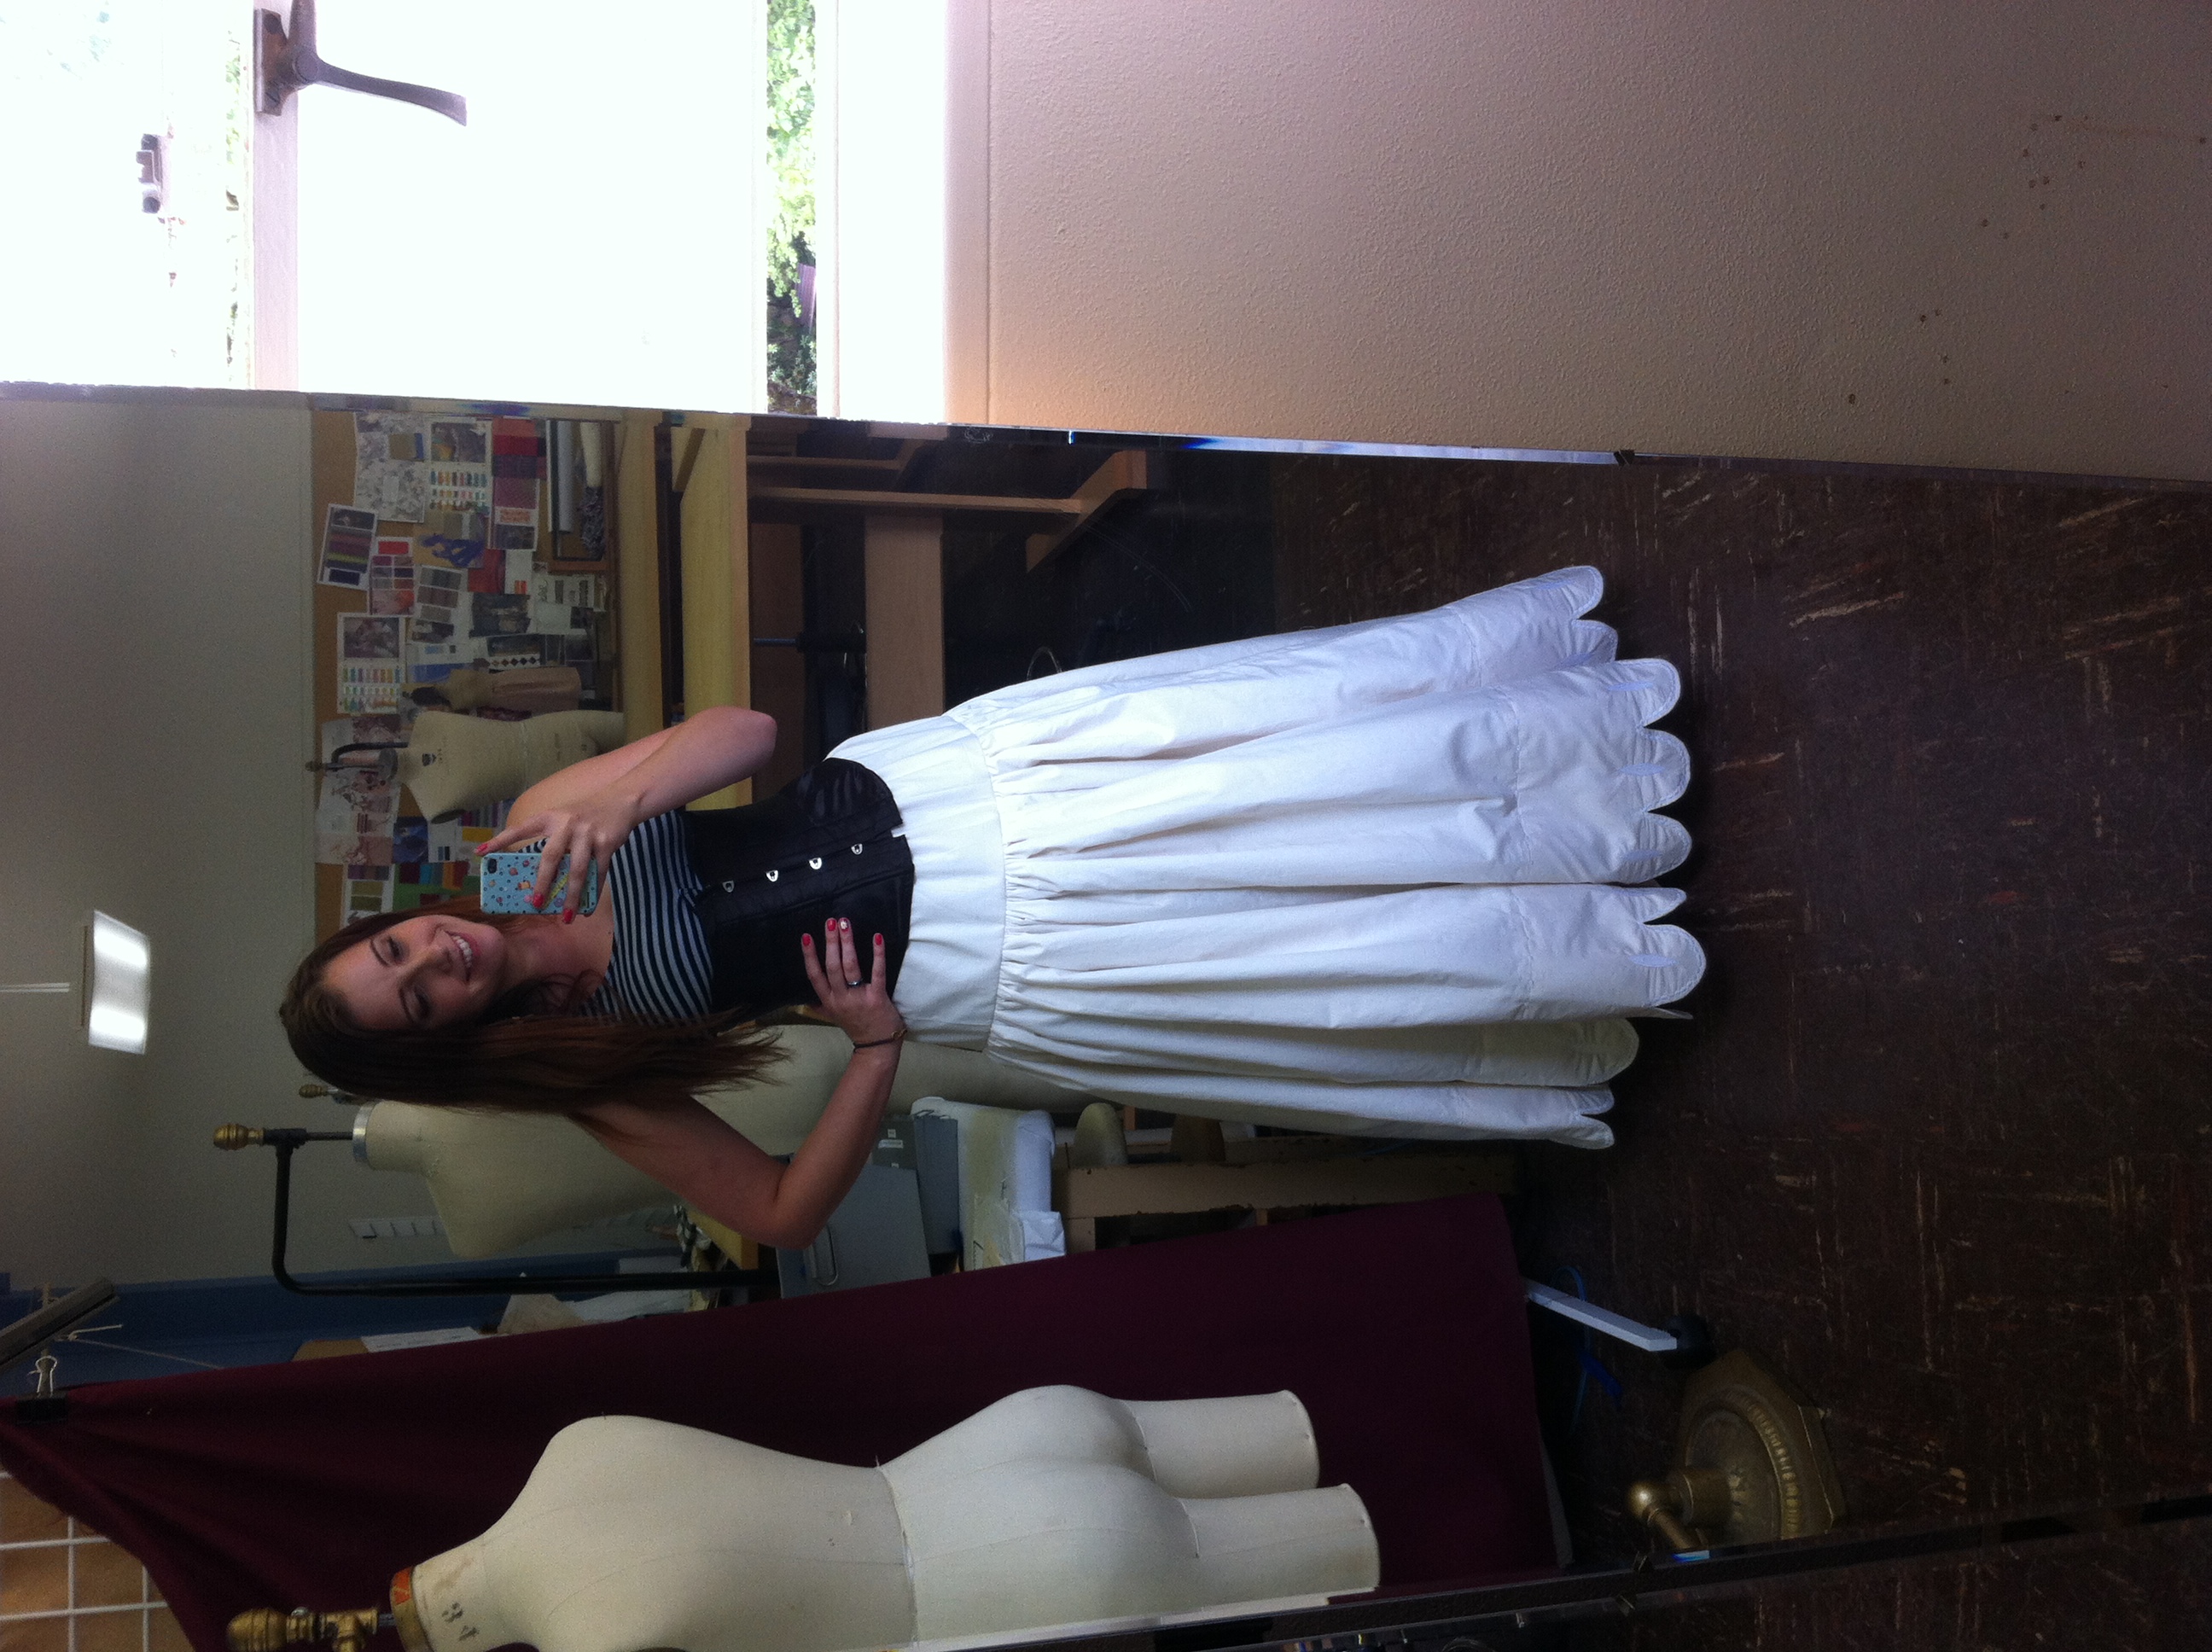
Once I had ribbon drawn into the casing the petticoat was done!

Bonus video of it in action!


Anna Coronation Dress Part 1

This blog post was originally published on my old website and has been reposted here unchanged.

Well it’s that time of year again when school is done for the summer, ITAA projects are finished and turned in, and I’m itching for a new project. I have really important graduate school tests to take over the summer, so my goal with my new project is to provide me something I can work on in my downtime at night after writing all day. My project would double as my Halloween costume, so it has to be fun. I decided on Anna’s Coronation gown from Frozen since I love the movie, my sister in law is convinced I am Anna, and my 2 year old niece will love it. The embroidery will keep me occupied for most of the summer so it’s perfect.

Since Frozen is so popular I thought I’d document my process in an almost tutorial like fashion in case other cosplayers are interested in how my costume is made.

I’m going to start from the inside out (sorta) I’m starting with her petticoat, then skirt, bodice, wig, and then finally her bloomers.

Today I am starting with the petticoat.

Anna’s dress has a very distinct motion in the movie, and behaves differently than most ballgowns would. Her petticoat is frequently seen when she kicks up her legs, jumps, and dances.

It appears to be a cream color, with a scalloped hem and decorative stitching. The petticoat helps to poof out her dress somewhat, but is easily collapsible, suggesting that there is no built in hoop, no visible layers of tulle, just a single layer with enough body to stand out.

Since the scene takes place in summer, it is likely the petticoat is made of a cotton-like fabric. Cotton would be period accurate, and also very breathable.

My goal with making this petticoat is to try and mimic the movement of the dress while maintaining the body the dress has while she’s standing still. In the screenshots there is no visible vertical seam lines. If the skirt was made with a single length of fabric I would be limited to 120” of fabric. I don’t think this will be wide enough so I’m going to add vertical seam lines. There is also no clear line where the facings of the scallops would be, implying the dress is lined up to the upper edge. I think a double layer of cotton would be too heavy, so I am opting for a faced scallop hem instead which will correspond with the horizontal line of decorative stitching shown in the above photos.

Lastly since the transition from her bodice to her skirt is fairly smooth, the fullness of the petticoat cannot interfere with the smoothness of this line. For this reason I will be making a yoke to stitch the petticoat onto which will then be tied at the waistline. If I wear a shaping corset underneath the bodice and over the petticoat, this will create the smooth line I am going for.

This is roughly the look I am going for. This is a crude rough sketch just to get an idea of the shape and pattern pieces. There will be a small slit at center back that will open for the drawstring. I haven’t decided how I am going to do the scallop embroidery yet but I will get to that in another post. For now I will just post about my progress so far.

I decided to flat line the cotton fabric with a thick nylon crinoline material to help give the fabric some body. I picked a crinoline in a color that is very similar to the outer fabric in the hopes that it will blend in well. The crinoline came in 54” wide bolts so I decided to make flat lining easier with little fabric waste I purchased 108” wide cotton muslin and cut it right down the middle.

I cut each of the large skirt sections in 36” long pieces. The rest of the length will be made up of the yoke section. If you are going to be doing this method always remember to check that the grain of your fabric is laying straight. I snipped and tore my fabric so I would end up with exact lengths, but check out how much my fabric was off grain straight off the bolt! With some stretching I got it pretty close to straight. Straightening the grain line of your fabric is important no matter what project you are working on!

Once I had the pieces laying straight I overlaid the crinoline on the top and pinned it all the way around the outside as flat as possible. At this point I serged them together along each side. If you don’t have a serger you can just straight stitch them together and do your seam finish when you go at attach the sides.

Once I had one panel serged together I threw some temporary gathering stitches to see how tight I could gather the material up. This allowed me to see how many panels I could theoretically stitch onto a yoke roughly 1.5x my waist. I ended up deciding to use five panels.

Once I had all five panels serged around the edges I stitched them together end to end until I had one long panel. Then I measured the length of my bottom edge to help figure out how long of a facing piece I’d have to cut. This also let me measure how big I wanted my scallops to be. I then created a pattern for the scallops that I will be transferring to the facing piece.

Next post will be about stitching the scallops and testing the embroidery!


Revisited: Legend of the Seeker Kahlan Costume Research: The Corset

This blog post was originally posted on my original website back in February of 2010. I am reposting some of the original content and adding some new information that was not originally available. Enjoy!

Hi All,

I’m planning on making Kahlan Amnell’s costumes from the television series “Legend of the Seeker” later on this summer. I’ve been researching the costumes for about 6 months now, and I decided to document my findings for others to reference. I’ll be going through my research first, and after I finish my other sewing projects, I’ll be posting progress images on my own construction of the costume.

I’m going to break down all the parts of her outfit little by little, with hopes of getting every piece replicated as close as possible. I do this by looking at many hi-res reference images, watching behind the scenes footage, and of course, watching the actual episodes.

Anywho, onto my first part of Kahlan’s costume, her corset.

Reference Image:

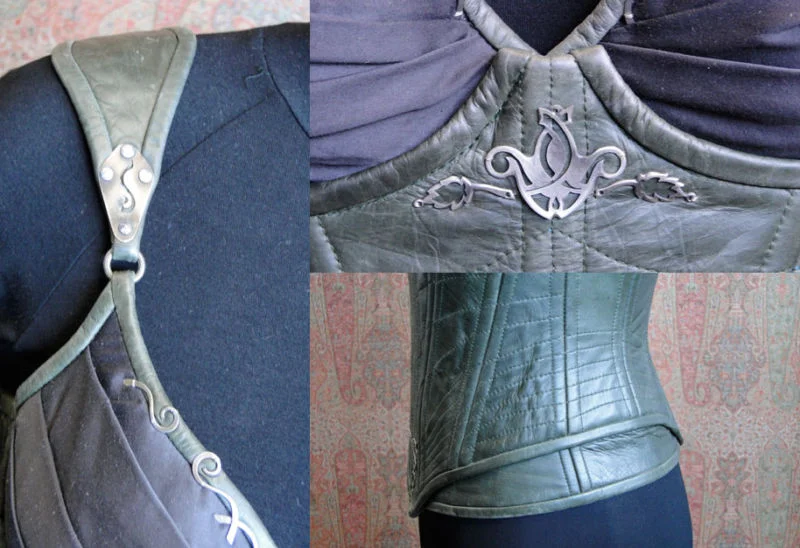
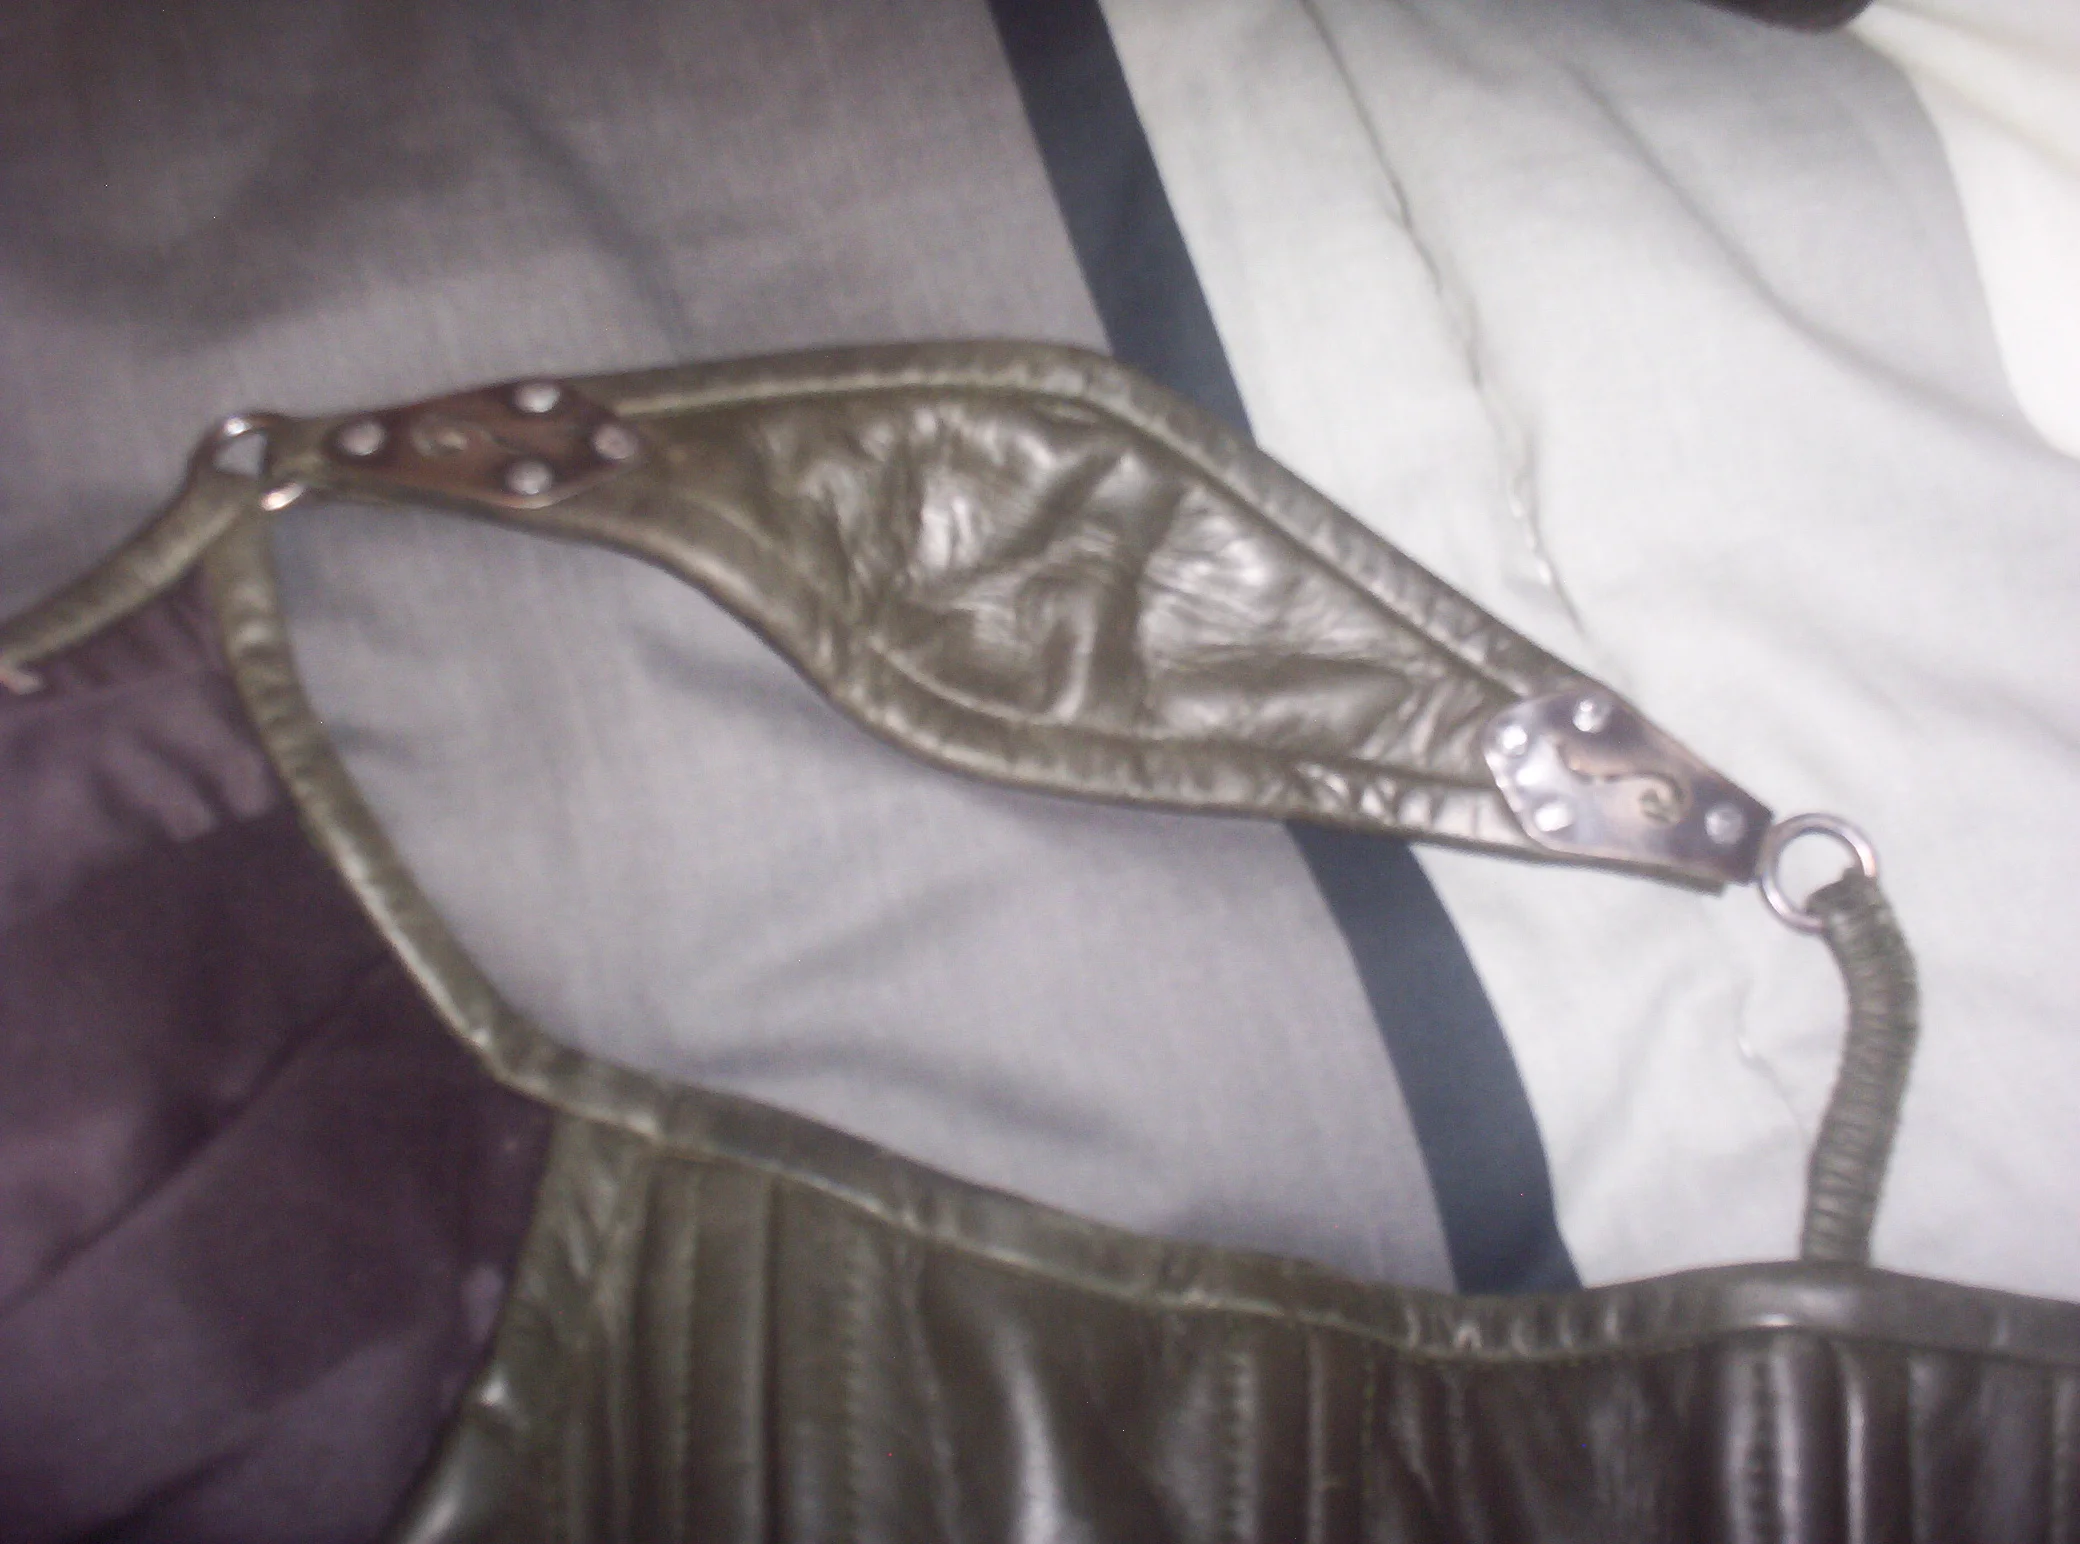
The corset is an overbust corset with bra cups and straps. The corset laces up in the back through grommets. Season One had Kahlan wearing one version of the corset, which had a panel at the hips and grommet lacing in the back. There was also a band underneath the bust in the season one corset. The first image is a screenshot and the other images are from the Shed 11 Costume auction. 

The season two corset does not have the hip panel, the underwire casing under the bust, and the back laces with boot laces rather than grommets. These photos are all from the Shed 11 Costume house Ebay auctions of the actual costumes from the show.  

The Fabric

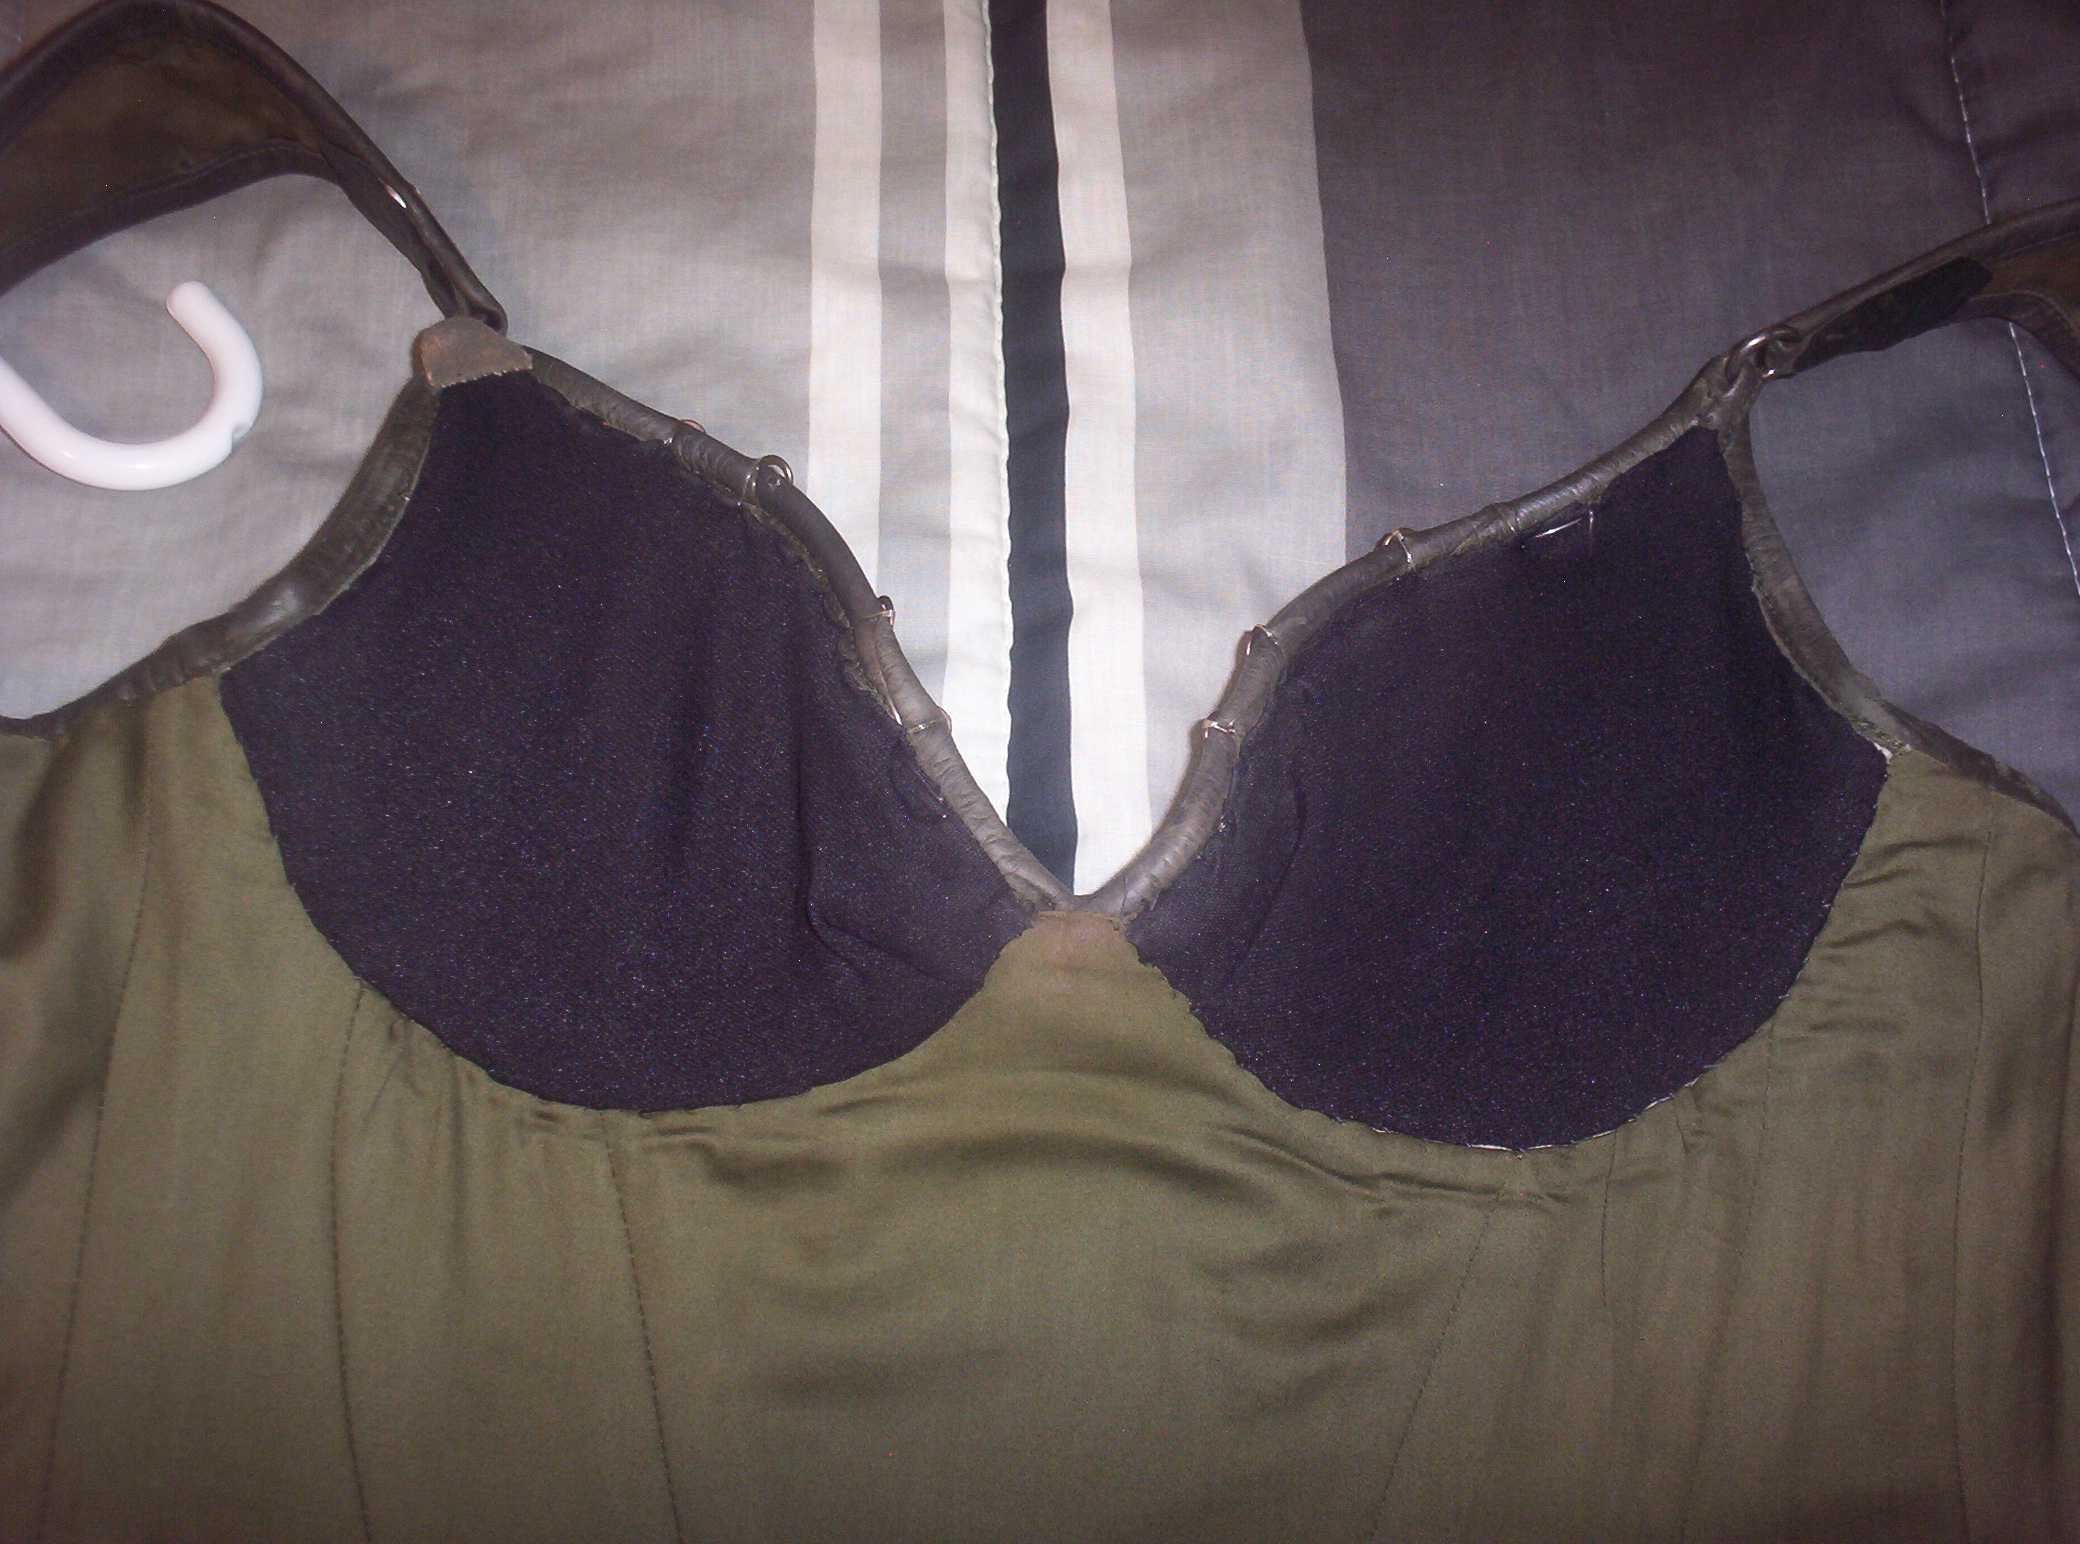
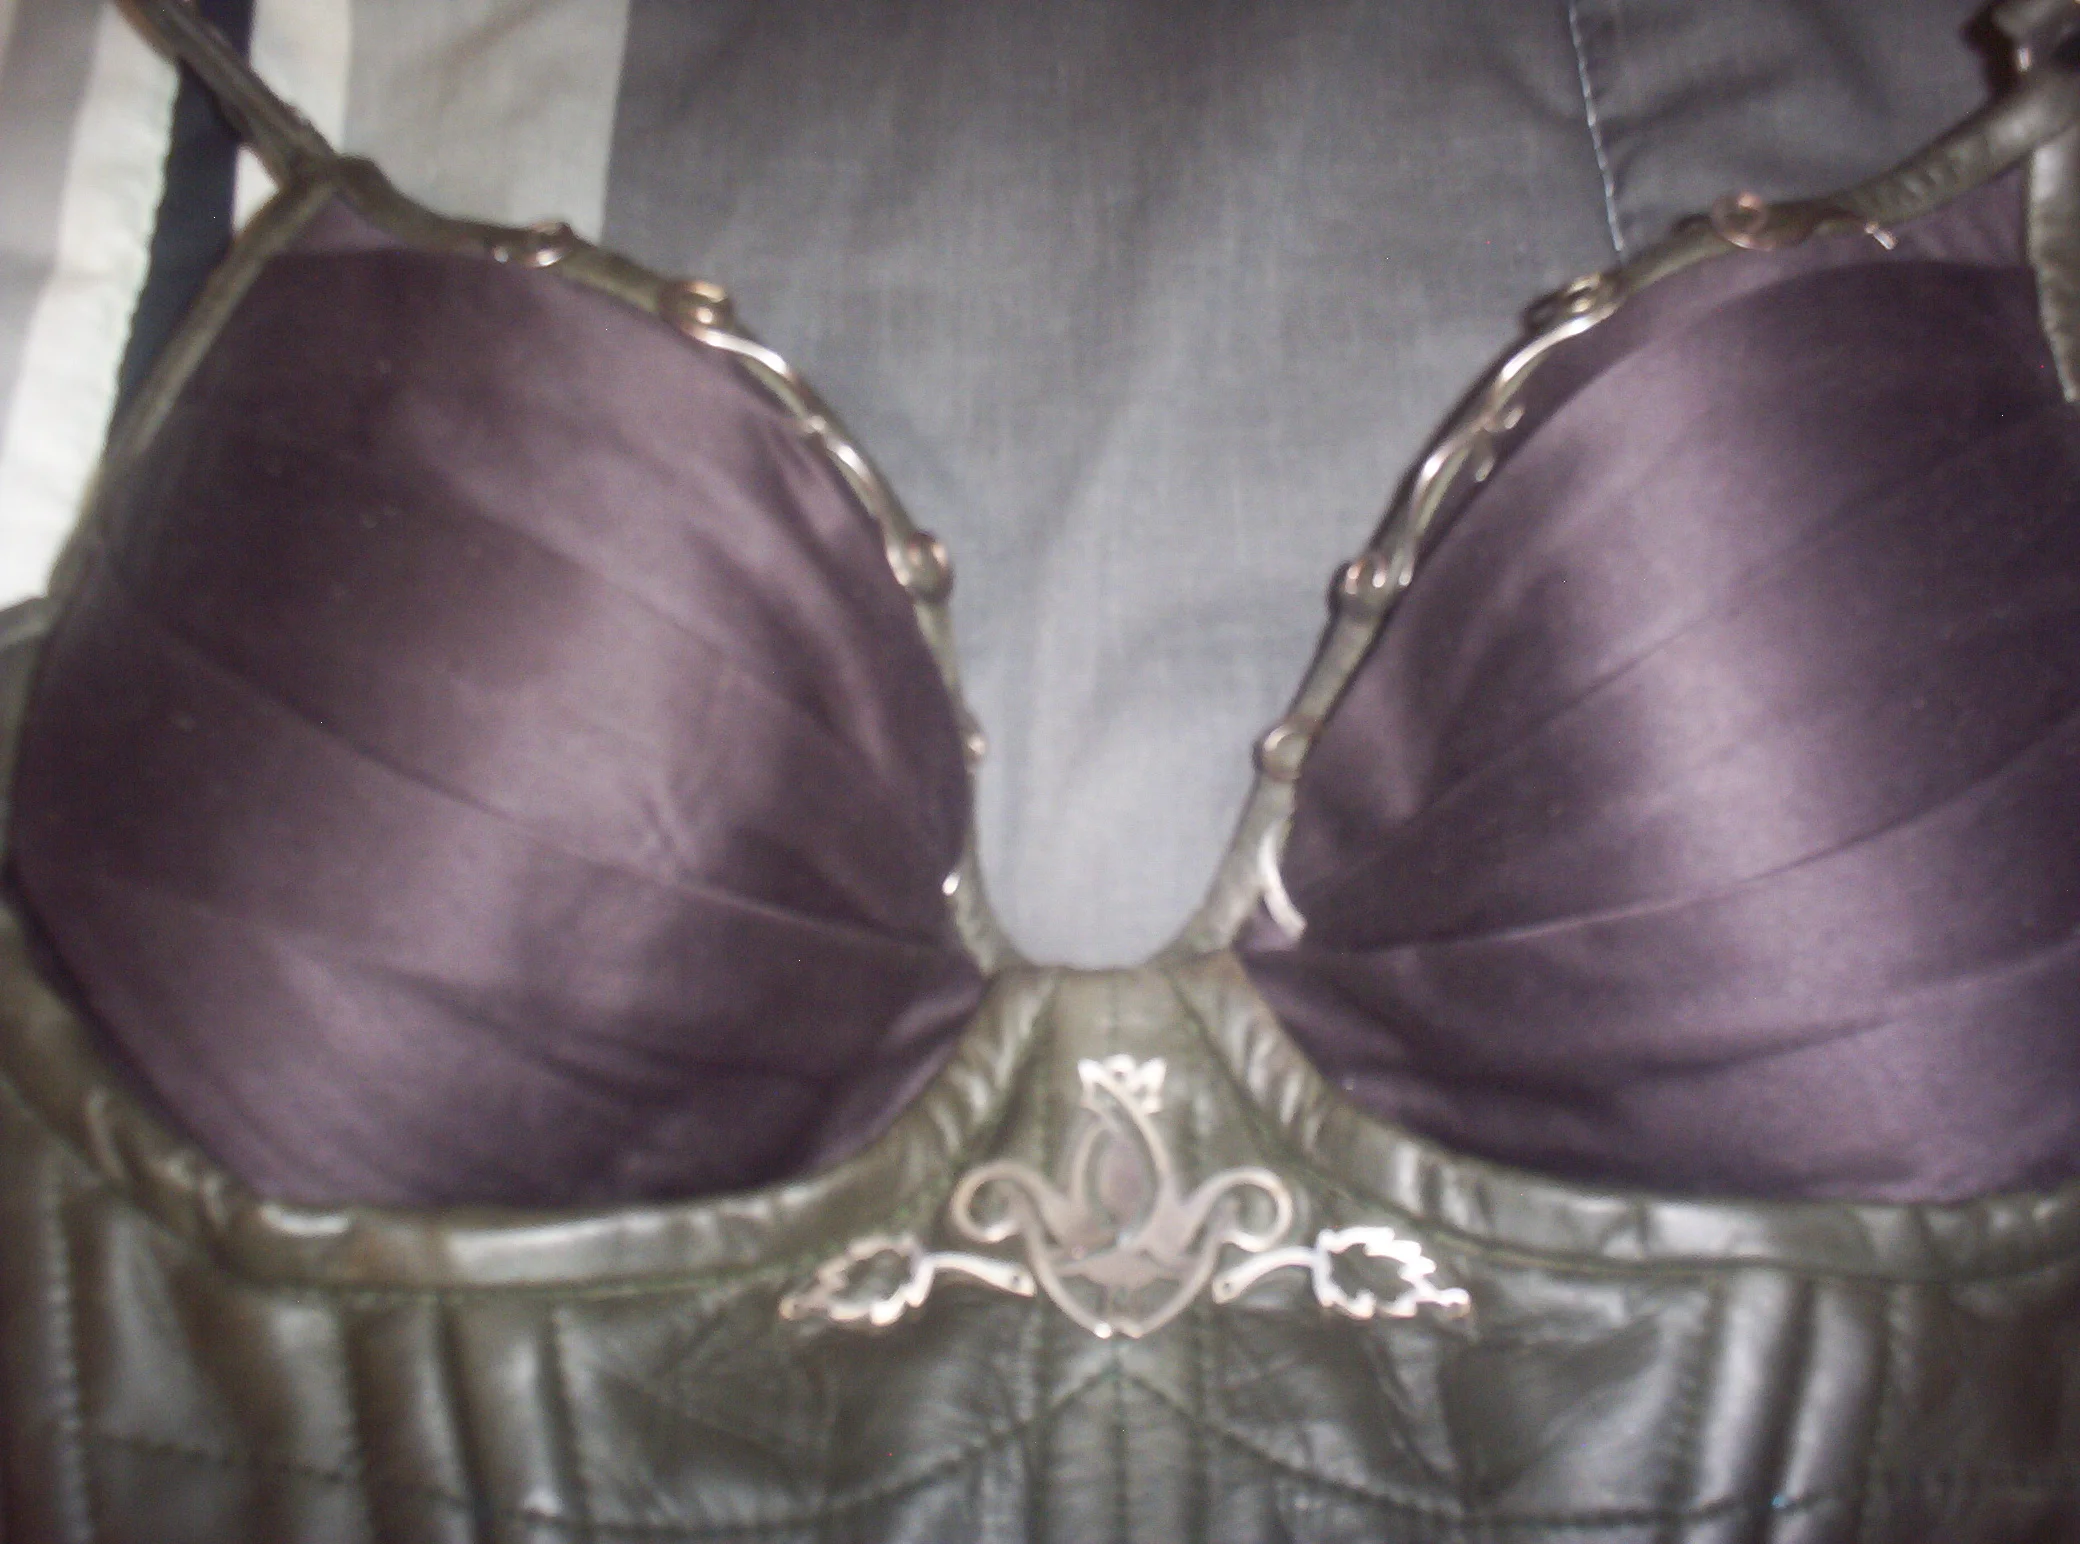
The body of the corset is made out of soft dark olive leather. The binding on the bottom edge in the Season 2 corset is the same fabric as the cups. The season 1 corset is bound in leather. The top edge of the corset, and the straps, are leather. The bra cups have a pleated sateen fabric on them. The Shed 11 costume auctions described the corset as "The spiral boned corset is constructed from dark green leather and attaches to a bra cup covered with pleated cotton sateen fabric in the same dark green. The metal decoration is silver and was handmade by the Legend of the Seeker costume department jeweller." 

You can make out some of the fabric notes written by the costume designers in their detailed notes. This binder went up for auction on Ebay and I've yet to contact the buyer about possibly providing more information about it. 

Some construction notes:

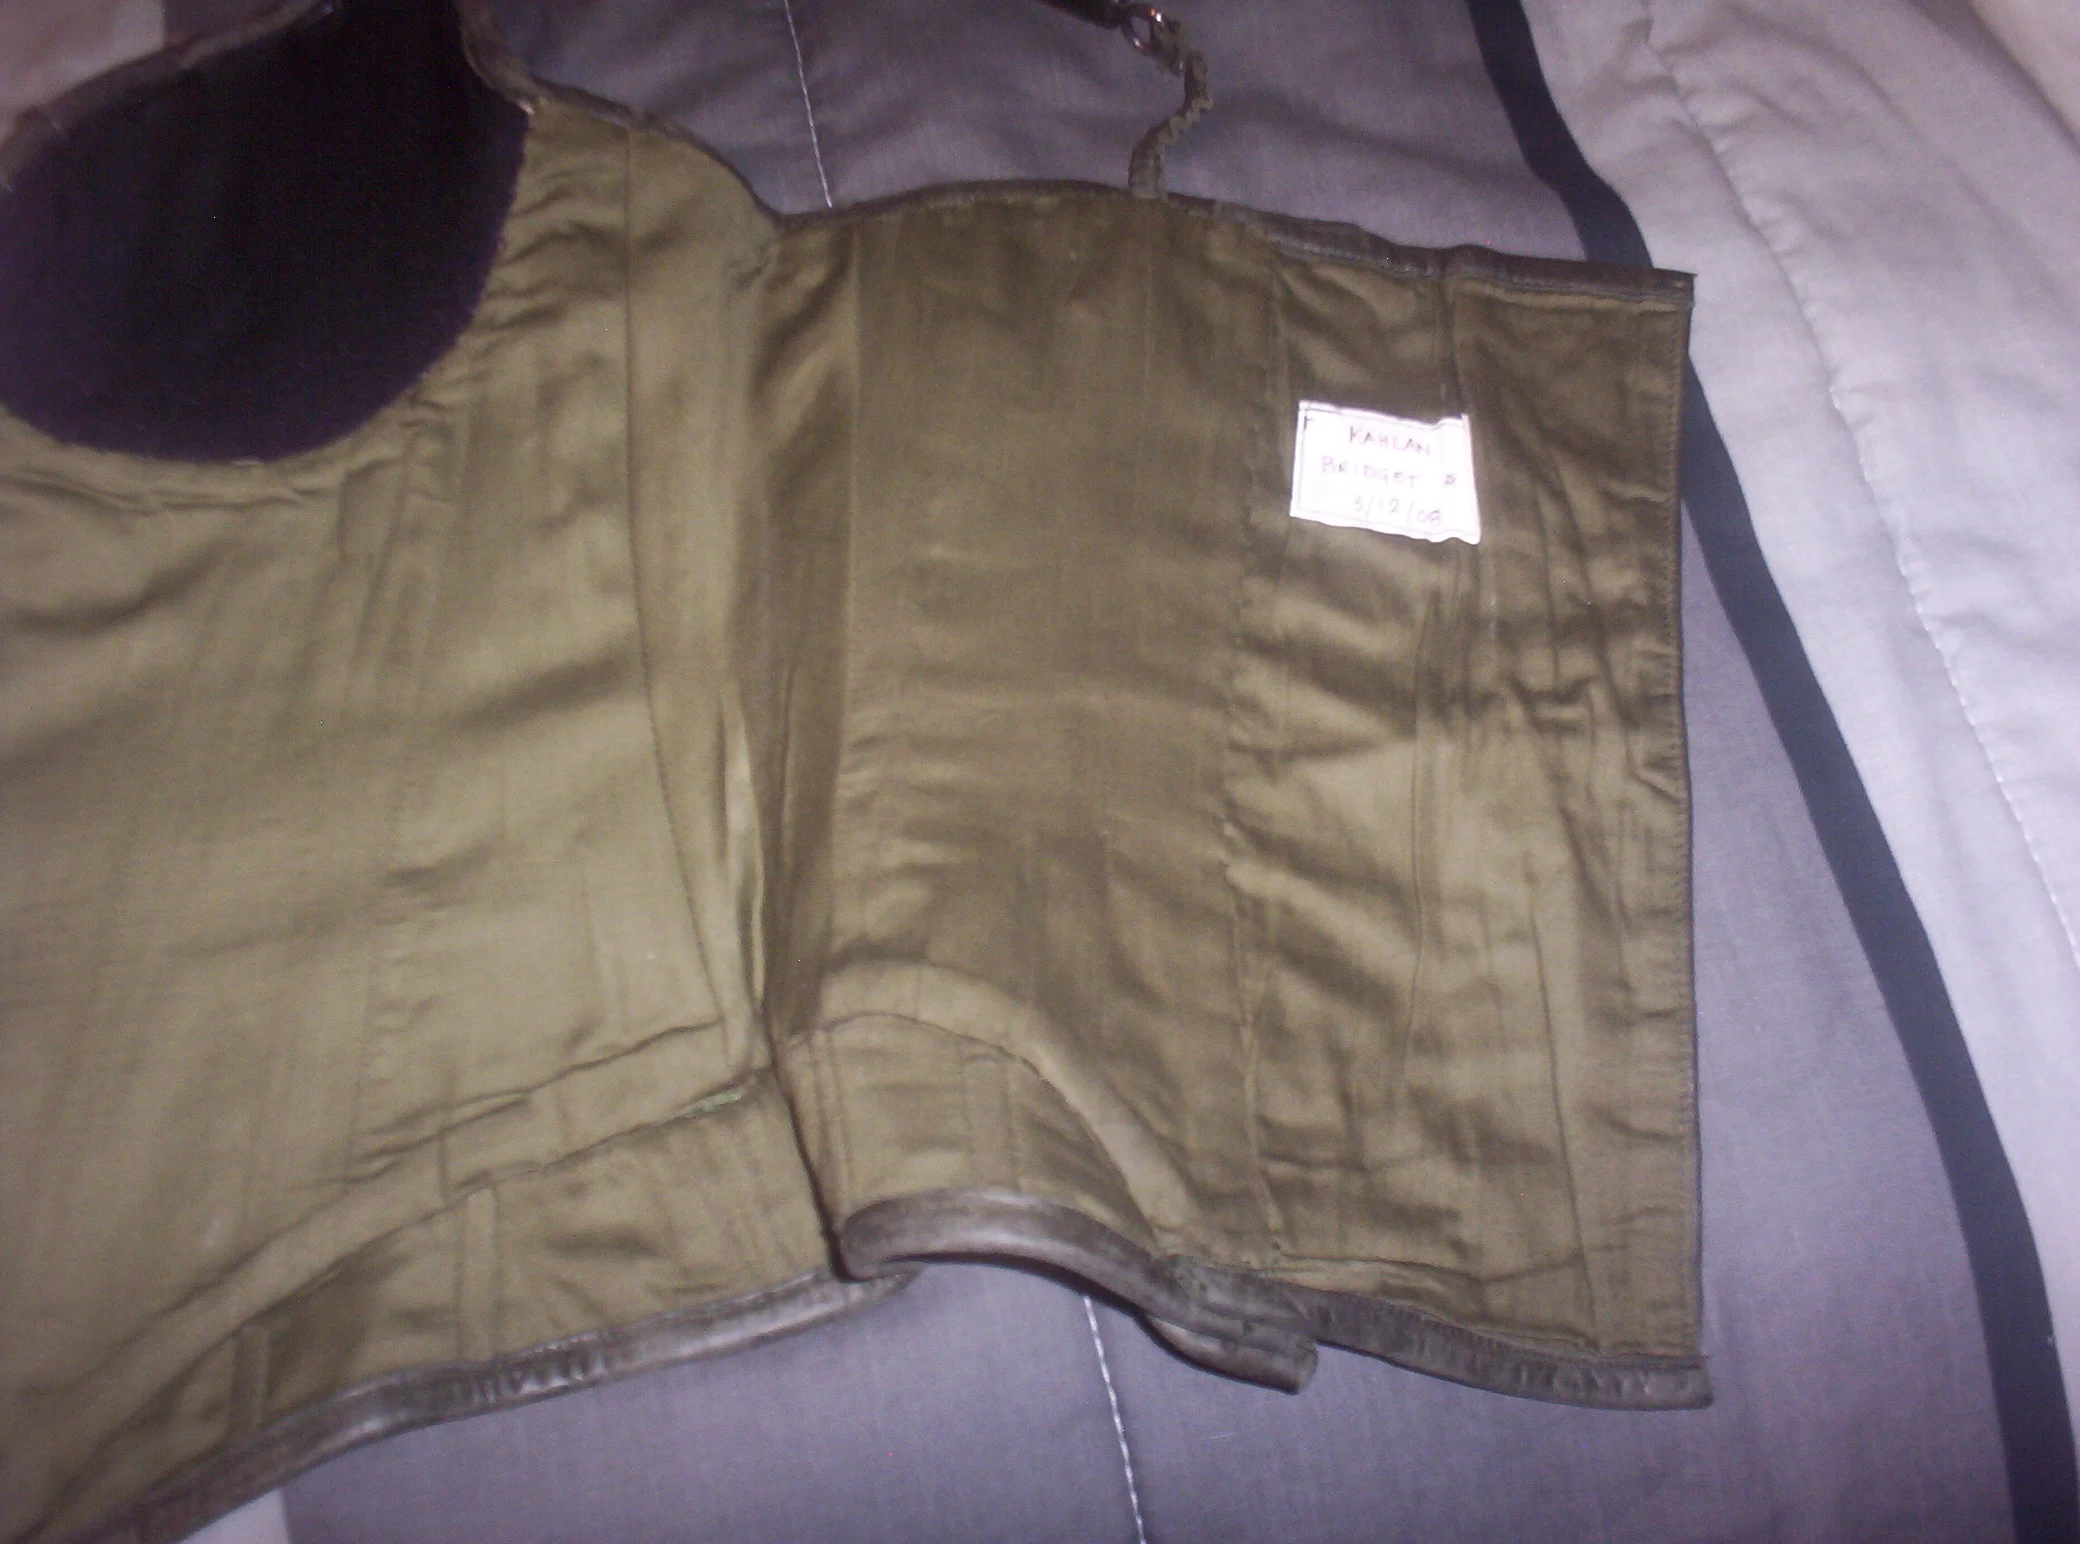
The corset has decorative stitching that is applied before the boning channels are sewn in, which would mean the boning channels on the inside of the corset use boning tape and the boning is not just stitched in the seam allowances of the corset. The boning is applied along all the seamlines, including center front.

The metal swirls on the edge of the bra cups are made of one piece of curled metal layed over itself in different directions.

Detail Shots

Thanks to Mr. Gracie, one of the winners of one of the season 1 Kahlan costumes we can now see the inside of Kahlans corset. He was nice enough to take photos of the corset for me so I could see what the inside construction looks like.

Thanks to another Ebay buyer, I also have these close up images of another of Kahlan's Season 1 corsets.